CSS Backgrounds (Images and Colours)
Submitted by Yorkiebar on Friday, January 17, 2014 - 06:05.
Introduction:
This is the third part in my CSS Styling tutorials, in which I will be covering backgrounds.
Different Types of Backgrounds:
In CSS, you can choose to set the background equal to an image, this can either be a url or a local file directory path, or a colour.
Image Settings:
Here is an example of setting the background of a class named 'myDiv' to background.jpg...
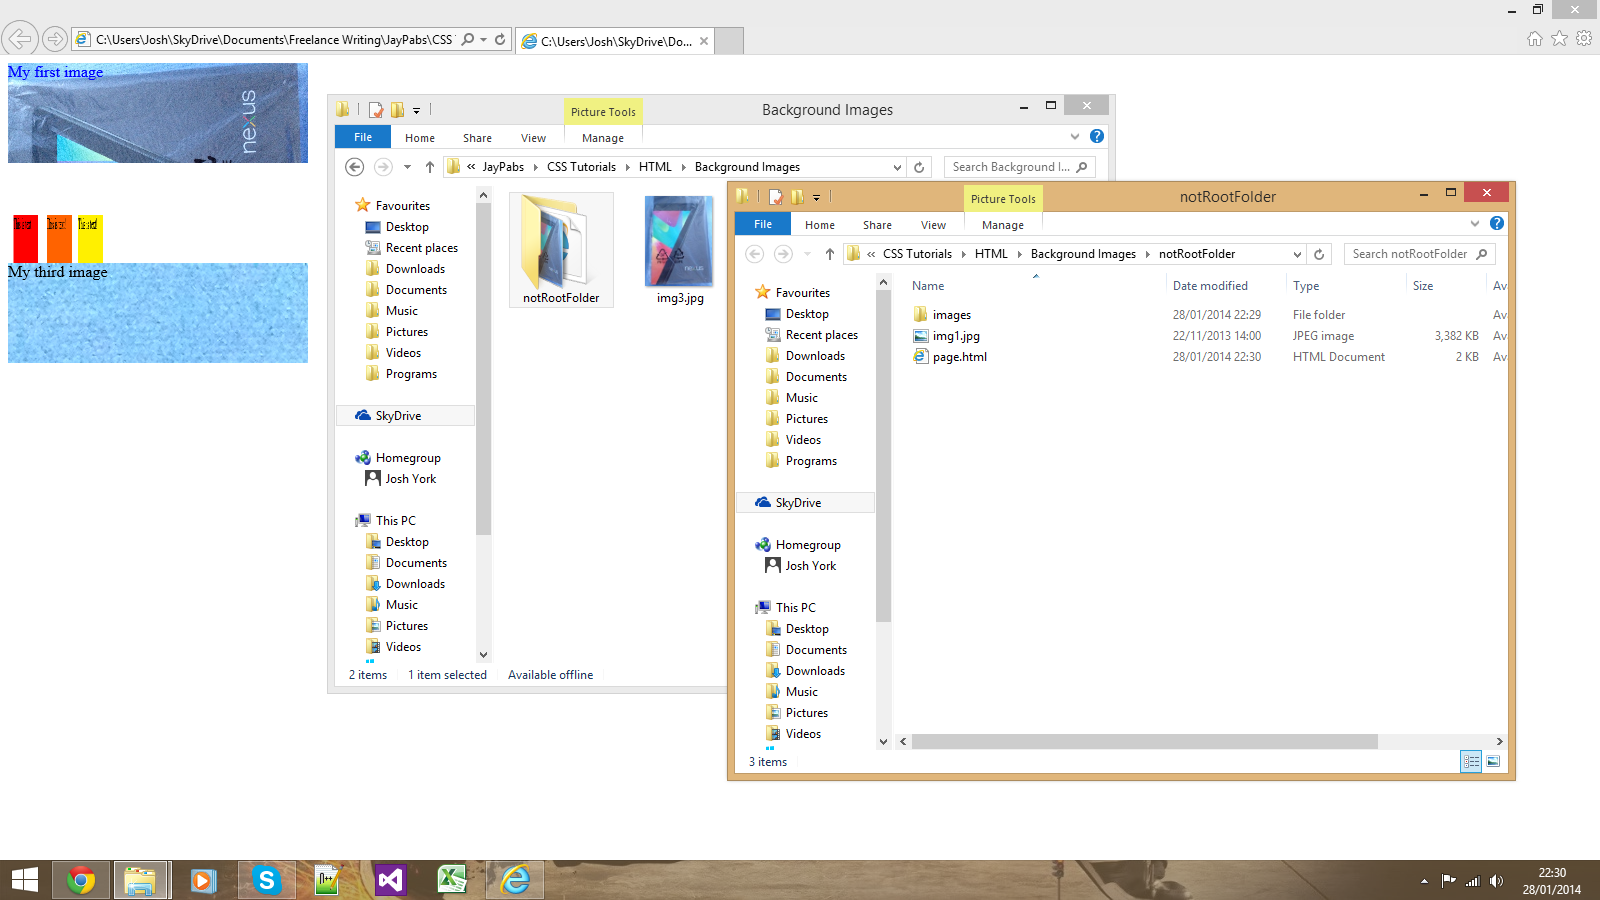
In the above example, the background.jpg file is located in the same directory folder as the page itself (the .css page, not the html page - unless it's inline or internal css styling). Here is how to go to the root directory and set the background image...
Background Image Settings:
There are a few different background image settings, some of which are...
When Are Background Images Used?
Background images (and background colours) are normally used on div elements however they can be used on any element that shows up on the webpage. The elemnt in use is normally a block display.
Background Colours:
To set a simple background colour, all you do is this...
Linking CSS To a HTML Element:
To link your CSS to an HTML element (text, div, etc.) you will need to decide whether you want to use a class or id, you will also need a unique name. Once you have those, go to your element in HTML and add...
... to the attributes of that element if you chose a class, or...
if you chose an id.
Make sure you replace 'myClass' and/or 'myID' with your unique name. Then, in the CSS you will want to encase your properties with...
if you chose a class, or...
(You can remove the line beginning with // if you wish).
Here's an example...
- .myDiv {
- background: url('background.jpg');
- background-image: url('background.jpg');
- }
- .myDiv {
- background: url('../background.jpg');
- background-image: url('../background.jpg');
- }
- background-size: 100% 100%; //width, height
- background-repeat: no-repeat; //repeat-y or repeat-x
- background-position: middle center; //horizontal, vertical
- background-color: #000000; //Colour code in hex value. 000000 is pure black.
- class='myClass'
- id='myID'
- .myClass {
- //Properties go here
- }
- #myID {
- //Properties go here
- }
- <html>
- <head>
- <style>
- .img1 {
- background: url('img1.jpg');
- background-image: url('img1.jpg');
- background-size: 100%;
- color: blue;
- width: 300px;
- height: 100px;
- //Background of img1.jpg located in the same directory as this file. 100% (original) image size.
- }
- .img2 {
- background: url('images/img2.png');
- background-image: url('images/img2.png');
- background-size: 100px 200px;
- background-position: middle;
- background-repeat: no-repeat;
- color: #fff;
- width: 300px;
- height: 100px;
- //Background of img2.png located the next directory of "images". The background has 100px width and 200px height. It is aligned to the middle of it''s container and won't repeat.
- }
- .img3 {
- background: url('../img3.jpg');
- background-image: url('../img3.jpg');
- color: #000;
- width: 300px;
- height: 100px;
- //Background of img3.jpg located in the root directory of the server upload area.
- }
- </style>
- </head>
- <body>
- <div class='img1'>My first image</div>
- <div class='img2'>My second image</div>
- <div class='img3'>My third image</div>
- </body>
- </html>