PHP Inserting Data To MySQL
Submitted by alpha_luna on Thursday, May 12, 2016 - 10:59.
PHP Inserting Data To MySQL
After the tutorials in PHP MySQL Database and PHP Creating MySQL Tables that we made. So, let's start for adding data. In this tutorial, we are going to learn on How To Create Insert Data To MySQL. For this tutorial, we have 3 ways to create this in PHP and MySQL. These are:- MySQLi (object-oriented)
- MySQLi (procedural)
- PDO (PHP Data Objects)
Creating our Table
We are going to make our database. To create a database:- Open the PHPMyAdmin.
- Create a database and name it as "add_query_pdo".
- After creating a database name, then we are going to create our table. And name it as "tbl_registration".
- Kindly copy the code below.
- -- --------------------------------------------------------
- --
- -- Table structure for table `tbl_registration`
- --
- CREATE TABLE `tbl_registration` (
- `tbl_registration_id` INT(11) NOT NULL,
- `first_name` VARCHAR(100) NOT NULL,
- `middle_name` VARCHAR(100) NOT NULL,
- `last_name` VARCHAR(100) NOT NULL,
- `email` VARCHAR(100) NOT NULL,
- `contact_number` VARCHAR(100) NOT NULL
- ) ENGINE=InnoDB DEFAULT CHARSET=latin1;
Creating Form Field
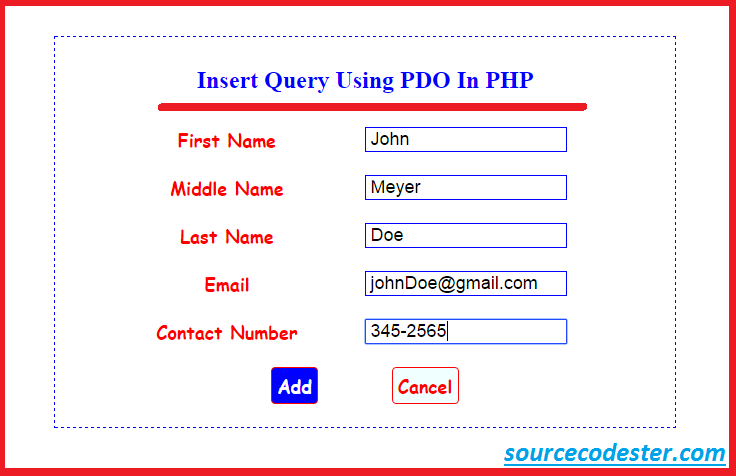
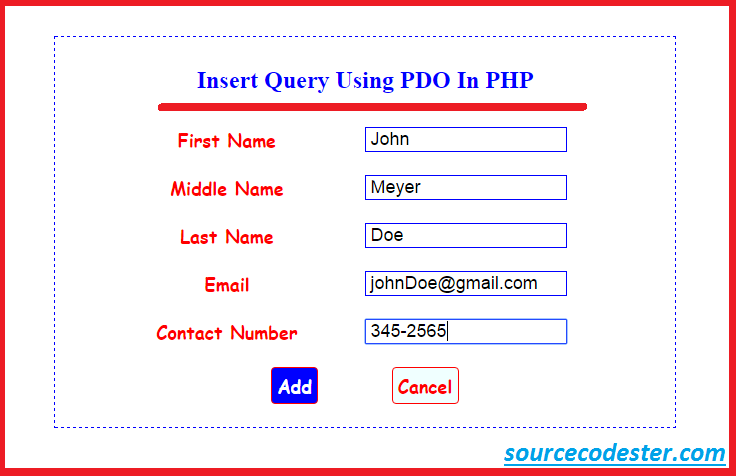
We have to create the form field where the user types the information in the textboxes.Creating Database Connection Using PDO
- <?php
- $conn = new PDO("mysql:host=localhost;dbname=add_query_pdo", 'root', '');
- ?>
Creating Insert Into Statement
This PHP query used to insert data into a database table.- <?php
- include ('connection.php');
- $first_name=$_POST['first_name'];
- $middle_name=$_POST['middle_name'];
- $last_name=$_POST['last_name'];
- $email=$_POST['email'];
- $contact_number=$_POST['contact_number'];
- $conn->setAttribute(PDO::ATTR_ERRMODE, PDO::ERRMODE_EXCEPTION);
- $sql = "INSERT INTO tbl_registration (first_name, middle_name, last_name, email, contact_number)
- VALUES ('$first_name', '$middle_name', '$last_name', '$email', '$contact_number')";
- echo "<script>alert('Successfully Added!'); window.location='index.php'</script>";
- ?>
- <style type="text/css">
- body {
- width:600px;
- border:blue 1px solid;
- border-style:dashed;
- margin:auto;
- padding:10px;
- margin-top: 40px;
- }
- td {
- text-align:center;
- padding:10px;
- }
- table {
- margin:auto;
- }
- input[type="text"] {
- width:200px;
- font-size: 18px;
- border: blue 1px solid;
- text-indent: 5px;
- cursor:pointer;
- }
- input[type="email"] {
- width:200px;
- font-size: 18px;
- border: blue 1px solid;
- text-indent: 5px;
- cursor:pointer;
- }
- label {
- font-size:18px;
- color:red;
- font-weight: bold;
- font-family: cursive;
- }
- h2 {
- color:blue;
- text-align:center;
- }
- .submit_btn {
- margin-right: 70px;
- border: blue 1px solid;
- font-size: 18px;
- font-family: cursive;
- padding: 5px;
- font-weight: bold;
- color: blue;
- background: azure;
- border-radius: 4px;
- }
- .submit_btn:hover {
- margin-right: 70px;
- border: red 1px solid;
- font-size: 18px;
- font-family: cursive;
- padding: 5px;
- font-weight: bold;
- color: white;
- background: blue;
- border-radius: 4px;
- cursor:pointer;
- }
- .cancel_btn {
- border: red 1px solid;
- font-size: 18px;
- font-family: cursive;
- padding: 5px;
- font-weight: bold;
- color: red;
- background: azure;
- border-radius: 4px;
- }
- .cancel_btn:hover {
- border: blue 1px solid;
- font-size: 18px;
- font-family: cursive;
- padding: 5px;
- font-weight: bold;
- color: white;
- background: red;
- border-radius: 4px;
- cursor:pointer;
- }
- </style>
Output:
Where the information type in the form field. After clicking the "Add" button. This is the data in the database table.
 Share us your thoughts and comments below. Thank you so much for dropping by and reading this tutorial post. For more updates, don’t hesitate and feel free to visit this website more often and please share this with your friends or email me at [email protected]. Practice Coding. Thank you very much.
