DateTime Picker Control Using C#
Submitted by joken on Friday, May 9, 2014 - 13:46.
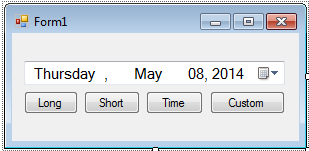
In this tutorial I’m going to show you how to use a DateTimePicker control in C#. The DateTimepicker control allows the user to select a date and a time and to display the date and time with specified format. To start creating this application, let’s create a new project in C# and we will call it as “Dates”. Then from the toolbox drag a DateTmePicker and four Buttons. The design will look like as shown below.
 Next, to add functionality to our application double click the “Long” button. And add the following code.
The code above will be executed when the “Long” button is clicked. Then it will display the date in a Long format using a dialog box. And this look like as shown below.
Next, to add functionality to our application double click the “Long” button. And add the following code.
The code above will be executed when the “Long” button is clicked. Then it will display the date in a Long format using a dialog box. And this look like as shown below.
 Next, For the “Short” button here’s the following code.
if the “Short” buttong is click it will display a short format of date in a dialog box. And it looks like as shown below.
Next, For the “Short” button here’s the following code.
if the “Short” buttong is click it will display a short format of date in a dialog box. And it looks like as shown below.
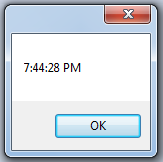
 And for the “Time” button, here’s the following code.
The output for “Time” button is look like as shown below.
And for the “Time” button, here’s the following code.
The output for “Time” button is look like as shown below.
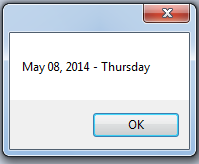
 Then, for the “Custom” button, here’s the following code.
And finally the output will look like as shown below.
Then, for the “Custom” button, here’s the following code.
And finally the output will look like as shown below.
 And here’s all the code used in this application.
Next, to add functionality to our application double click the “Long” button. And add the following code.
- private void button1_Click(object sender, EventArgs e)
- {
- //set datetimepicker format to long
- dateTimePicker1.Format = DateTimePickerFormat.Long;
- //display the value of dateTimePicker in a Message Dialog Box
- MessageBox.Show(dateTimePicker1.Text);
- }
Next, For the “Short” button here’s the following code.
- private void button2_Click(object sender, EventArgs e)
- {
- //set datetimepicker format to short
- dateTimePicker1.Format = DateTimePickerFormat.Short;
- //display the value of dateTimePicker in a Message Dialog Box
- MessageBox.Show(dateTimePicker1.Text);
- }
And for the “Time” button, here’s the following code.
- private void button3_Click(object sender, EventArgs e)
- {
- //set datetimepicker format to time
- dateTimePicker1.Format = DateTimePickerFormat.Time;
- //display the value of dateTimePicker in a Message Dialog Box
- MessageBox.Show(dateTimePicker1.Text);
- }
Then, for the “Custom” button, here’s the following code.
- private void button4_Click(object sender, EventArgs e)
- {
- // Set the CustomFormat string.
- dateTimePicker1.CustomFormat = "MMMM dd, yyyy - dddd";
- dateTimePicker1.Format = DateTimePickerFormat.Custom;
- MessageBox.Show(dateTimePicker1.Text);
- }
And here’s all the code used in this application.
- using System;
- using System.Collections.Generic;
- using System.ComponentModel;
- using System.Data;
- using System.Drawing;
- using System.Linq;
- using System.Text;
- using System.Windows.Forms;
- namespace Dates
- {
- public partial class Form1 : Form
- {
- public Form1()
- {
- InitializeComponent();
- }
- private void button1_Click(object sender, EventArgs e)
- {
- //set datetimepicker format to long
- dateTimePicker1.Format = DateTimePickerFormat.Long;
- //display the value of dateTimePicker in a Message Dialog Box
- MessageBox.Show(dateTimePicker1.Text);
- }
- private void button2_Click(object sender, EventArgs e)
- {
- //set datetimepicker format to short
- dateTimePicker1.Format = DateTimePickerFormat.Short;
- //display the value of dateTimePicker in a Message Dialog Box
- MessageBox.Show(dateTimePicker1.Text);
- }
- private void button3_Click(object sender, EventArgs e)
- {
- //set datetimepicker format to time
- dateTimePicker1.Format = DateTimePickerFormat.Time;
- //display the value of dateTimePicker in a Message Dialog Box
- MessageBox.Show(dateTimePicker1.Text);
- }
- private void button4_Click(object sender, EventArgs e)
- {
- // Set the CustomFormat string.
- dateTimePicker1.CustomFormat = "MMMM dd, yyyy - dddd";
- dateTimePicker1.Format = DateTimePickerFormat.Custom;
- MessageBox.Show(dateTimePicker1.Text);
- }
- }
- }