Copy Data to a File into Another File using Java
Today in Java, I will teach you how to create a program that copies data of a file into another file using the FileInputStream and FileOutputStream of the IO package.
So, now let's start this tutorial!
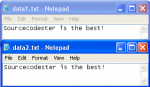
1. Open Notepad. Put any data in there, for example, i have write "Sourcecodester is the best!". Save it to the same folder with your java program and named it as data1.txt. Now, create another text file using Notepad and leave it blank. Name this as data2.txt.
2.
- Read more about Copy Data to a File into Another File using Java
- Log in or register to post comments
- 122 views