Timer in Visual Basic
Submitted by Yorkiebar on Tuesday, May 13, 2014 - 08:46.
Introduction:
This tutorial is on how to create a timer in Visual Basic.
Threads:
Te first thing you must know about this tutorial is how to use threads. Threads are essentially processes which run certain parts of your programs code, the main thread handles the design of your form as well as the code of your form, therefore, when you have a lot of long-running code, your UI will freeze. We can get around this by using additional threads.
Design:
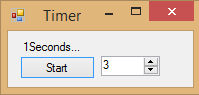
For this we simply need one label on a new Windows Form and a numericupdown number box.
We also want a button to begin the timer.
Imports:
For threading, we need to import the threading namespace...
Button Click:
Once the button is clicked, we first want to create a new thread to run the timer....
we then want to create a variable to hold the current timer time and set the value to the numericupdown value (seconds)...
Next we want to loop around through each unit of the numericupdown value, each loop we want to reduce the variable value by one, and re-set the label to the value of the timer, as a string...
Cross Threading:
The final thing we need to do is disable checking for illegal cross thread calls otherwise we will get an error when trying to access the label control from a newly created thread (trd)...
- Imports System.Threading
- Private Sub Button1_Click(sender As Object, e As EventArgs) Handles Button1.Click
- Dim trd As New thread(AddressOf timing)
- trd.isbackground = True
- trd.start()
- End Sub
- Private Function timing()
- Dim timeing As Integer = NumericUpDown1.Value
- End Function
- Private Function timing()
- Dim timeing As Integer = NumericUpDown1.Value
- For i As Integer = 0 To timeing
- Label1.Text = (timeing - i).ToString() + "Seconds..."
- Thread.Sleep(1000)
- Next
- MsgBox("Timer Done")
- End Function
- Private Sub Form1_Load(sender As Object, e As EventArgs) Handles MyBase.Load
- CheckForIllegalCrossThreadCalls = False
- End Sub