Getting Started
In order to beautify the presentation of this tutorial, I've used Bootstrap which is included in the downloadable of this tutorial but if you want, you can download Bootstrap using
this link.
Creating our Backup Function
Next, we create the function that backup and download our MySQL database.
Create a new file, name it as
function.php and paste the codes below.
<?php
function backDb($host, $user, $pass, $dbname, $tables = '*'){
//make db connection
$conn = new mysqli($host, $user, $pass, $dbname);
if ($conn->connect_error) {
die("Connection failed: " . $conn->connect_error); }
//get all of the tables
if($tables == '*'){
$sql = "SHOW TABLES";
$query = $conn->query($sql);
while($row = $query->fetch_row()){
$tables[] = $row[0];
}
}
else{
}
//getting table structures
$outsql = '';
foreach ($tables as $table) {
// Prepare SQLscript for creating table structure
$sql = "SHOW CREATE TABLE $table";
$query = $conn->query($sql);
$row = $query->fetch_row();
$outsql .= "\n\n" . $row[1] . ";\n\n";
$sql = "SELECT * FROM $table";
$query = $conn->query($sql);
$columnCount = $query->field_count;
// Prepare SQLscript for dumping data for each table
for ($i = 0; $i < $columnCount; $i ++) {
while ($row = $query->fetch_row()) {
$outsql .= "INSERT INTO $table VALUES(";
for ($j = 0; $j < $columnCount; $j ++) {
$row[$j] = $row[$j];
$outsql .= '"' . $row[$j] . '"';
} else {
$outsql .= '""';
}
if ($j < ($columnCount - 1)) {
$outsql .= ',';
}
}
$outsql .= ");\n";
}
}
$outsql .= "\n";
}
// Save the SQL script to a backup file
$backup_file_name = $dbname . '_backup.sql';
$fileHandler = fopen($backup_file_name, 'w+'); fwrite($fileHandler, $outsql);
// Download the SQL backup file to the browser
header('Content-Description: File Transfer'); header('Content-Type: application/octet-stream'); header('Content-Disposition: attachment; filename=' . basename($backup_file_name)); header('Content-Transfer-Encoding: binary'); header('Cache-Control: must-revalidate'); exec('rm ' . $backup_file_name);
}
?>
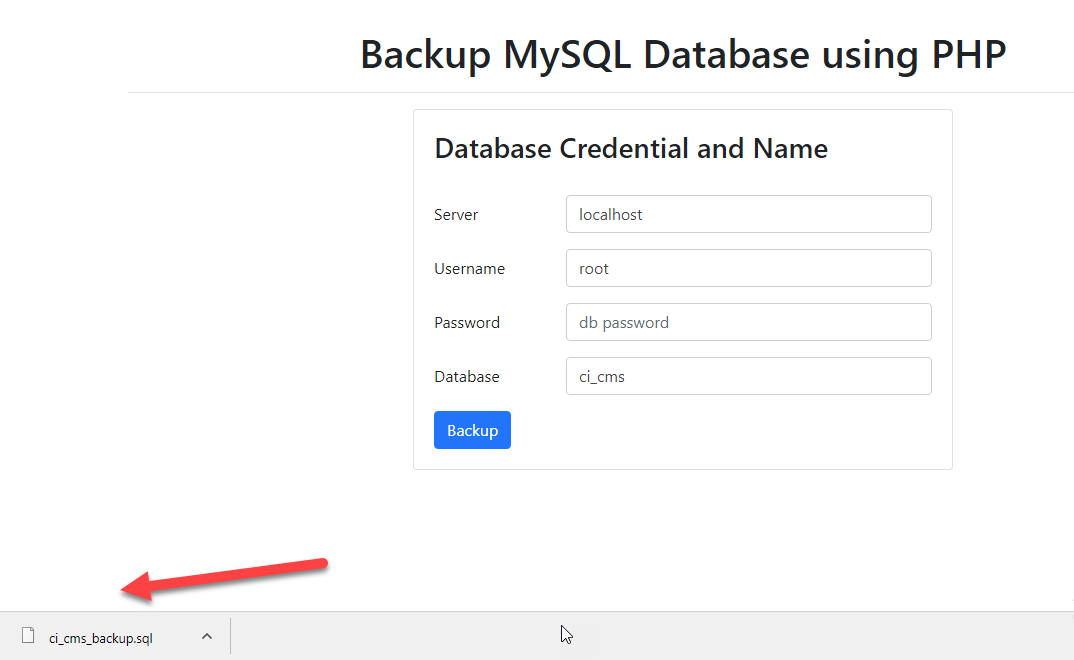
Creating our Form
Next, for the sake of presentation, we are going to create a form where you can put your database credential and database name that you want to backup.
Create a new file, name it as
index.html and paste the codes below.
<!DOCTYPE html>
<title>How to Backup MySQL Database using PHP
</title> <link rel="stylesheet" type="text/css" href="bootstrap4/css/bootstrap.min.css"> <h1 class="text-center" style="margin-top:30px;">Backup MySQL Database using PHP
</h1> <div class="row justify-content-center"> <h3>Database Credential and Name
</h3> <form method="POST" action="backup.php"> <div class="form-group row"> <label for="server" class="col-sm-3 col-form-label">Server
</label> <input type="text" class="form-control" id="server" name="server" placeholder="ex 'localhost'" required> <div class="form-group row"> <label for="username" class="col-sm-3 col-form-label">Username
</label> <input type="text" class="form-control" id="username" name="username" placeholder="ex 'root'" required> <div class="form-group row"> <label for="password" class="col-sm-3 col-form-label">Password
</label> <input type="text" class="form-control" id="password" name="password" placeholder="db password"> <div class="form-group row"> <label for="dbname" class="col-sm-3 col-form-label">Database
</label> <input type="text" class="form-control" id="dbname" name="dbname" placeholder="database name to backup" required> <button type="submit" class="btn btn-primary" name="backup">Backup
</button>
Creating our Submit Action
Lastly, we create the code that handles submission of our created form.
Create a new file, name it as
backup.php and paste the codes below.
<?php
//include our function
include 'function.php';
if(isset($_POST['backup'])){ //get credentails via post
$server = $_POST['server'];
$username = $_POST['username'];
$password = $_POST['password'];
$dbname = $_POST['dbname'];
//backup and dl using our function
backDb($server, $username, $password, $dbname);
}
else{
echo 'Fill up database credentail and name';
}
?>
That ends this tutorial. Happy Coding :)