Creating an Image from Text with PHP and GD Library
In this tutorial, we will tackle about Generating an Image from String or Text using PHP and GD Library. This tutorial aims to provide the students and new in PHP programming language with a reference for learning that focuses on manipulating images using the said library and programming language. Here, I will explain the usage of the useful functions that will be use in a sample web application script that consist of converting the provided text into an image.
What is GD Library?
The `GD Library`, short for "Graphic Draw Library", is a widely used library in PHP for image creation and manipulation. This library is equipped with functions and capabilities primarily tailored for dynamic image generation and editing tasks, including creating thumbnails, adding text to images, drawing shapes, and performing image transformations like resizing and cropping.
Explore some of the small PHP projects that I've personally created and published on this website, all utilizing the GD Library:
Developing a Basic PHP Web Application
Let's now embark on creating a straightforward web application using the PHP programming language. This application's primary functionality is to transform a string into an image. It has the ability to generate an image with the provided string placed in two different orientations: Horizontal and Vertical.
Prior to getting started, please ensure that you have downloaded and installed the following on your local machine if they are not already in place:
- XAMPP/WAMP web server or an equivalent
- Code Editor such as MS Visual Studio Code, Sublime Text, or Notepad++
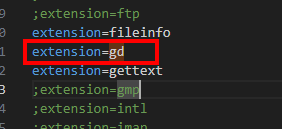
Enabling the GD Library
Once you have successfully installed the required software, you can proceed to enable the GD Library. To do this, locate the `php.ini` file in the designated path of your chosen web server, for example, (C:\xampp\php\php.ini). Next, open the file using your installed code editor and navigate to the line containing `;extension=gd`. Remove the semicolon at the beginning of this line, save the file, and then run or start your Apache or related web server service on your local machine. Ensure that you restart the service if it's already running.
Designing the User Interface for the Web Application
Now, let's proceed with the creation of the HTML file that will contain the necessary elements for our web page's user interface. This web page boasts a simple design using the Bootstrap Framework and features a form with fields for entering text and selecting the desired string placement. To get started, open your code editor, create a new HTML file, and save it as `index.html`. You can refer to the following script to structure the HTML file for your web application.
- <!DOCTYPE html>
- <html lang="en">
- <head>
- <meta charset="UTF-8">
- <meta name="viewport" content="width=device-width, initial-scale=1.0">
- <!-- Bootstrap 5.3 CSS-->
- <link rel="stylesheet" href="https://cdn.jsdelivr.net/npm/[email protected]/dist/css/bootstrap.min.css">
- <!-- jQuery -->
- <!-- Bootstrap 5.3 JS-->
- <script src=" https://cdn.jsdelivr.net/npm/[email protected]/dist/js/bootstrap.bundle.min.js"></script>
- </head>
- <body>
- <nav class="navbar navbar-expand-lg bg-body-tertiary">
- <div class="container-fluid">
- </div>
- </nav>
- <div class="container-md py-4">
- <div class="card rounded-0">
- <div class="card-header rounded-0">
- </div>
- <div class="card-body rounded-0">
- <form action="generate_image.php" id="string-to-img-frm" target="_blank" method="POST">
- <div class="container-fluid">
- <div class="mb-3">
- </div>
- <div class="mb-3">
- <select name="placement" id="placement" cols="30" rows="10" class="form-control rounded-0">
- </select>
- </div>
- </div>
- </form>
- </div>
- <div class="card-footer">
- <div class="d-flex w-100 justify-content-center">
- </div>
- </div>
- </div>
- </div>
- </body>
- </html>
Developing the Main Script
Now, it's time to create the PHP script responsible for generating an image that incorporates the text entered in the form. Begin by crafting a new PHP file and saving it as `generate_image.php`. This file encompasses the procedures that utilize the functions and capabilities of the GD Library to achieve the objective of our sample application. You can refer to the PHP script provided below for guidance:
- <?php
- // Canvas Size
- $imageHeight = 400;
- $imageWidth = 400;
- // creating the image canvas
- /**
- * Setting up the String Colors
- */
- /**
- * Setting up font size
- */
- $fontSize = 13.5;
- $fontHeight = $fontSize / 2;
- $fontAngle = $placement;
- // Setting Image Bacground
- $height_offset = 0;
- foreach($lines as $line){
- // Line width
- if($placement == 0){
- // X Position of the string in image canvas
- $stringX = ( $imageWidth - $width_of_line ) / 2;
- // Y Position of the string in image canvas
- }else{
- // X Position of the string in image canvas
- // Y Position of the string in image canvas
- $stringY = $imageHeight - (( $imageHeight - $width_of_line ) / 2);
- }
- // Height offset
- $height_offset += $fontHeight;
- // Rendering String to Image
- }
- // Render Image
- // Destroy Image
- ?>
Below, you'll find a list of essential functions from the GD Library that I've employed in the provided PHP script for generating an image from the text entered in the form:
- `
imagecreatetruecolor(int $width, int $height)` - This function creates a new true color image that serves as the canvas for the image. - `
imagecolorallocate(GdImage $image, int $red, int $green, int $blue)` - This function allocates a color for an image using RGB color codes. - `
imagettftext(GdImage $image, float $size, float $angle, int $x, int $y, int $color, string $font_filename, string $text, array $options = [])` - This function writes text to the image using TrueType Fonts. For this script, you can download any desired TTF font file and specify the file path in the `$fontFile` variable. - `
imagepng(GDImage $image, $file = null, int $quality = -1, int $filters = -1)` - This function is designed to output a PNG image to either the browser or a file.
For further details about these functions and additional functions provided by the GD Library, you can visit the PHP manual at (https://www.php.net/manual/en/ref.image.php).
Visual Results of the Web Application
Here, you can view snapshots that illustrate the outcomes produced by the script I've shared previously.
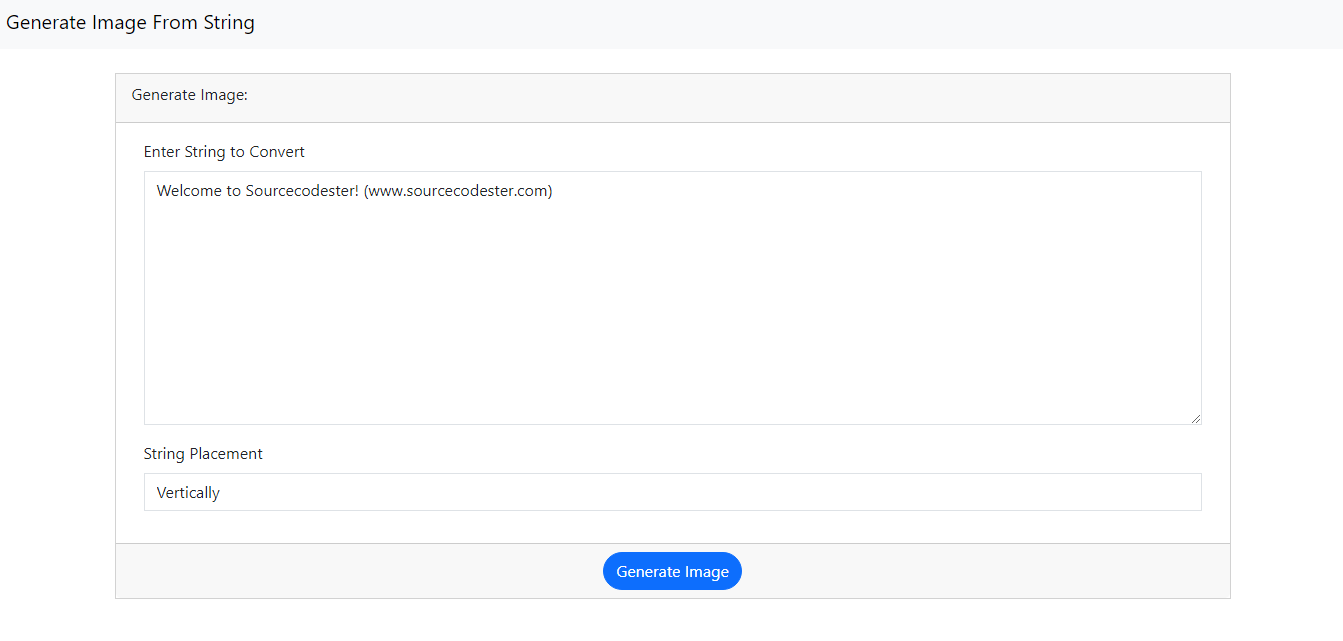
Page UI
Generated Image using Horizontal Placement
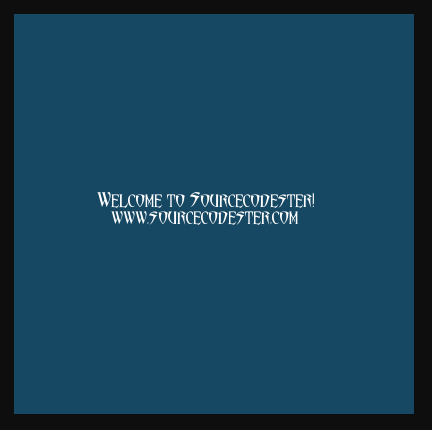
Generated Image using Vertical Placement

That's it! I've also made the source code available for download as a compressed file right below this article. Simply click the download button to access it.
I hope that this tutorial on "Creating an Image from Text with PHP and GD Library" has provided you with the knowledge and tools you were seeking, and that you'll find it valuable for both your current and future PHP projects. Feel free to explore our website for more Free Source Codes, Tutorials, and Articles that cover a wide range of programming languages.