Creating a CodeIniter App using jQuery Ajax
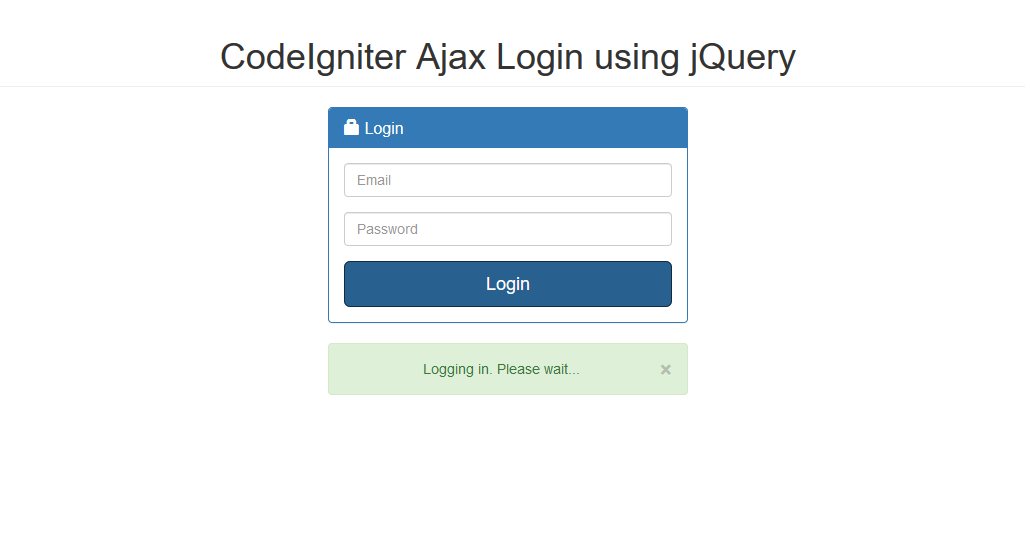
This tutorial tackles how to create an Ajax Login in CodeIgniter. We used jQuery to handle our ajax request to our controller. jQuery is a javascript library that makes you handle javascript better. CodeIgniter is a lightweight PHP framework that uses the MVC(Model-View-Controller) architecture.
Installing CodeIgniter
If you don't have CodeIgniter installed yet, you can use this link to download the latest version of CodeIgniter which is 3.1.7 that I've used in this tutorial.Then download the jQuery library, click here to download. I have used also Bootstrap for the design
After downloading, extract the file in the folder of your server. Since I'm using XAMPP as my localhost server, I've put the folder in htdocs folder of my XAMPP.
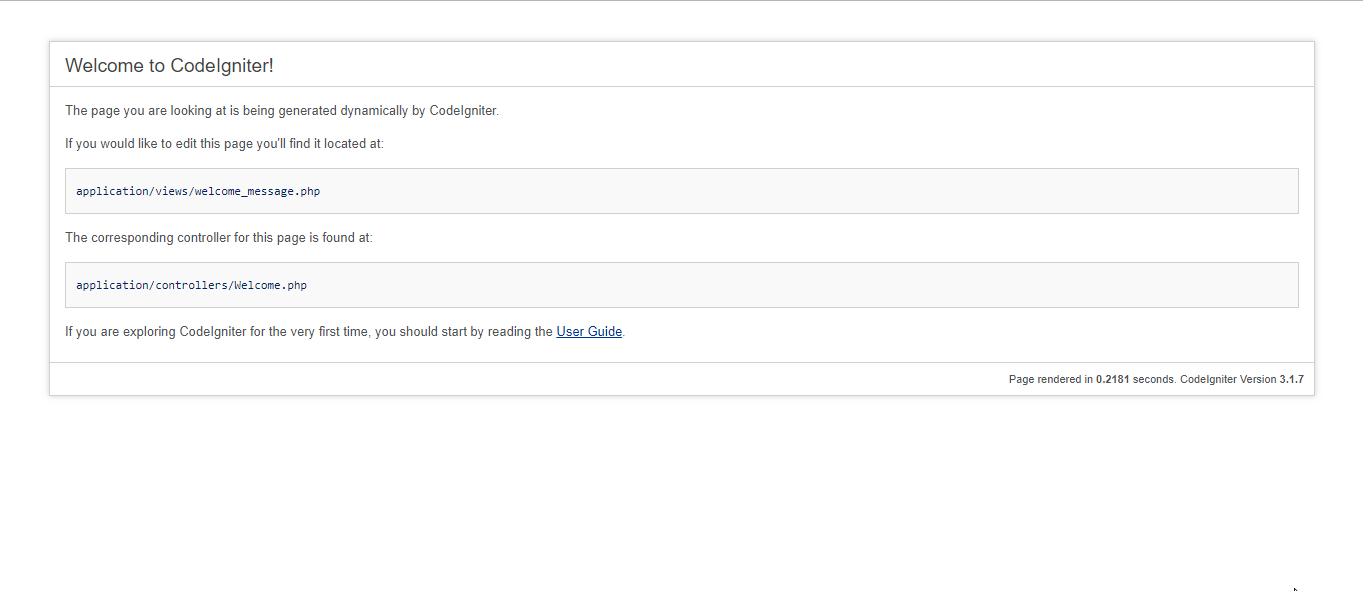
Then, you can test whether you have successfully installed Codeigniter by typing your app name in your browser. In my case, I named my app as codeigniter_login_ajax so I'm using the below code.
- localhost/codeigniter_login_ajax/

Creating our Database
First, we are going to create our database and insert sample data for this tutorial.
- Open your PHPMyAdmin.
- Create a new database named
codeigniter. - Click the database that we created, click the SQL tab then paste the below code or import the included .sql file in the downloadable of this source code located in the db folder.
Email: [email protected]
Password: nurhodelta
Email: [email protected]
Password: cepe
Connecting our App into our Database
Next, we're going to connect our Codeigniter application to the database that we created earlier.
- In your codeigniter app folder, open
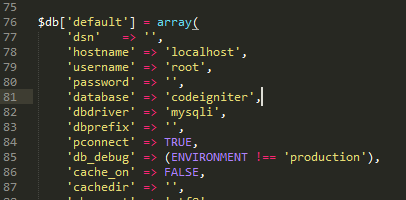
database.phplocated in application/config folder. - Update database.php with your credential the same as what I did in the image below.
The database is where we define the database that we created earlier.

Configuring our Base URL
Next, we configure our base_url to tell Codeigniter that this is the URL of our site/application. We're gonna be using this a lot that's why we need to configure this.
- In your codeigniter app folder, open
config.phplocated inapplication/configfolder. - Find and edit the ff line:
- $config['base_url'] = 'http://localhost/codeigniter_login_ajax/';
The codeigniter_login_ajax is the name of your app folder.
Creating our Model
Next, we create the model for our app. Take note that the first letter of your model name should be in a CAPITAL letter and the name of the model should be the same as the file name to avoid confusion.
Create a file named Users_model.php in application/models folder of our app and put the ff codes.
- <?php
- class Users_model extends CI_Model {
- function __construct(){
- parent::__construct();
- $this->load->database();
- }
- public function login($email, $password){
- return $query->row_array();
- }
- }
- ?>
Creating our Controller
The next step is to create our controller. Controllers follow the same naming convention as models.
Create a file named User.php in application/controllers folder of our app and put the ff codes.
- <?php
- class User extends CI_Controller {
- function __construct(){
- parent::__construct();
- $this->load->helper('url');
- $this->load->model('users_model');
- }
- public function index(){
- //load session library
- $this->load->library('session');
- //restrict users to go back to login if session has been set
- if($this->session->userdata('user')){
- redirect('user/home');
- }
- else{
- $this->load->view('login_page');
- }
- }
- public function login(){
- //load session library
- $this->load->library('session');
- $email = $_POST['email'];
- $password = $_POST['password'];
- $data = $this->users_model->login($email, $password);
- if($data){
- $this->session->set_userdata('user', $data);
- $output['message'] = 'Logging in. Please wait...';
- }
- else{
- $output['error'] = true;
- $output['message'] = 'Login Invalid. User not found';
- }
- }
- public function home(){
- //load session library
- $this->load->library('session');
- //restrict users to go to home if not logged in
- if($this->session->userdata('user')){
- $this->load->view('home');
- }
- else{
- redirect('/');
- }
- }
- public function logout(){
- //load session library
- $this->load->library('session');
- $this->session->unset_userdata('user');
- redirect('/');
- }
- }
Defining our Default Controller
Next, we are going to set our default controller so that if no controller is defined, this default controller will be used.
Open routes.php located in application/config folder and set the default route to our user controller.
- $route['default_controller'] = 'user';
Creating our Views
Lastly, we create the views of our app.
Create the ff files inside the application/views folder.
login_page.php
- <!DOCTYPE html>
- <html>
- <head>
- <meta charset="utf-8">
- <title>CodeIgniter Ajax Login using jQuery</title>
- <link rel="stylesheet" href="<?php echo base_url(); ?>bootstrap/css/bootstrap.min.css">
- <script src="<?php echo base_url(); ?>jquery/jquery.min.js"></script>
- <script src="<?php echo base_url(); ?>bootstrap/js/bootstrap.min.js"></script>
- </head>
- <body>
- <div class="container">
- <h1 class="page-header text-center">CodeIgniter Ajax Login using jQuery</h1>
- <div class="row">
- <div class="col-sm-4 col-sm-offset-4">
- <div class="login-panel panel panel-primary">
- <div class="panel-heading">
- <h3 class="panel-title"><span class="glyphicon glyphicon-lock"></span> Login
- </h3>
- </div>
- <div class="panel-body">
- <form id="logForm">
- <fieldset>
- <div class="form-group">
- <input class="form-control" placeholder="Email" type="text" name="email">
- </div>
- <div class="form-group">
- <input class="form-control" placeholder="Password" type="password" name="password">
- </div>
- <button type="submit" class="btn btn-lg btn-primary btn-block"><span id="logText"></span></button>
- </fieldset>
- </form>
- </div>
- </div>
- <div id="responseDiv" class="alert text-center" style="margin-top:20px; display:none;">
- <button type="button" class="close" id="clearMsg"><span aria-hidden="true">×</span></button>
- <span id="message"></span>
- </div>
- </div>
- </div>
- </div>
- <script type="text/javascript">
- $(document).ready(function(){
- $('#logText').html('Login');
- $('#logForm').submit(function(e){
- e.preventDefault();
- $('#logText').html('Checking...');
- var url = '<?php echo base_url(); ?>';
- var user = $('#logForm').serialize();
- var login = function(){
- $.ajax({
- type: 'POST',
- url: url + 'index.php/user/login',
- dataType: 'json',
- data: user,
- success:function(response){
- $('#message').html(response.message);
- $('#logText').html('Login');
- if(response.error){
- $('#responseDiv').removeClass('alert-success').addClass('alert-danger').show();
- }
- else{
- $('#responseDiv').removeClass('alert-danger').addClass('alert-success').show();
- $('#logForm')[0].reset();
- setTimeout(function(){
- location.reload();
- }, 3000);
- }
- }
- });
- };
- setTimeout(login, 3000);
- });
- $(document).on('click', '#clearMsg', function(){
- $('#responseDiv').hide();
- });
- });
- </script>
- </body>
- </html>
home.php
- <!DOCTYPE html>
- <html>
- <head>
- <meta charset="utf-8">
- <title>CodeIgniter Ajax Login using jQuery</title>
- <link rel="stylesheet" type="text/css" href="<?php echo base_url(); ?>bootstrap/css/bootstrap.min.css">
- </head>
- <body>
- <div class="container">
- <h1 class="page-header text-center">CodeIgniter Ajax Login using jQuery</h1>
- <div class="row">
- <div class="col-md-4 col-md-offset-4">
- <?php
- $user = $this->session->userdata('user');
- ?>
- <h2>Welcome to Homepage </h2>
- <h4>User Info:</h4>
- <p>Fullname: <?php echo $fname; ?></p>
- <p>Email: <?php echo $email; ?></p>
- <p>Password: <?php echo $password; ?></p>
- <a href="<?php echo base_url(); ?>index.php/user/logout" class="btn btn-danger">Logout</a>
- </div>
- </div>
- </div>
- </body>
- </html>
That ends this tutorial. You can download the working source code that I have created and used in this tutorial. The download button is located below.
Happy Coding :)
