Animation in VB.NET
Submitted by donbermoy on Monday, March 10, 2014 - 09:28.

Animation is a simulation of movement created by displaying a series of pictures, or frames. Cartoons on television is one example of animation. Animation on computers is one of the chief ingredients of multimedia presentations. There are many software applications that enable you to create animations that you can display on a computer monitor. And for now, we will create an animation using vb.net.
Now, let's start this tutorial!
1. Let's start with creating a Windows Form Application for this tutorial by following the following steps in Microsoft Visual Studio: Go to File, click New Project, and choose Windows Application.
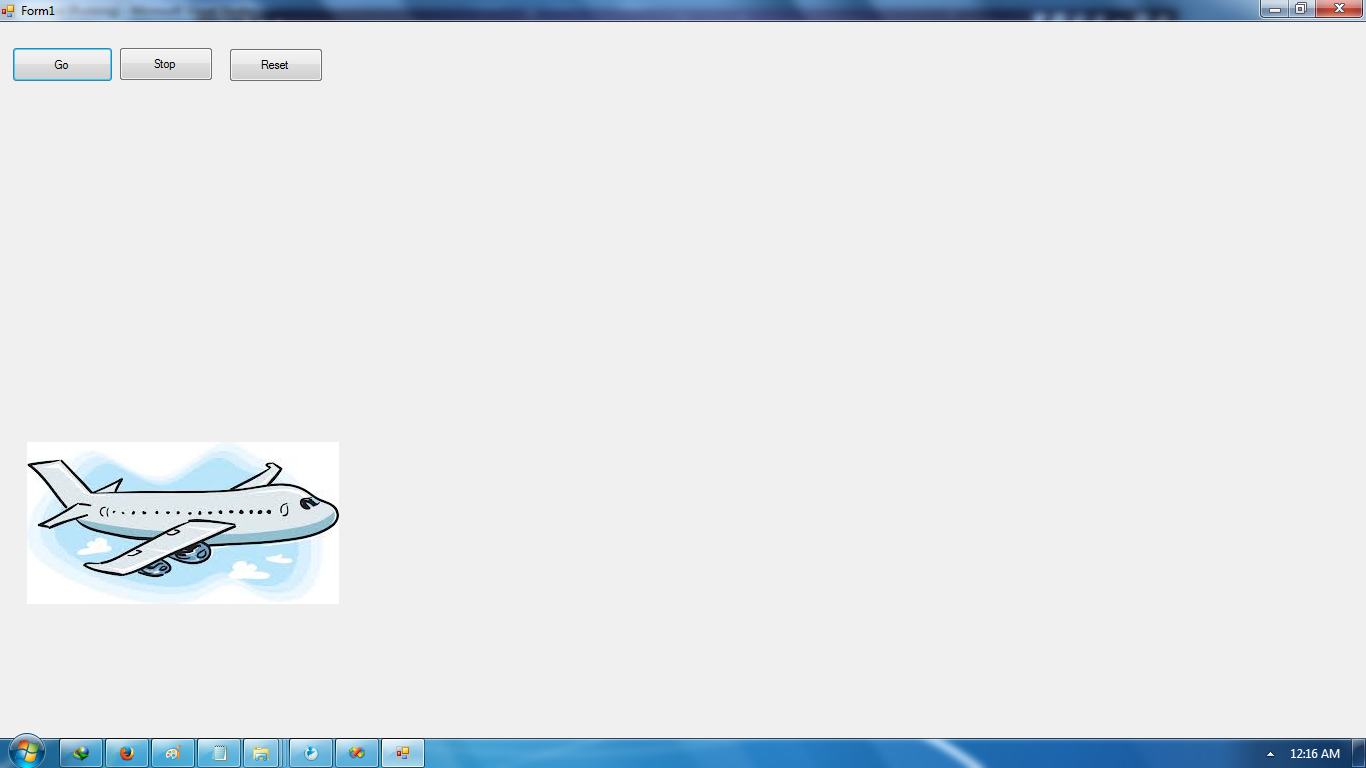
2. Next, add only one PictureBox named PictureBox1 and have any image load in it; the location property must be 27, 420. Add also 3 buttons named Button1 labeled as "Go",Button2 labeled as "Stop", and Button3 labeled as "Reset". Lastly add a timer named Timer1; and an Interval property of 100. You must design your layout like this:
 3. Now put add this code for your code module.
 Download the source code and try it!
Best Regards,
Download the source code and try it!
Best Regards,
3. Now put add this code for your code module.
- Public Class Form1
- Private Sub Timer1_Tick(ByVal sender As System.Object, ByVal e As System.EventArgs) Handles Timer1.Tick
- PictureBox1.Left = PictureBox1.Left + 27
- If PictureBox1.Left >= 300 Then
- PictureBox1.Left = PictureBox1.Left + 27
- PictureBox1.Top = PictureBox1.Top - 10
- PictureBox1.Left = PictureBox1.Left + 27
- End If
- End Sub
- Private Sub Button1_Click(ByVal sender As System.Object, ByVal e As System.EventArgs) Handles Button1.Click
- Timer1.Enabled = True
- End Sub
- Private Sub Button2_Click(ByVal sender As System.Object, ByVal e As System.EventArgs) Handles Button2.Click
- Timer1.Enabled = False
- End Sub
- Public Sub Button3_Click(ByVal sender As System.Object, ByVal e As System.EventArgs) Handles Button3.Click
- PictureBox1.Left = 27
- PictureBox1.Top = 420
- Timer1.Enabled = False
- End Sub
- End Class
Explanation:
We create a method for the Timer for Ticking. As the timer will start the position of our PictureBox will increment by 27 in its Left Location. If the picturebox will be more than or equal to the Left location of 300, then it will again increment to the left location by 27 and if it will reach more than the 300 location to the left it will decrement by 10; means that the picturebox will move to the right and will go up as it decrements by 10 and will go right side again for incrementing again the left side by 27. Button1 is for the Go Button, meaning to say that timer must be enabled so that the picturebox will move with regards to the Timer_Tick. Button2 is the Stop Button and will used to stop the picturebox for moving as we have the code of disabling the timer. Button3 is for the Reset Button means that the picturebox will be in the start or default position. As I said earlier that the location of the image is 27 by Left Location, and 420 by Top Position.Output:
Download the source code and try it!
Best Regards,
Engr. Lyndon R. Bermoy
IT Instructor/System Developer/Android Developer
Mobile: 09079373999
Telephone: 826-9296
E-mail:[email protected]
Visit and like my page on Facebook at: Bermz ISware Solutions
Subscribe at my YouTube Channel at: SerBermz