Book record Navigation Using Visual Basic.Net
Submitted by joken on Thursday, November 28, 2013 - 11:48.
In this tutorial, I'm going to teach you how to create a Book Navigation using Visual basic and Microsoft Access for database. This tutorial will help both novice, or an enthusiast programmer to understand the concept of how to add a record navigation in any system especially when you are planning to create or developing a library system. To start on lesson, open visual basic and add save it as “Record Navigation”. Then we’re going to add controls such four labels, four Text box and four Buttons.
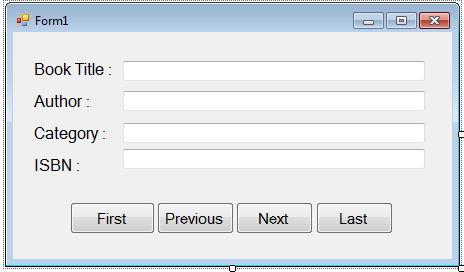
Next, arrange all controls that look like as shown below:
 At this time, since we have already done add controls to our application. We are now going to add functionality to our program. To start with this, double click the form and under public class, add the following code:
Next, we’re going to set a database function that will return our connection string as a new connection string. And this function holds our data source and the database provider. And here’s the following code:
Then double click the form, and add the following code:
At this time, we’re going to create a new sub procedure to be used for the navigation of data and we will call the sub procedure as “naive”. And here’s the following code:
Next, we will add a functionality to our Next record Button. To do this, double click this button and Add the following code:
For Last Record, double click the button and add the following code:
And for the Previous record, add the following code:
The database name is ”library” and it is place inside “Record Navigation\Record Navigation\bin\Debug”.
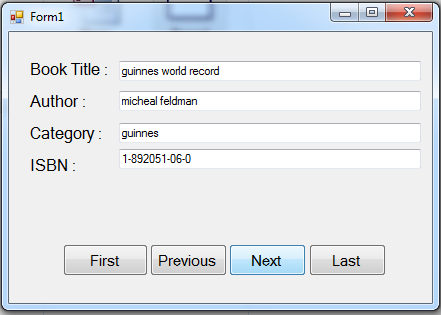
At this time you can now test your program by pressing “F5”.
At this time, since we have already done add controls to our application. We are now going to add functionality to our program. To start with this, double click the form and under public class, add the following code:
Next, we’re going to set a database function that will return our connection string as a new connection string. And this function holds our data source and the database provider. And here’s the following code:
Then double click the form, and add the following code:
At this time, we’re going to create a new sub procedure to be used for the navigation of data and we will call the sub procedure as “naive”. And here’s the following code:
Next, we will add a functionality to our Next record Button. To do this, double click this button and Add the following code:
For Last Record, double click the button and add the following code:
And for the Previous record, add the following code:
The database name is ”library” and it is place inside “Record Navigation\Record Navigation\bin\Debug”.
At this time you can now test your program by pressing “F5”.
At this time, since we have already done add controls to our application. We are now going to add functionality to our program. To start with this, double click the form and under public class, add the following code:
- 'cmd represent an SQL statement or stored procedure to execute against a data source
- Dim cmd As New OleDb.OleDbCommand
- 'it represent data commands and database connection that are used to fill the dataset or datatable
- Dim da As New OleDb.OleDbDataAdapter
- 'it represent an open connection to a data source and we equal this to our function name mycon()
- Dim con As OleDb.OleDbConnection = mycon()
- 'we create data table as our imaginary table to our memory
- Dim maindt As New DataTable
- 'this sql will hold later our SQL statements
- Dim sql As String
- 'our initial value for our minimun value to be used later for navigation
- Dim minval As Integer = 0
- 'the integer thata will hold the maximum value
- Dim maxval As Integer
- Public Function mycon() As OleDb.OleDbConnection
- Return New OleDb.OleDbConnection("Provider=Microsoft.Jet.OLEDB.4.0;Data Source=" & Application.StartupPath & "\library.mdb")
- End Function
- Try
- 'set the SQL Statements getting all the data of books
- sql = "Select * from tblbooks"
- 'opens the connections
- con.Open()
- 'gets the sql connection and storede procedure to execute the at the data source
- With cmd
- .CommandText = sql
- .Connection = con
- End With
- 'get the stored procedure used to select records in the data source
- da.SelectCommand = cmd
- 'refreshes the rows and fill the value to the Data table named maindt
- da.Fill(maindt)
- 'Get the result number of result and assigne to maxval
- maxval = maindt.Rows.Count
- Catch ex As Exception
- End Try
- Public Sub nav(ByVal a As Integer)
- Try
- 'gets the value from the specific column in the data table
- 'and assign to a specific text box
- txtouttile.Text = maindt.Rows(a).Item(1)
- txtoutauthor.Text = maindt.Rows(a).Item(2)
- txtoutcategory.Text = maindt.Rows(a).Item(4)
- txtisbn.Text = maindt.Rows(a).Item(3)
- Catch ex As Exception
- End Try
- End Sub
- 'check if minval is not equal to maxval minus 1
- If minval <> maxval - 1 Then
- 'minval is incremented by 1
- minval = minval + 1
- 'throw the value of minval to nav procedure
- nav(minval)
- Else
- End If
- If minval <> maxval Then
- minval = maxval - 1
- nav(minval)
- End If
And finally, for the First record button, here’s the following code:
- If minval <> 0 Then
- minval = 0
- nav(minval)
- End If