Timer using JavaScript
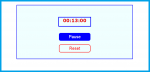
This is a simple Timer using JavaScript. This program has the capability to pause the time and to resume the timer again.
- Read more about Timer using JavaScript
- 1 comment
- Log in or register to post comments
- 173 views