How To Create Registration Page In PHP/MySQL
Submitted by alpha_luna on Friday, April 29, 2016 - 13:40.
If you are looking for on How To Create Registration Page In PHP/MySQL then you are at the right place. In this tutorial, we are going to learn on how to create registration page using PHP/MySQL.
In this article, the user types their information in the form field to save in the database. After saving the data, the alert message will pop up and said: "User successfully added!".
First, we are going to make our database.
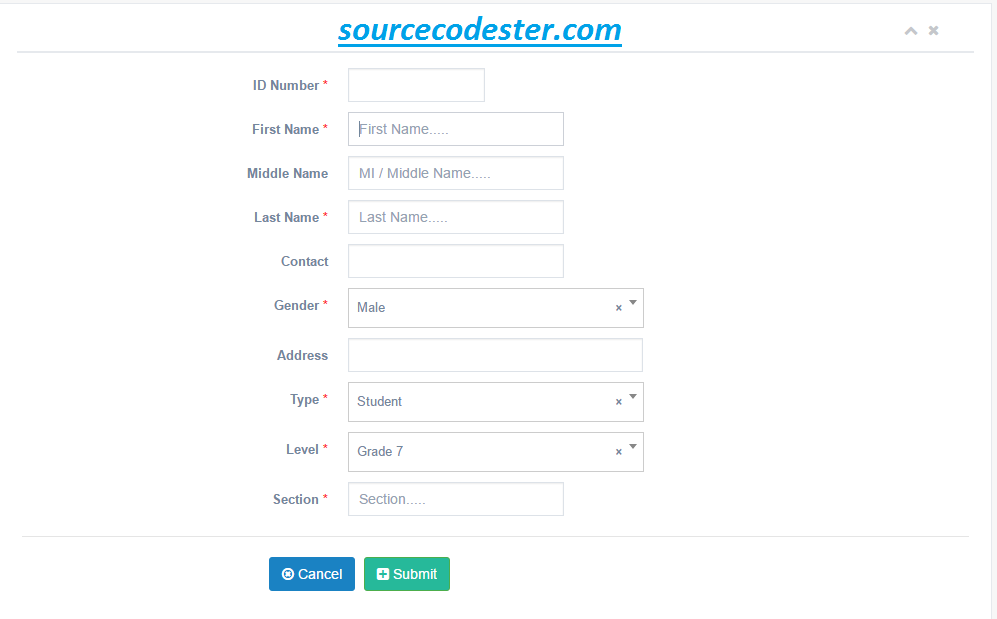
Second, we are going to make our form field.
Third, we are going to make our database connection.
Fourth, we are going to make our saving PHP Script.
So, this is it, just follow the steps to have this Registration Page or you can download the full source code below by clicking the "Download Code" button below.
Share us your thoughts and comments below. Thank you so much for dropping by and reading this tutorial post. For more updates, don’t hesitate and feel free to visit this website more often and please share this with your friends or email me at [email protected]. Practice Coding. Thank you very much.
Creating our Table
We are going to make our database. To create a database:- Open the PHPMyAdmin
- Create a database and name it as "user_registration".
- After creating a database name, click the SQL and kindly copy the code below.
- --
- -- Table structure for table `user`
- --
Creating Form Field
This form field that the user types their information to save in the database.- <form method="post" enctype="multipart/form-data" class="form-horizontal form-label-left">
- <div class="form-group">
- </label>
- <div class="col-md-2">
- <input type="number" name="school_number" id="first-name2" required="required" class="form-control col-md-7 col-xs-12">
- </div>
- </div>
- <div class="form-group">
- </label>
- <div class="col-md-3">
- <input type="text" name="firstname" placeholder="First Name....." id="first-name2" required="required" class="form-control col-md-7 col-xs-12">
- </div>
- </div>
- <div class="form-group">
- <label class="control-label col-md-4" for="first-name">Middle Name
- </label>
- <div class="col-md-3">
- <input type="text" name="middlename" placeholder="MI / Middle Name....." id="first-name2" class="form-control col-md-7 col-xs-12">
- </div>
- </div>
- <div class="form-group">
- </label>
- <div class="col-md-3">
- <input type="text" name="lastname" placeholder="Last Name....." id="last-name2" required="required" class="form-control col-md-7 col-xs-12">
- </div>
- </div>
- <div class="form-group">
- <label class="control-label col-md-4" for="last-name">Contact
- </label>
- <div class="col-md-3">
- <input type="tel" pattern="[0-9]{11,11}" autocomplete="off" maxlength="11" name="contact" id="last-name2" class="form-control col-md-7 col-xs-12">
- </div>
- </div>
- <div class="form-group">
- </label>
- <div class="col-md-4">
- <select name="gender" class="select2_single form-control" required="required" tabindex="-1" >
- </select>
- </div>
- </div>
- <div class="form-group">
- <label class="control-label col-md-4" for="last-name">Address
- </label>
- <div class="col-md-4">
- <input type="text" name="address" id="last-name2" class="form-control col-md-7 col-xs-12">
- </div>
- </div>
- <div class="form-group">
- </label>
- <div class="col-md-4">
- <select name="type" class="select2_single form-control" required="required" tabindex="-1" >
- </select>
- </div>
- </div>
- <div class="form-group">
- </label>
- <div class="col-md-4">
- <select name="level" class="select2_single form-control" required="required" tabindex="-1" >
- </select>
- </div>
- </div>
- <div class="form-group">
- </label>
- <div class="col-md-3">
- <input type="text" name="section" placeholder="Section....." id="first-name2" required="required" class="form-control col-md-7 col-xs-12">
- </div>
- </div>
- <div class="form-group">
- </label>
- <div class="col-md-4">
- <input type="file" style="height:44px;" name="image" id="last-name2" class="form-control col-md-7 col-xs-12">
- </div>
- </div>
- <div class="form-group">
- <div class="col-md-9 col-sm-9 col-xs-12 col-md-offset-3">
- </div>
- </div>
- </form>
Database Connection
This PHP Script is our database. Copy and paste this then save it as "dbcon.php".- <?php
- ?>
Saving Script - PHP
- <?php
- include ('include/dbcon.php');
- echo "";
- }else{
- $file=$_FILES['image']['tmp_name'];
- $image = $_FILES["image"] ["name"];
- $size = $_FILES["image"] ["size"];
- $error = $_FILES["image"] ["error"];
- {
- if($size > 10000000) //conditions for the file
- {
- }
- else
- {
- $profile=$_FILES["image"]["name"];
- $school_number = $_POST['school_number'];
- $firstname = $_POST['firstname'];
- $middlename = $_POST['middlename'];
- $lastname = $_POST['lastname'];
- $contact = $_POST['contact'];
- $gender = $_POST['gender'];
- $address = $_POST['address'];
- $type = $_POST['type'];
- $level = $_POST['level'];
- $section = $_POST['section'];
- $result=mysql_query("select * from user WHERE school_number='$school_number' ") or die (mySQL_error());
- if ($row > 0)
- {
- echo "<script>alert('ID Number already active!'); window.location='user.php'</script>";
- }
- else
- {
- mysql_query("insert into user (school_number,firstname, middlename, lastname, contact, gender, address, type, level, section, status, user_added)
- values ('$school_number','$firstname', '$middlename', '$lastname', '$contact', '$gender', '$address', '$type', '$level', '$section', 'Active', NOW())")or die(mysql_error());
- echo "<script>alert('User successfully added!'); window.location='user.php'</script>";
- }
- }
- }
- }?>