vb.net mysql
sir can you teach how to do it with vb.net and mysql
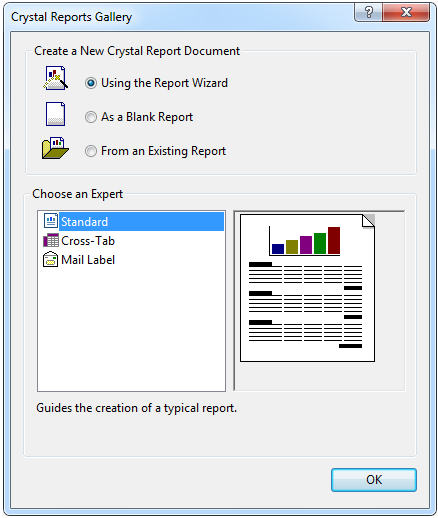
 After that, the Crystal Reports Gallery will show. Select a radio button of “Using the Report Ward”, select a “standard” for choosing an expert and hit “ok”.
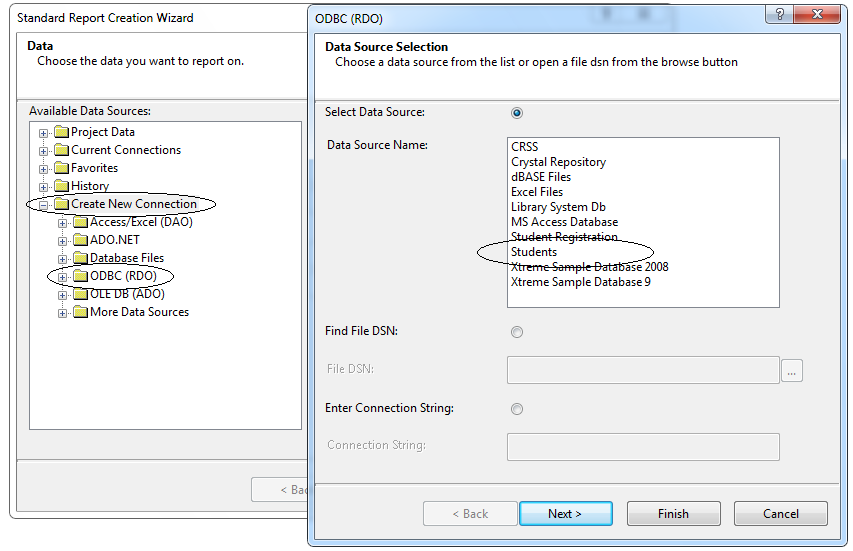
 And then, the Standard Report Wizard will show. Select “Create New Connection” , after that, select the folder of ODBC (RDO). The Data Source selection will show and select the name of your data source (“Students”) that you created in the previous tutorial. Then hit “next”.
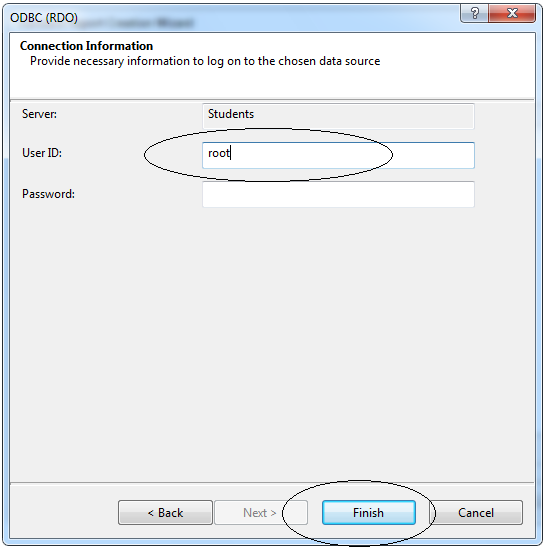
 The connection information will show. Write the word “root” to the user id and leave the password blank. Then hit “Finish”.
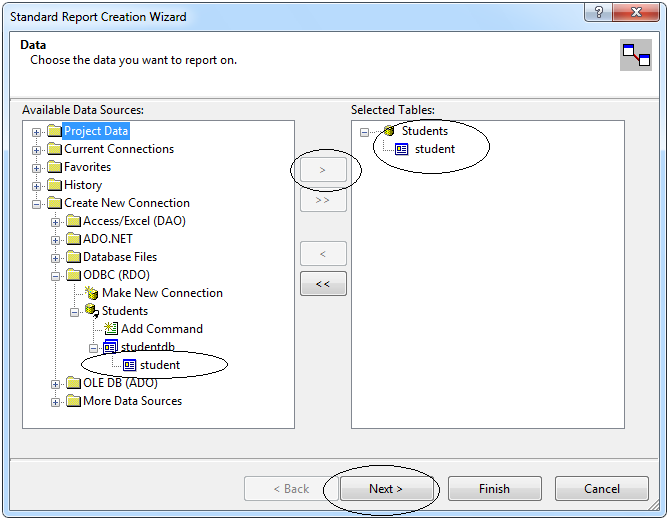
 The database will be added to the folder of ODBC (RDO). Select the table of the database and hit the “greater than sign(>)”. After that, hit “next”.
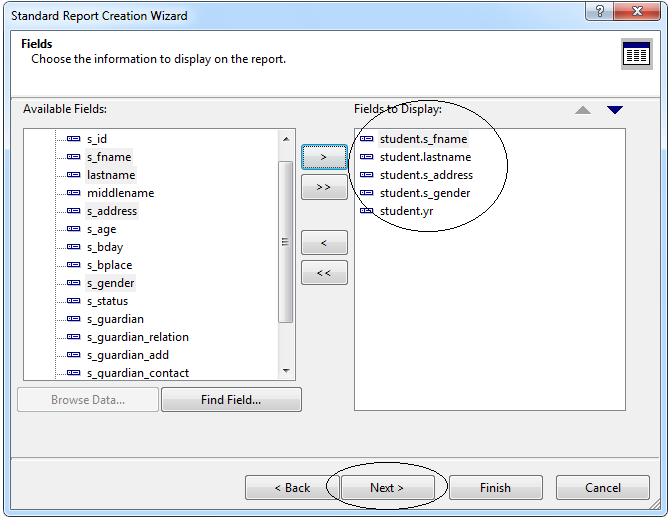
 Then, choose the fields that you want to display in the reports.
Hit the “next”.
Then, choose the fields that you want to display in the reports.
Hit the “next”.
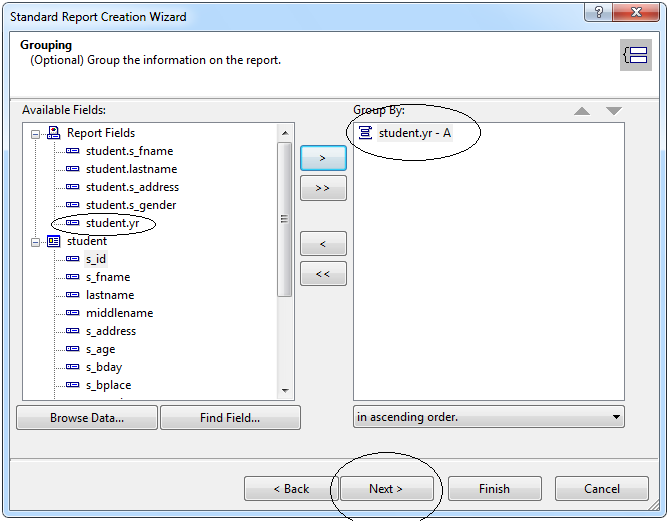
 After that, choose what you want to group on the reports and hit “next”.
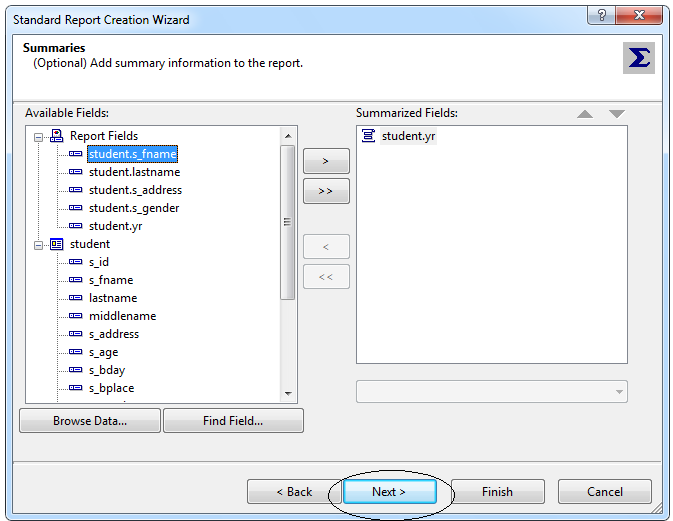
 I didn’t put a summarize field because it was an information about the student. You can use the summarize field when it deals with Inventory. Hit “next” again.
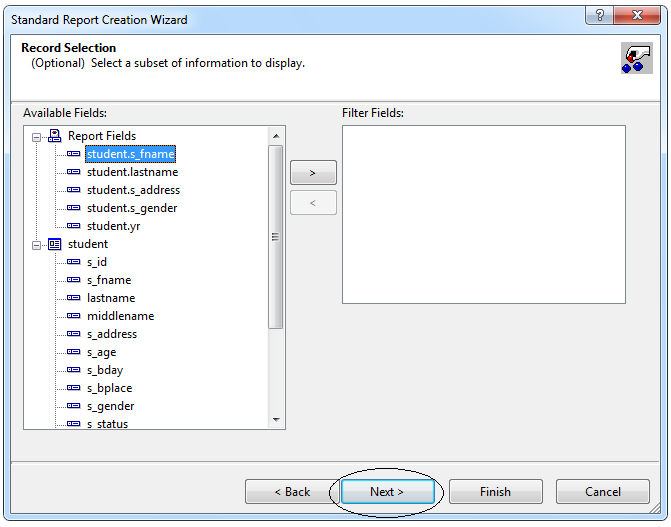
 Hit the “next”. I Leave subset fields blank because I don’t have to filter any records and I will display all of it.
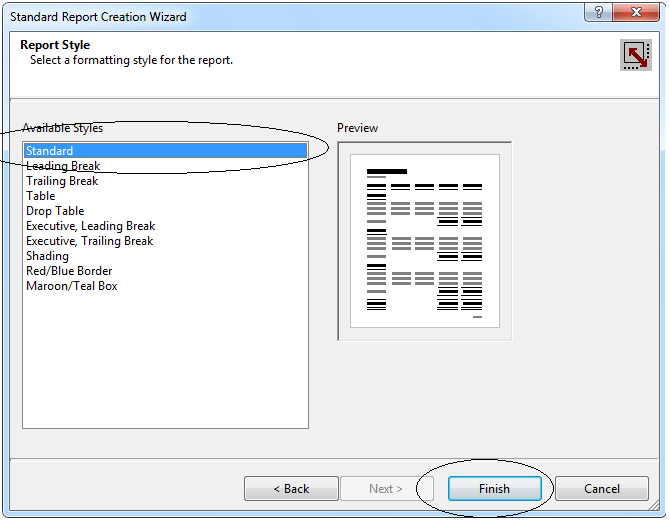
 Choose a standard formatting of the reports and hit “Finish”.
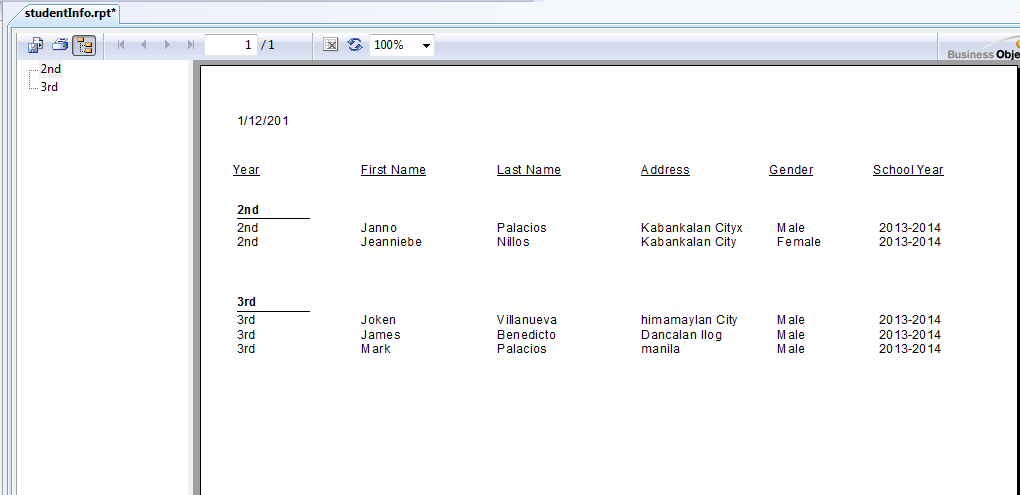
 This will be the output after you hit the “Finish”.
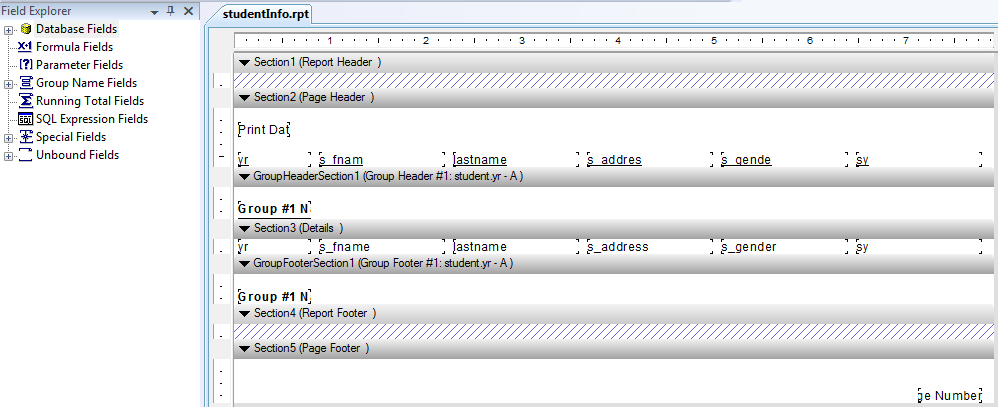 You can now preview it and you can change the header if you like.
I will show you how to set it up into a Windows Form on my next tutorial.
You can now preview it and you can change the header if you like.
I will show you how to set it up into a Windows Form on my next tutorial.