Getting Started
In the previous tutorial, we discussed on
How to Backup MySQL Database using PHP. This time we are going to discuss on how to restore back up mysql databases using php.
In order to beautify the presentation of this tutorial, I've used Bootstrap which is included in the downloadable of this tutorial but if you want, you can download Bootstrap using
this link.
Creating our Restore Function
Next, we create our restore function that will restore our sql database and return status message.
Create a new file, name it as
function.php and paste the codes below.
<?php
function restore($server, $username, $password, $dbname, $location){
//connection
$conn = new mysqli($server, $username, $password, $dbname);
//variable use to store queries from our sql file
$sql = '';
//get our sql file
$lines = file($location);
//return message
$output = array('error'=>false);
//loop each line of our sql file
foreach ($lines as $line){
//skip comments
if(substr($line, 0, 2) == '--' || $line == ''){ continue;
}
//add each line to our query
$sql .= $line;
//check if its the end of the line due to semicolon
//perform our query
$query = $conn->query($sql);
if(!$query){
$output['error'] = true;
$output['message'] = $conn->error;
}
else{
$output['message'] = 'Database restored successfully';
}
//reset our query variable
$sql = '';
}
}
return $output;
}
?>
Creating our Form
Normally, you can already use the function to restore the database but for the sake of presentation, we are going to create a form where you can input database credential, db name where you want to restore the back up sql and the back up sql.
Create a new file, name it as
index.php and paste the codes below.
<!DOCTYPE html>
<html>
<head>
<meta charset="utf-8">
<title>How to Restore MySQL Database using PHP</title>
<link rel="stylesheet" type="text/css" href="bootstrap4/css/bootstrap.min.css">
</head>
<body>
<div class="container">
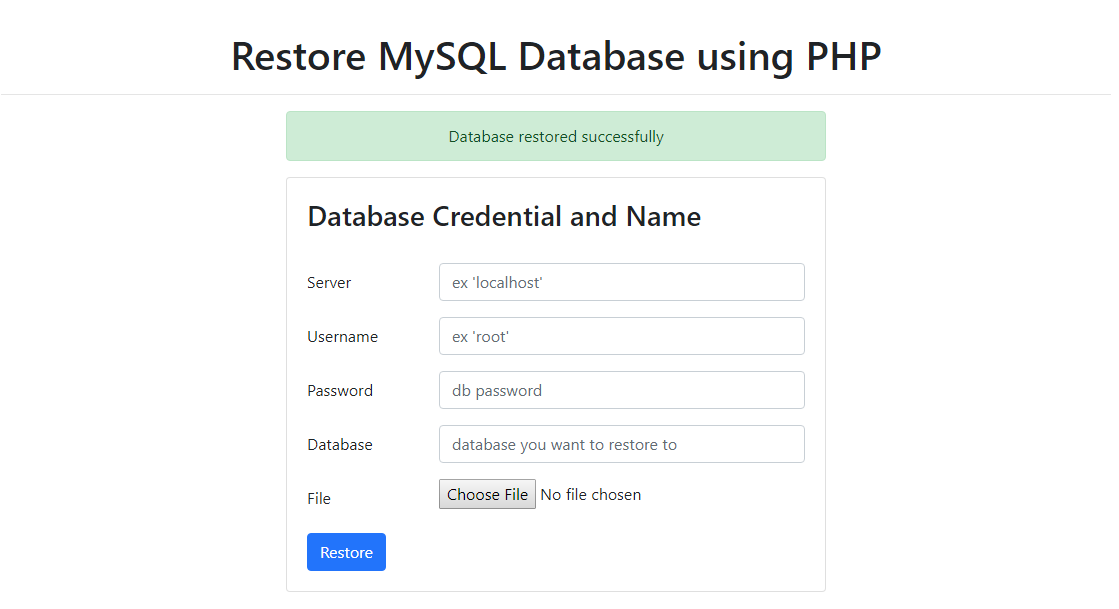
<h1 class="text-center" style="margin-top:30px;">Restore MySQL Database using PHP</h1>
<hr>
<div class="row justify-content-center">
<div class="col-sm-6">
<?php
if(isset($_SESSION['error'])){ ?>
<div class="alert alert-danger text-center">
<?php echo $_SESSION['error']; ?>
</div>
<?php
unset($_SESSION['error']); }
if(isset($_SESSION['success'])){ ?>
<div class="alert alert-success text-center">
<?php echo $_SESSION['success']; ?>
</div>
<?php
unset($_SESSION['success']); }
?>
<div class="card">
<div class="card-body">
<h3>Database Credential and Name</h3>
<br>
<form method="POST" action="restore.php" enctype="multipart/form-data">
<div class="form-group row">
<label for="server" class="col-sm-3 col-form-label">Server</label>
<div class="col-sm-9">
<input type="text" class="form-control" id="server" name="server" placeholder="ex 'localhost'" required>
</div>
</div>
<div class="form-group row">
<label for="username" class="col-sm-3 col-form-label">Username</label>
<div class="col-sm-9">
<input type="text" class="form-control" id="username" name="username" placeholder="ex 'root'" required>
</div>
</div>
<div class="form-group row">
<label for="password" class="col-sm-3 col-form-label">Password</label>
<div class="col-sm-9">
<input type="text" class="form-control" id="password" name="password" placeholder="db password">
</div>
</div>
<div class="form-group row">
<label for="dbname" class="col-sm-3 col-form-label">Database</label>
<div class="col-sm-9">
<input type="text" class="form-control" id="dbname" name="dbname" placeholder="database you want to restore to" required>
</div>
</div>
<div class="form-group row">
<label for="sql" class="col-sm-3 col-form-label">File</label>
<div class="col-sm-9">
<input type="file" class="form-control-file" id="sql" name="sql" placeholder="database you want to restore to" required>
</div>
</div>
<button type="submit" class="btn btn-primary" name="restore">Restore</button>
</form>
</div>
</div>
</div>
</div>
</div>
</body>
</html>
Creating our Restore Action
Lastly, we create the action if the form we created is submitted. This action will restore our back up sql.
Create a new file, name it as
restore.php and paste the codes below.
<?php
//include our function
include 'function.php';
if(isset($_POST['restore'])){
//get post data
$server = $_POST['server'];
$username = $_POST['username'];
$password = $_POST['password'];
$dbname = $_POST['dbname'];
//moving the uploaded sql file
$filename = $_FILES['sql']['name'];
$file_location = 'upload/' . $filename;
//restore database using our function
$restore = restore($server, $username, $password, $dbname, $file_location);
if($restore['error']){
$_SESSION['error'] = $restore['message'];
}
else{
$_SESSION['success'] = $restore['message'];
}
}
else{
$_SESSION['error'] = 'Fill up credential first';
}
?>
Note: Be sure to create
upload folder. This is where our uploaded files are save.
That ends this tutorial. Happy Coding :)