How To Create Grade Solver Using JavaScript
Submitted by alpha_luna on Thursday, April 14, 2016 - 16:12.
If you are looking for a solution or an easy way to solve subject grades then you are at the right place.
In this tutorial, we are going to learn on How To Create Grade Solver Using JavaScript. And using HTML forms and CSS. What does the program work?
To ask the user their Full name, their subject, prelim, midterm and their end term grade. Then, click the “Compute Grade” button that our program will compute the average grade of the student. Final, our program will check your average grade to determine the student passed or failed in their subject. And, we have another one button to reset the data in the form field to have a new student or a new set of grades to compute.
JavaScript
This script that we need to compute the student's grade and to determine if they passed or failed in their subject.
HTML
This is the HTML Form Field.
CSS
And, this is our style.
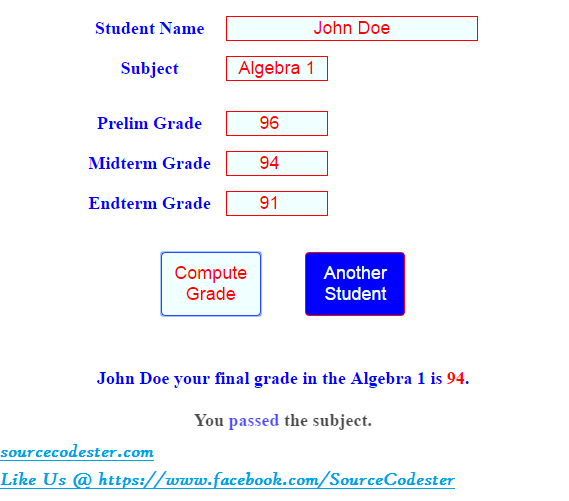
Output:
This is the result if the student passed for their subject.
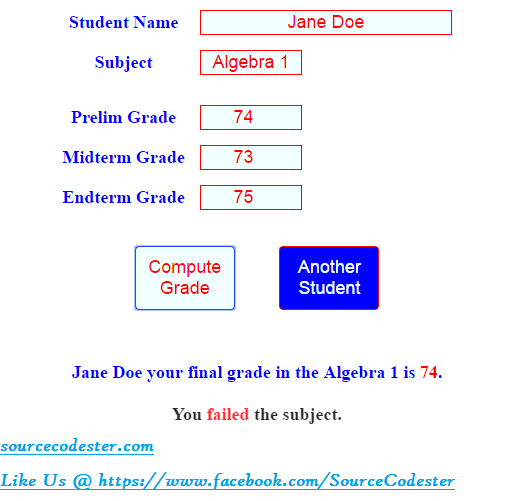
 This is the result if the student failed for their subject.
 Share us your thoughts and comments below. Thank you so much for dropping by and reading this tutorial post. For more updates, don’t hesitate and feel free to visit this website more often and please share this with your friends or email me at [email protected]. Practice Coding. Thank you very much.
- <script>
- var button = document.getElementsByTagName('button');
- button[0].onclick = solve_subject_grade;
- button[1].onclick = clear_text;
- document.onload = function() {
- document.getElementById('student_name').focus();
- };
- function solve_subject_grade() {
- var remarks;
- var student_name = document.getElementById("student_name").value;
- var subject = document.getElementById("subject").value;
- var prelim_grade = document.getElementById("prelim_grade").value;
- var midterm_grade = document.getElementById("midterm_grade").value;
- var endterm_grade = document.getElementById("endterm_grade").value;
- var final_grade =(parseInt(prelim_grade) + parseInt(midterm_grade)+ parseInt(endterm_grade)) / 3;
- if (final_grade >= 75) {
- remarks = "<b style='color:blue;'> passed </b>";
- }
- if (final_grade <= 74) {
- remarks = "<b style='color:red;'> failed </b>";
- }
- if (student_name && subject && prelim_grade && midterm_grade && endterm_grade) {
- document.getElementById('result1').innerHTML =
- student_name + " your final grade in the " +subject+ " is " +
- "<font color='red'>"+ Math.round(final_grade,0) + "</font>.<br /><br />"+
- "<b class='blink_text'>You " + remarks + " the subject.</b>";
- } else {
- document.getElementById('result1').innerHTML = "<b style='color:red;'>Kindly check your details.</b>"
- }
- }
- function clear_text() {
- document.getElementById("student_name").value="";
- document.getElementById("subject").value="";
- document.getElementById("prelim_grade").value="";
- document.getElementById("midterm_grade").value="";
- document.getElementById("endterm_grade").value="";
- document.getElementById("student_name").focus();
- }
- </script>
- <center>
- <table cellpadding="5" cellspacing="5">
- <tr>
- <td>
- <input type="text" style="width:250px; border:red 1px solid; background:azure; text-align:center; font-size:large; color:red;" id="student_name" autofocus>
- </td>
- </tr>
- <tr>
- <td>
- <input type="text" style="width:100px; border:red 1px solid; background:azure; text-align:center; font-size:large; color:red;" id="subject">
- </td>
- </tr>
- <tr style="text-align:center;">
- </tr>
- <tr>
- <td>
- <input type="number" step="1" min="0" style="width:100px; border:red 1px solid; background:azure; text-align:center; font-size:large; color:red;" id="prelim_grade">
- </td>
- </tr>
- <tr>
- <td>
- <input type="number" step="1" min="0" style="width:100px; border:red 1px solid; background:azure; text-align:center; font-size:large; color:red;" id="midterm_grade">
- </td>
- </tr>
- <tr>
- <td>
- <input type="number" step="1" min="0" style="width:100px; border:red 1px solid; background:azure; text-align:center; font-size:large; color:red;" id="endterm_grade">
- </td>
- </tr>
- <tr>
- <td colspan="2" style="text-align:center;">
- <br />
- <button style="color:red; cursor:pointer; width:100px; margin-right:40px; border-radius:4px; font-size:18px; border:blue 1px solid; background:azure; padding:10px;">
- Compute Grade
- </button>
- <button style="color:azure; cursor:pointer; width:100px; font-size:18px; border-radius:4px; border:red 1px solid; background:blue; padding:10px;">
- Another Student
- </button>
- </td>
- </tr>
- </table>
- </center>
- <style type="text/css">
- body {
- font-family:helvitica;
- color:blue;
- font-size:18px;
- font-weight:bold;
- }
- label {
- display: table-cell;
- text-align: right;
- }
- input {
- display: table-cell;
- }
- div.row {
- display:table-row;
- }
- .blink_text {
- -webkit-animation-name: blinker;
- -webkit-animation-duration: 1s;
- -webkit-animation-timing-function: linear;
- -webkit-animation-iteration-count: infinite;
- -moz-animation-name: blinker;
- -moz-animation-duration: 1s;
- -moz-animation-timing-function: linear;
- -moz-animation-iteration-count: infinite;
- animation-name: blinker;
- animation-duration: 1s;
- animation-timing-function: linear;
- animation-iteration-count: infinite;
- color:black;
- }
- @-moz-keyframes blinker {
- 0% { opacity: 1.0; }
- 50% { opacity: 0.0; }
- 100% { opacity: 1.0; }
- }
- @-webkit-keyframes blinker {
- 0% { opacity: 1.0; }
- 50% { opacity: 0.0; }
- 100% { opacity: 1.0; }
- }
- @keyframes blinker {
- 0% { opacity: 1.0; }
- 50% { opacity: 0.0; }
- 100% { opacity: 1.0; }
- }
- </style>
This is the result if the student failed for their subject.
Share us your thoughts and comments below. Thank you so much for dropping by and reading this tutorial post. For more updates, don’t hesitate and feel free to visit this website more often and please share this with your friends or email me at [email protected]. Practice Coding. Thank you very much.