Cropping an Image before Saving using JS, jQuery, and PHP Tutorial

Introduction
In this tutorial, I will show you How to Crop an Image before Saving it using JS, jQuery, and JS Library. We can achieve this kind of feature for our web application by using Croppie Library. The tutorial aims to provide the student and new programmers a reference to learn with to enhance and develop their programming skills using JavaScript and PHP Language. Here, snippets and sample source codes are provided.
How to Crop Image before Saving it
There are a lot of options to Crop an Image in web development. This feature is usually created using JavaScript to allow the end-users to crop the image on the client side. We can create this kind of feature by using DOM Manipulation, event listeners, and some other method or object that are available in JavaScript. Writing code for this might be time-consuming and not easy, especially for beginners. But, with the help of Croppie Library, we can achieve this kind of feature without hassle.
What is Croppie Library?
Croppie Library is a JavaScript Library that was developed by Foliotek. This library comes with JavaScript and CSS files. It was mainly created to crop an image using JavaScript. You can download this library at https://github.com/Foliotek/Croppie/releases.
How to use Croppie Library?
Here are some snippets of using the Croppie Library to crop an Image before saving it in your web server. The said library comes with multiple options and methods that you can use.
Here's a basic example of using the Library
- var $croppie = new Croppie($('#croppie-element')[0], {
- boundary: { width: 400, height: 400 },
- viewport: {
- height: 300,
- width: 300,
- type:'square'
- },
- })
The script above is only initializing the Cropping Feature to the specific element in your web page or HTML page. It will create a container and field where you can edit or crop your chosen image.
To bind an Image to the library. You can use the following snippet.
- $croppie.bind({
- url: "sample_img.png",
- });
The script above will bind your chosen image to the cropper element where you can adjust the image and select the part of the image to crop.
After you finish cropping the image, you can get the cropped image using the result method of the library. You can choose the format of the image (PNG, JPEG, WEBP) and select the type of result you want ('canvas', 'html', 'blob', or, 'rawcanvas'). Here's the following example to do it.
- $croppie.result('blob').then(function(blob) {
- // do something here and use blob variable to get the cropped image result
- });
Example
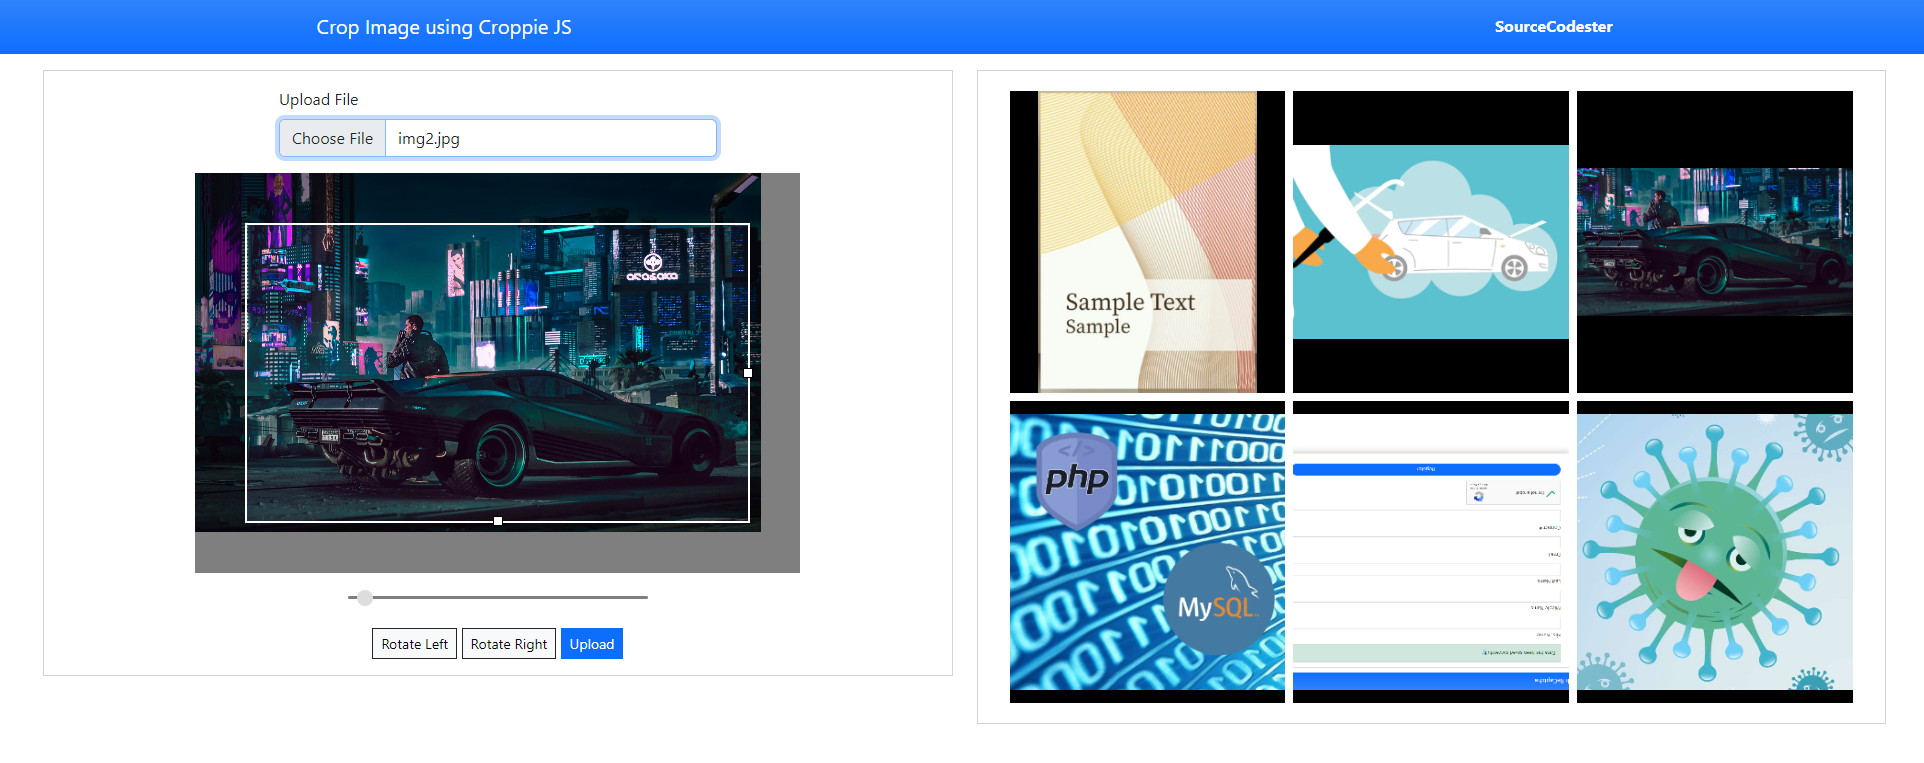
Here's a sample application that demonstrates how to crop images before saving them using Croppie Library, jQuery, Ajax, and PHP. This application allows users to upload and crop images. The browsed or chosen image can be also rotated clockwise or counterclockwise. Users can also resize the cropping container.
Interface
index.php
- <!DOCTYPE html>
- <html lang="en">
- <head>
- <meta charset="UTF-8">
- <meta http-equiv="X-UA-Compatible" content="IE=edge">
- <meta name="viewport" content="width=device-width, initial-scale=1.0">
- <link rel="stylesheet" href="https://cdn.jsdelivr.net/npm/[email protected]/dist/css/bootstrap.min.css" integrity="sha384-Zenh87qX5JnK2Jl0vWa8Ck2rdkQ2Bzep5IDxbcnCeuOxjzrPF/et3URy9Bv1WTRi" crossorigin="anonymous">
- <link rel="stylesheet" href="./croppie/croppie.css">
- <script src="https://cdn.jsdelivr.net/npm/[email protected]/dist/js/bootstrap.bundle.min.js" integrity="sha384-OERcA2EqjJCMA+/3y+gxIOqMEjwtxJY7qPCqsdltbNJuaOe923+mo//f6V8Qbsw3" crossorigin="anonymous"></script>
- <style>
- html, body{
- min-height:100%;
- width:100%;
- }
- .img-holder {
- width: calc(100%);
- height: 30vh;
- background: black;
- }
- .img-holder img{
- object-position:
- }
- .img-holder img {
- width: calc(100%);
- height: calc(100%);
- object-fit: scale-down;
- object-position: center center;
- }
- </style>
- </head>
- <body>
- <nav class="navbar navbar-expand-lg navbar-dark bg-primary bg-gradient">
- <div class="container">
- <div>
- </div>
- </div>
- </nav>
- <div class="container-fluid px-5 my-3">
- <div class="row">
- <div class="col-lg-6">
- <div class="card rounded-0">
- <div class="card-body rounded-0">
- <form action="upload.php" method="POST" enctype="multipart/form-data">
- <div class="col-lg-6 col-md-8 col-sm-12 mx-auto">
- <div class="mb-3">
- <input class="form-control" type="file" name="upload" accept="image/jpeg, image/png" id="upload">
- </div>
- </div>
- </form>
- <div id="croppie-editor" class="d-none">
- <div class="mx-0 text-center">
- </div>
- </div>
- </div>
- </div>
- </div>
- <div class="col-lg-6">
- <div class="card round-0 rounded-0">
- <div class="card-body rounded-0">
- <div class="container-fluid">
- <div class="d-flex flex-wrap">
- <?php
- $dir = "uploads/";
- if(is_dir($dir)):
- $scandir = scandir($dir);
- foreach($scandir as $img):
- if(in_array($img, ['.', '..']))
- continue;
- ?>
- <div class="col-lg-4 col-md-6 col-sm-12 p-1">
- <div class="position-relative img-holder">
- <img src="<?= $dir.$img ?>" alt="">
- </div>
- </div>
- <?php endforeach; ?>
- <?php endif; ?>
- </div>
- </div>
- </div>
- </div>
- </div>
- </div>
- </div>
- </body>
- </html>
JavaScript
app.js
- var $croppie = new Croppie($('#croppie-field')[0], {
- enableExif: true,
- enableResize:true,
- enableZoom:true,
- boundary: { width: 400, height: 400 },
- viewport: {
- height: 300,
- width: 300
- },
- enableOrientation: true
- })
- $(document).ready(function(){
- var img_name;
- // console.log($croppie)
- $('#upload').on('change', function(e){
- var reader = new FileReader();
- img_name = e.target.files[0].name;
- reader.onload = function (e) {
- $croppie.bind({
- url: e.target.result
- });
- $('#croppie-editor').removeClass('d-none')
- }
- reader.readAsDataURL(this.files[0]);
- })
- $('#rotate-left').click(function(){
- $croppie.rotate(90);
- })
- $('#rotate-right').click(function(){
- $croppie.rotate(-90);
- })
- $('#upload-btn').click(function(){
- $croppie.result({
- type:'base64',
- format: 'png'
- }).then((imgBase64)=>{
- $.ajax({
- url:'save_image.php',
- method:'POST',
- data: { 'img' : imgBase64, 'fname' : img_name },
- dataType: 'json',
- error: err => {
- console.error(err)
- },
- success: function(response){
- if(response.status == 'success'){
- alert("Cropped Image has been saved successfully.")
- location.reload()
- }else{
- console.error(response)
- }
- }
- })
- })
- })
- })
Saving the Cropped Image
save_image.php
- <?php
- $dir = "uploads/";
- if($save){
- $resp['status'] = 'success';
- }else{
- $resp['status'] = 'failed';
- }
Snapshot
Here's the snapshot of the result of the source code I provided above.
I also provided the full source code zip file of the sample application on this website. You can download it by clicking the download button below this article. Leave a comment below with any questions you might want to ask regarding this tutorial.
That's it! I hope this Cropping Images before Saving Tutorial will help you with what you are looking for and that you'll find this useful for your current future web application projects.
Explore more on this website for more Tutorials and Free Source Codes.