Sending Email using PHPMailer
Submitted by nurhodelta_17 on Thursday, February 1, 2018 - 20:31.

Getting Started
I've used CDN for Bootstrap in this tutorial so you need internet connection for it to work. If ever you want a full documentation of this plugin, you can visit Github.Installing the PHPMailer using Composer
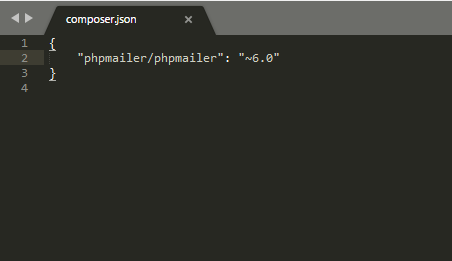
If you don't have composer yet, you may use this link to download the latest version. 1. Create a folder of your app, in my case I've created my app inside htdocs folder of my xampp and name it phpmailer. 2. Create a file named composer,json inside your app folder and put the ff. line inside it. This will tell composer to install phpmailer to our app.- {
- "phpmailer/phpmailer": "~6.0"
- }
 3. Open command prompt, navigate to your app and type the ff.
- composer require phpmailer/phpmailer
Creating our Send Email Form
Next, we're gonna create a form to send email using PHPMailer and this will be our index.php.- <?php
- ?>
- <!DOCTYPE html>
- <html>
- <head>
- <meta charset="utf-8">
- <title>Sending Email using PHPMailer</title>
- <link href="https://maxcdn.bootstrapcdn.com/bootstrap/3.3.7/css/bootstrap.min.css" rel="stylesheet">
- </head>
- <body>
- <div class="container">
- <h1 class="page-header text-center">Sending Email using PHPMailer</h1>
- <div class="row">
- <div class="col-sm-4 col-sm-offset-4">
- <?php
- ?>
- <div class="alert alert-info text-center">
- <?php echo $_SESSION['message']; ?>
- </div>
- <?php
- }
- ?>
- <form method="POST" action="send.php" enctype="multipart/form-data">
- <div class="form-group">
- <label>Email:</label>
- <input type="email" class="form-control" name="email" required>
- </div>
- <div class="form-group">
- <label>Subject:</label>
- <input type="text" class="form-control" name="subject" required>
- </div>
- <div class="form-group">
- <label>Message:</label>
- <textarea class="form-control" name="message" required></textarea>
- </div>
- <div class="form-group">
- <label>Add Attachment:</label>
- <input type="file" name="attachment">
- </div>
- <button type="submit" name="send" class="btn btn-primary">Send</button>
- </form>
- </div>
- </div>
- </div>
- </body>
- </html>
Creating our Send Email Code
This contains our code that send email using PHPMailer and we're gonna name it as send.php.- <?php
- // Import PHPMailer classes into the global namespace
- // These must be at the top of your script, not inside a function
- use PHPMailer\PHPMailer\PHPMailer;
- use PHPMailer\PHPMailer\Exception;
- $email = $_POST['email'];
- $subject = $_POST['subject'];
- $message = $_POST['message'];
- $filename = $_FILES['attachment']['name'];
- $location = 'attachment/' . $filename;
- //Load composer's autoloader
- require 'vendor/autoload.php';
- $mail = new PHPMailer(true); // Passing `true` enables exceptions
- try {
- //Server settings
- $mail->isSMTP(); // Set mailer to use SMTP
- $mail->Host = 'smtp.gmail.com'; // Specify main and backup SMTP servers
- $mail->SMTPAuth = true; // Enable SMTP authentication
- $mail->Password = 'mysourcepass'; // Your Password
- 'verify_peer' => false,
- 'verify_peer_name' => false,
- 'allow_self_signed' => true
- )
- );
- $mail->SMTPSecure = 'ssl';
- $mail->Port = 465;
- //Send Email
- //Recipients
- $mail->addAddress($email);
- //Attachment
- $mail->addAttachment($location, $filename);
- }
- //Content
- $mail->isHTML(true);
- $mail->Subject = $subject;
- $mail->Body = $message;
- $mail->send();
- $_SESSION['message'] = 'Message has been sent';
- } catch (Exception $e) {
- $_SESSION['message'] = 'Message could not be sent. Mailer Error: '.$mail->ErrorInfo;
- }
- }
- else{
- $_SESSION['message'] = 'Please fill up the form first';
- }