Simple CRUD Operation Using AngularJS - Part 2

Language

In this tutorial, we will create a Simple CRUD(update, delete) Operations Using AngularJS. In my last tutorial Simple CRUD Operation Using AngularJS - Part 1 we already created a function that can create and read a data. This time we will try add some function that can update and delete the existing data. Before we proceed I hope that you read the previous tutorial and have already the code to continue on for what we left behind before. So coders let's start coding. Creating a Form 
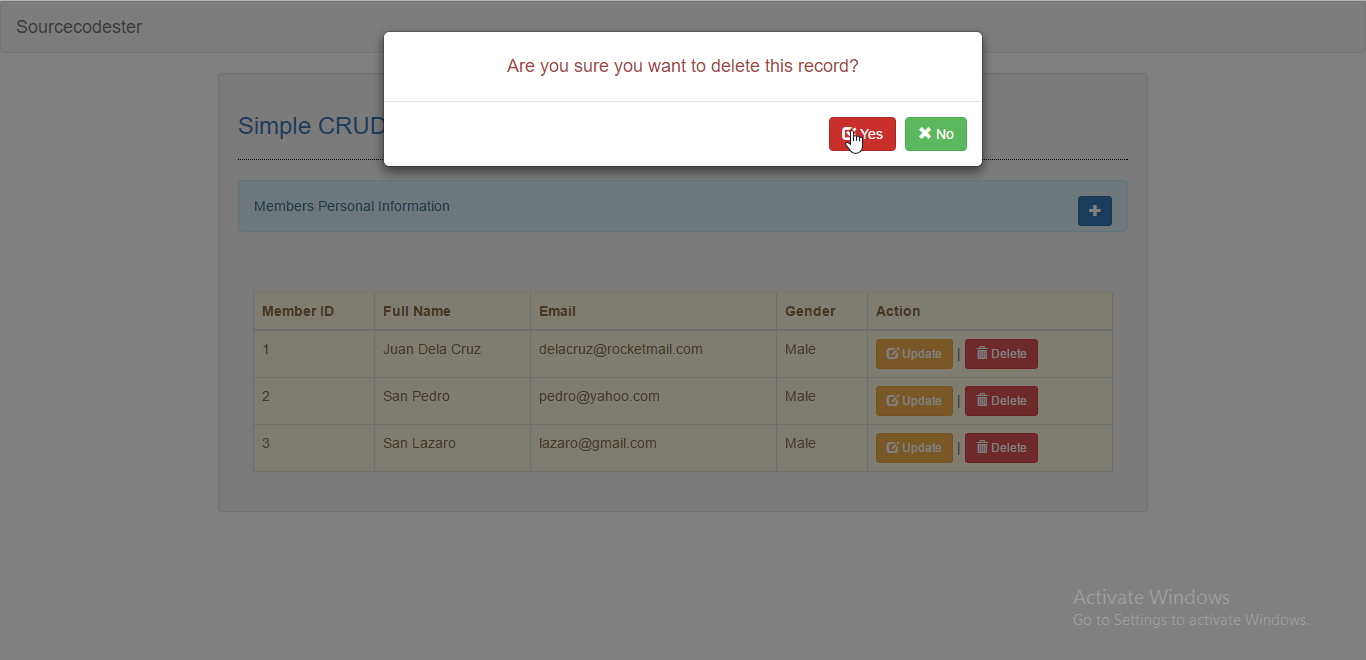
In this form I just added a modal for update and delete
  1. <!DOCTYPE html>
  2. <html lang = "en">
  3. <head>
  4. <meta charset = "UTF-8" name = "viewport" content = "width=device-width, initial-scale=1"/>
  5. <title>Sourcecodester</title>
  6. <link rel = "stylesheet" type = "text/css" href = "css/bootstrap.css" />
  7. <script src = "js/angular.js"></script>
  8. <script src = "js/app.js"></script>
  9. </head>
  10. <body ng-app = "myModule" ng-controller = "myController">
  11. <nav class = "navbar navbar-default">
  12. <div class = "containet-fluid">
  13. <a class = "navbar-brand" href = "https://www.sourcecodester.com" >Sourcecodester</a>
  14. </div>
  15. </nav>
  16. <div class = "row">
  17. <div class = "col-md-2"></div>
  18. <div class = "col-md-8 well">
  19. <h3 class = "text-primary">Simple CRUD Operation Using AngularJS - Part 2</h3>
  20. <hr style = "border-top:1px dotted #000;"/>
  21. <div class = "alert alert-info">Members Personal Information <button class = "btn btn-sm btn-primary pull-right" data-toggle="modal" data-target="#add_member"><span class = "glyphicon glyphicon-plus"></span></button></div>
  22. <div class = "container-fluid">
  23. <br />
  24. <br />
  25. <table class = "table table-bordered alert-warning">
  26. <tr>
  27. <th>Member ID</th>
  28. <th>Full Name</th>
  29. <th>Email</th>
  30. <th>Gender</th>
  31. <th>Action</th>
  32. </tr>
  33. </thead>
  34. <tr ng-repeat = "member in members">
  35. <td>{{$index+1}}</td>
  36. <td>{{member.name}}</td>
  37. <td>{{member.email}}</td>
  38. <td>{{member.gender}}</td>
  39. <td><button type = "button" data-toggle = "modal" data-target = "#update_member" ng-click = "selectMember(member)" class = "btn btn-sm btn-warning"><span class = "glyphicon glyphicon-edit"></span> Update</button> | <button type = "button" data-toggle = "modal" data-target = "#delete_member" class = "btn btn-sm btn-danger"><span class = "glyphicon glyphicon-trash"></span> Delete</button></td>
  40. </tr>
  41. </tbody>
  42. </table>
  43. </div>
  44. </div>
  45. </div>
  46. <div class="modal fade" id="add_member" tabindex="-1" role="dialog" aria-labelledby="myModalLabel">
  47. <div class="modal-dialog" role="document">
  48. <div class="modal-content">
  49. <form>
  50. <div class="modal-header">
  51. <button type="button" class="close" data-dismiss="modal" aria-label="Close"><span aria-hidden="true">&times;</span></button>
  52. <h4 class="modal-title text-info" id="myModalLabel">Member Registration</h4>
  53. </div>
  54. <div class="modal-body">
  55. <div class = "form-group">
  56. <label>Full Name</label>
  57. <input type = "text" class = "form-control" ng-model = "newMember.name"/>
  58. </div>
  59. <div class = "form-group">
  60. <label>Email</label>
  61. <input type = "email" class = "form-control" ng-model = "newMember.email"/>
  62. </div>
  63. <div class = "form-group">
  64. <label>Gender</label>
  65. <select class = "form-control" ng-model = "newMember.gender" >
  66. <option value = "">Choose an option</option>
  67. <option value = "Male">Male</option>
  68. <option value = "Female">Female</option>
  69. </select>
  70. </div>
  71. </div>
  72. <div class="modal-footer">
  73. <button class="btn btn-primary" ng-click = "saveMember()" data-dismiss = "modal"><span class = "glyphicon glyphicon-save"></span> Save</button>
  74. </div>
  75. </form>
  76. </div>
  77. </div>
  78. </div>
  79. <div class="modal fade" id="update_member" tabindex="-1" role="dialog" aria-labelledby="myModalLabel">
  80. <div class="modal-dialog" role="document">
  81. <div class="modal-content">
  82. <form>
  83. <div class="modal-header">
  84. <button type="button" class="close" data-dismiss="modal" aria-label="Close"><span aria-hidden="true">&times;</span></button>
  85. <h4 class="modal-title text-info" id="myModalLabel">Updating Member</h4>
  86. </div>
  87. <div class="modal-body">
  88. <div class = "form-group">
  89. <label>Full Name</label>
  90. <input type = "text" class = "form-control" ng-model = "selectedMember.name"/>
  91. </div>
  92. <div class = "form-group">
  93. <label>Email</label>
  94. <input type = "email" class = "form-control" ng-model = "selectedMember.email"/>
  95. </div>
  96. <div class = "form-group">
  97. <label>Gender</label>
  98. <select class = "form-control" ng-model = "selectedMember.gender" >
  99. <option value = "">Choose an option</option>
  100. <option value = "Male">Male</option>
  101. <option value = "Female">Female</option>
  102. </select>
  103. </div>
  104. </div>
  105. <div class="modal-footer">
  106. <button class="btn btn-success" data-dismiss = "modal" ng-click = "update_member()"><span class = "glyphicon glyphicon-edit"></span> Update</button>
  107. </div>
  108. </form>
  109. </div>
  110. </div>
  111. </div>
  112. <div class="modal fade" id="delete_member" tabindex="-1" role="dialog" aria-labelledby="myModalLabel">
  113. <div class="modal-dialog" role="document">
  114. <div class="modal-content">
  115. <form>
  116. <div class="modal-body">
  117. <center><h4 class = "text-danger">Are you sure you want to delete this record?</h4></center>
  118. </div>
  119. <div class="modal-footer">
  120. <button class="btn btn-danger" data-dismiss = "modal" ng-click = "deleteMember()"><span class = "glyphicon glyphicon-check"></span> Yes</button>
  121. <button class="btn btn-success" data-dismiss = "modal"><span class = "glyphicon glyphicon-remove"></span> No</button>
  122. </div>
  123. </form>
  124. </div>
  125. </div>
  126. </div>
  127. </body>
  128. <script src = "js/jquery-3.1.1.js"></script>
  129. <script src = "js/bootstrap.js"></script>
  130. </html>
In the code above I just add some function to make the update and delete worked. The ng-click = "selectMember(member)" will store the value of the indexing array in the table when clicked by the user. ng-click = "deleteMember" will store the index of the targeted member when clicked. Creating a function with AngularJS directives This script will call a function within the angularJS directives.
  1. var app = angular.module("myModule", [])
  2. .controller("myController", function($scope){
  3.  
  4. $scope.newMember = {};
  5. $scope.clickedMembers = [];
  6.  
  7. $scope.members = [
  8. {name: "Juan Dela Cruz", email: "[email protected]", gender: "Male"},
  9. {name: "San Pedro", email: "[email protected]", gender: "Male"},
  10. {name: "San Lazaro", email: "[email protected]", gender: "Male"}
  11. ];
  12.  
  13. $scope.saveMember = function(){
  14. $scope.members.push($scope.newMember);
  15. $scope.newMember = {};
  16. };
  17.  
  18. $scope.selectMember = function(member){
  19. $scope.selectedMember = member;
  20. };
  21.  
  22. $scope.updateMember = function(){
  23.  
  24. };
  25.  
  26. $scope.deleteMember = function(){
  27. $scope.members.splice($scope.members.indexOf($scope.selectMember), 1);
  28. };
  29. });
The code above will process the request when clicked. The $scope.selectMember will store the value of the selected member when clicked. The $scope.deleteMember will delete the index of the targeted value when clicked. There you have it we created a simple CRUD operation using AngularJS. I hope that this tutorial give you some insights about angularJS and help you to your on working projects. For more updates and tutorials just kindly visit this site. Enjoy Coding!!

Note: Due to the size or complexity of this submission, the author has submitted it as a .zip file to shorten your download time. After downloading it, you will need a program like Winzip to decompress it.

Virus note: All files are scanned once-a-day by SourceCodester.com for viruses, but new viruses come out every day, so no prevention program can catch 100% of them.

FOR YOUR OWN SAFETY, PLEASE:

1. Re-scan downloaded files using your personal virus checker before using it.
2. NEVER, EVER run compiled files (.exe's, .ocx's, .dll's etc.)--only run source code.

Tags

Comments

Submitted byGayathri Mallya (not verified)on Tue, 02/07/2017 - 19:04

Respected sir, Sir in which application did u use, we can form a code? Pl reply sir

Add new comment