This tutorial is a continuation of our project called “How to Create a Social Networking Site Tutorial”. At this time we’re going to focus on creating login-logout system in a secure way using session. Logging in or signing in or on is the process by which individual access to a computer system is controlled by identifying and authenticating the user through the credentials presented by the user.
To start in this tutorial, let’s create first a new PHP file called “session.php”. Then save it inside the inludes folder. Then add the following code:
In this code we are creating a session variable that will hold the information of member who logged in our site, and this information willl be available to all pages in one application.
<?php
//before we store information of our member, we need to start first the session
//create a new function to check if the session variable member_id is on set
function logged_in() {
return isset($_SESSION['member_id']);
}
//this function if session member is not set then it will be redirected to index.php
function confirm_logged_in() {
if (!logged_in()) {?>
<script type="text/javascript">
window.location = "index.php";
</script>
<?php
}
}
?>
Next open the “initialize.php” inside the includes folder. Then under "
require_once(LIB_PATH.DS."functions.php");", add the following code:
require_once(LIB_PATH.DS."session.php");
We put this code inside the initialize.php file so that we don’t need to call the session.php file all over again in all pages.
And the initialize.php file will now look like as shon below:
<?php
/**
* Description: This includes for basic and core configurations.
* Author: Joken Villanueva
* Date Created: NA
* Revised By:
*/
//define the core paths
//Define them as absolute peths to make sure that require_once works as expected
//DIRECTORY_SEPARATOR is a PHP Pre-defined constants:
//(\ for windows, / for Unix)
defined('SITE_ROOT') ?
null : define ('SITE_ROOT', $_SERVER['DOCUMENT_ROOT'].DS
.'philsocial');
defined('LIB_PATH') ?
null : define ('LIB_PATH',SITE_ROOT
.DS
.'includes');
// load config file first
require_once(LIB_PATH.DS."config.php");
//load basic functions next so that everything after can use them
require_once(LIB_PATH.DS."functions.php");
//later here where we are going to put our class session
require_once(LIB_PATH.DS."session.php");
//Load Core objects
require_once(LIB_PATH.DS."database.php");
//Load database-related classes
?>
Next step,open our “index.php”. and on above of all the codes add the following code:
This code will get all the database connection, classes, objects and functions inside the includes folder.
<?php
require_once("includes/initialize.php");
?>
Then, on the head area of our html tags. Add the following code:
This code will check if session variable is set, then it will be redirected to ” home.php”.
<?php
if (logged_in()){?>
<script type="text/javascript">
window.location = "home.php";
</script>
<?php
}
?>
And under the body, here’s the modified login form:
In this code, we add method to “POST” and action to “index.php”. and for the email input tag we add name as “log_eamil” then for password tag we add name as “log_pword”, and finally for button we set the name to “btnlogin”.
<form class="navbar-form navbar-right" method="POST" action="index.php">
<div class="form-group">
<input type="text" placeholder="Email" class="form-control" name="log_email">
</div>
<div class="form-group">
<input type="password" placeholder="Password" class="form-control" name="log_pword">
</div>
<button type="submit" class="btn btn-success" name="btnlogin">Sign in</button>
</form>
At this time, let’s add above some PHP code for login. And here’s the following code:
<?php
if (isset($_POST['btnlogin'])) { //form has been submitted1
$email = trim($_POST['log_email']); $upass = trim($_POST['log_pword']);
//check if the email and password is equal to nothing or null then it will show message box
if ($email == '') {
?> <script type="text/javascript">
alert("Username or Password Not Registered! Contact Your administrator.");
</script>
<?php
} elseif ($upass == '') {
?> <script type="text/javascript">
alert("Username or Password Not Registered! Contact Your administrator.");
</script>
<?php
} else {
//create some sql statement
$sql = "SELECT * FROM `user_info` WHERE `email`='" . $email . "' and `pword`='" . $h_upass . "'";
//get the number of results based n the sql statement
//check the number of result, if equal to one
if ($numrows == 1) {
//store the result to a array and passed to variable found_user
//store the result to session variables
$_SESSION['member_id'] = $found_user['member_id'];
$_SESSION['fName'] = $found_user['fName'];
$_SESSION['lName'] = $found_user['lName'];
$_SESSION['email'] = $found_user['email'];
$_SESSION['pword'] = $found_user['pword'];
$_SESSION['mm'] = $found_user['mm'];
$_SESSION['dd'] = $found_user['dd'];
$_SESSION['yy'] = $found_user['yy'];
$_SESSION['gender'] = $found_user['gender'];
?> <script type="text/javascript">
//then it will be redirected to home.php
window.location = "home.php";
</script>
<?php
} else {
?> <script type="text/javascript">
alert("Username or Password Not Registered! Contact Your administrator.");
window.location = "home.php";
</script>
<?php
}
}
} else {
$email = "";
$upass = "";
}
?>
And this time were going to create a “home.php” file as our final output for this tutorial. And add the following code:
<?php
require_once("includes/initialize.php");
?>
<!DOCTYPE html>
<html lang="en">
<head>
<meta charset="utf-8">
<meta name="viewport" content="width=device-width, initial-scale=1.0">
<meta name="description" content="">
<meta name="author" content="">
<link rel="shortcut icon" href="">
<title>Philsocial</title>
<!-- Bootstrap core CSS -->
<link href="css/bootstrap.css" rel="stylesheet">
<!-- Custom styles for this template -->
<link href="jumbotron.css" rel="stylesheet">
<!-- HTML5 shim and Respond.js IE8 support of HTML5 elements and media queries -->
<!--[if lt IE 9]>
<script src="../../assets/js/html5shiv.js"></script>
<script src="../../assets/js/respond.min.js"></script>
<![endif]-->
<?php
//login confirmation
confirm_logged_in();
?>
</head>
<body>
<div class="navbar navbar-inverse navbar-fixed-top">
<div class="container">
<div class="navbar-header">
<button type="button" class="navbar-toggle" data-toggle="collapse" data-target=".navbar-collapse">
<span class="icon-bar"></span>
<span class="icon-bar"></span>
<span class="icon-bar"></span>
</button>
<a class="navbar-brand" href="home.php"><B>Philsocial</B></a>
</div>
<form class="navbar-form navbar-left">
<div class="form-group">
<div class="rows">
<input type="text" placeholder="Email" class="form-control" size="40">
</div>
</div>
</form>
<div class="navbar-collapse collapse">
<form class="navbar-form navbar-right">
<ul class="nav navbar-nav">
<li class="active"><a href="home.php">Home</a></li>
<li class="dropdown">
<a href="#" class="dropdown-toggle" data-toggle="dropdown">
<?php
//retrieve session variable
echo $_SESSION['fName'];?>
<b class="caret"></b>
</a>
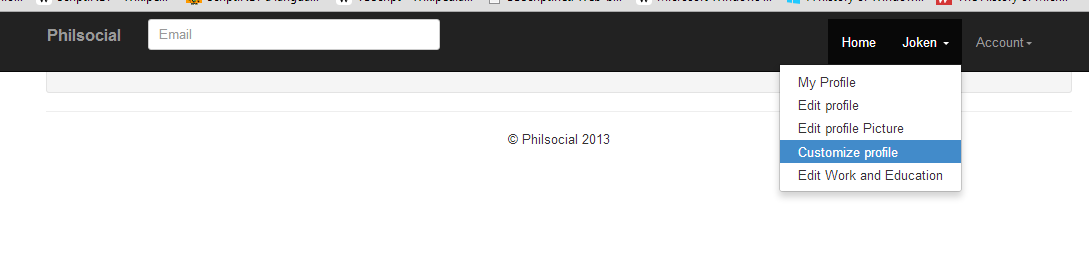
<ul class="dropdown-menu">
<li><a href="#">My Profile</a></li>
<li><a href="#">Edit profile</a></li>
<li><a href="#">Edit profile Picture</a></li>
<li><a href="#">Customize profile</a></li>
<li><a href="#">Edit Work and Education</a></li>
</ul>
</li>
<li class="dropdown">
<a href="#" class="dropdown-toggle" data-toggle="dropdown">Account<b class="caret"></b></a>
<ul class="dropdown-menu">
<li><a href="#">Account Settings</a></li>
<li><a href="#">Privacy Settings</a></li>
<li><a href="#">Manage Social Accounts</a></li>
<li><a href="#">Manage Credits</a></li>
<li><a href="logout.php">Logout</a></li>
</ul>
</li>
</ul>
</form>
</div><!--/.navbar-collapse -->
</div>
</div>
<div class="container">
<div class="well">
</div>
</body>
</html>
<hr>
<footer>
<p align="center">© Philsocial 2013</p>
</footer>
</div> <!-- /container -->
<!-- Bootstrap core JavaScript
================================================== -->
<!-- Placed at the end of the document so the pages load faster -->
<script src="assets/js/jquery.js"></script>
<script src="js/bootstrap.min.js"></script>
</body>
</html>
, I modified the "user_info" table. Here's the query and you can use this to modify yours also.
ALTER TABLE `USER_INFO` CHANGE `USER_ID` `MEMBER_ID` INT( 11 ) NOT NULL AUTO_INCREMENT
Here’s some refference you can use for creating a secure login system:
How to Create Login Page in PHP and MySQL with Session
How to Create Secure Registration Page in PHP/MySQL Part I
How to Create Secure Registration Page in PHP/MySQL Part II
How to Create Secure Registration Page in PHP/MySQL Part III
If you want to see more of my works, new Source Code or Application and Tutorials Just click
here.