PHP - Submit Post In SQLite3
Submitted by razormist on Wednesday, December 11, 2019 - 16:29.
In this tutorial we will create a Submit Post In SQLite3 using PHP. This code will submit post data to SQLite database when user submit form input. The code use PHP POST method to call a specific function that will display your post information in the wall. This a free program, you can apply this to your system as your own.
We will be using SQLite that provides an interface for accessing the database. It includes class interfaces to the SQL commands. And also it allows you to create SQL functions and aggregate using PHP.
Getting started:
First you have to download & install XAMPP or any local server that run PHP scripts. Here's the link for XAMPP server https://www.apachefriends.org/index.html. And, this is the link for the bootstrap that i used for the layout design https://getbootstrap.com/. Installing SQLite Browser We will now then install the SQLite data viewer, here's the link for the DB Browser for SQLite http://sqlitebrowser.org/.Setting Up SQLite
First, we are going to enable SQLite 3 in our PHP.- Open localhost server folder XAMPP, etc and locate php.ini.
- Open php.ini and enable sqlite3 by removing the semicolon in the line.
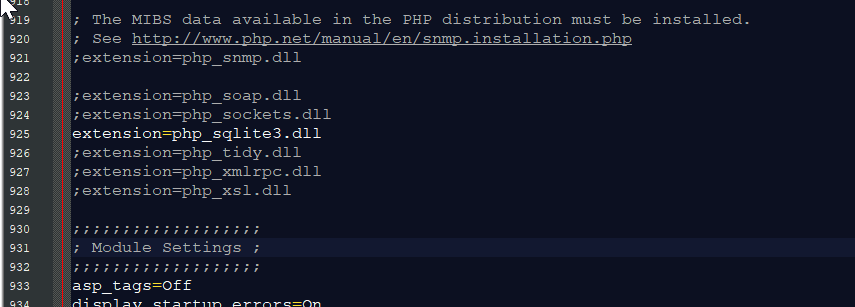
- Save changes and Restart Server.
Creating the database connection
Open your any kind of text editor(notepad++, etc..). Then just copy/paste the code below then name it conn.php.Creating The Interface
This is where we will create a simple form for our application. To create the forms simply copy and write it into you text editor, then save it as index.php.- <!DOCTYPE html>
- <html lang="en">
- <head>
- <meta charset="UTF-8" name="viewport" content="width=device-width, initial-scale=1" />
- <link rel="stylesheet" type="text/css" href="css/bootstrap.css" />
- </head>
- <body>
- <nav class="navbar navbar-default">
- <div class="container-fluid">
- <a class="navbar-brand" href="https://sourcecodester.com">Sourcecodester</a>
- </div>
- </nav>
- <div class="col-md-3"></div>
- <div class="col-md-6 well">
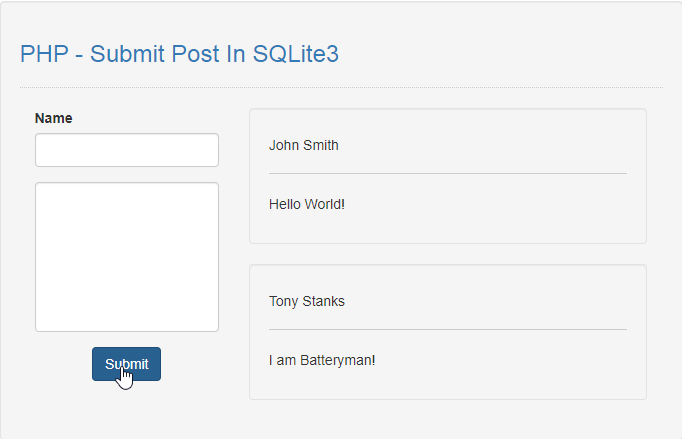
- <h3 class="text-primary">PHP - Submit Post In SQLite3</h3>
- <hr style="border-top:1px dotted #ccc;"/>
- <div class="col-md-4">
- <form method="POST" action="submit.php">
- <div class="form-group">
- <label>Name</label>
- <input type="text" class="form-control" name="name" required="required"/>
- </div>
- <div class="form-group">
- <textarea class="form-control" name="content" required="required" style="resize:none; height:150px;"></textarea>
- </div>
- <center><button class="btn btn-primary" name="submit" >Submit</button></center>
- </form>
- </div>
- <div class="col-md-8">
- <?php
- require'conn.php';
- while($fetch=$query->fetchArray()){
- echo "<div class='well'><h5>".$fetch['name']."</h5><hr style='border-top:1px solid #ccc;'/><p>".$fetch['content']."</p></div>";
- }
- ?>
- </div>
- </div>
- </body>
- </html>