PHP - Display MySQLi Result By Date
Submitted by razormist on Tuesday, August 27, 2019 - 20:32.
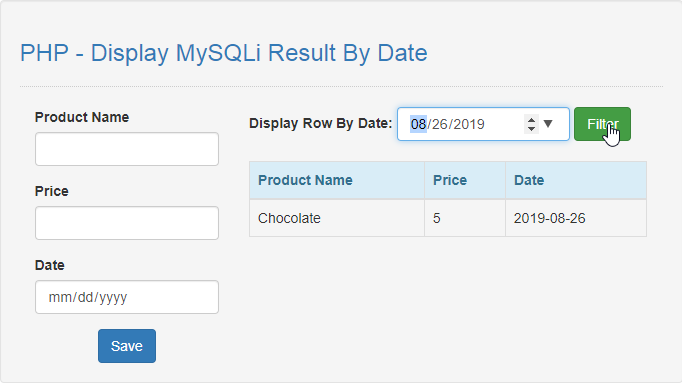
In this tutorial we will create a Display MySQLi Result By Date using PHP. This code can display a specific table row from MySQLi when user provide a date input. The code use MySQLi SELECT query to display a specific data in the table row by providing a date in the WHERE clause filter_date. This a user-friendly program feel free to modify and use it to your system.
We will be using PHP as a scripting language and interpreter that is used primarily on any webserver including xamp, wamp, etc. It is being use to any famous websites because of modern approach as its today.
 There you have it we successfully created Display MySQLi Result By Date using PHP. I hope that this simple tutorial help you to what you are looking for. For more updates and tutorials just kindly visit this site. Enjoy Coding!
Getting Started:
First you have to download & install XAMPP or any local server that run PHP scripts. Here's the link for XAMPP server https://www.apachefriends.org/index.html. And, this is the link for the bootstrap that i used for the layout design https://getbootstrap.com/.Creating Database
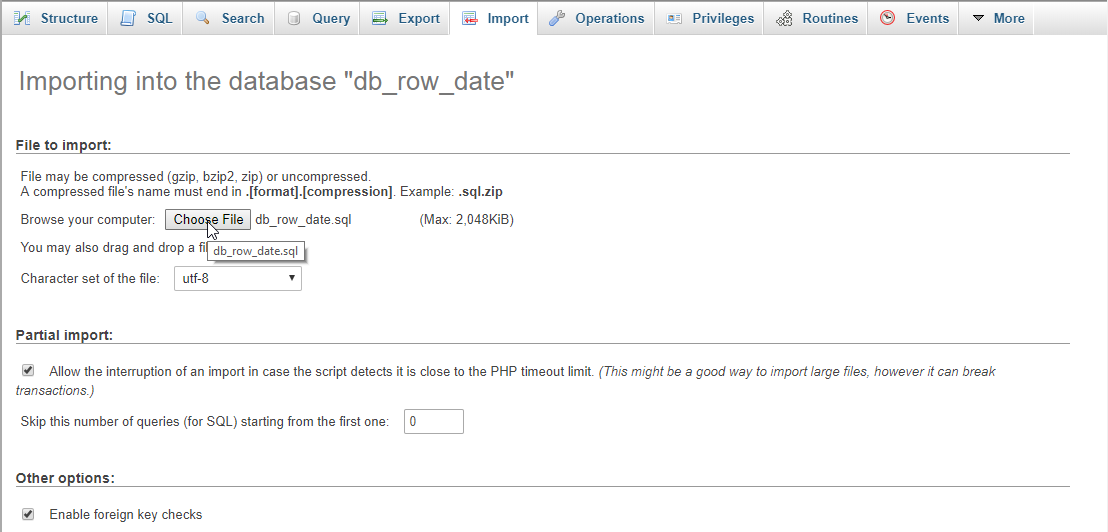
Open your database web server then create a database name in it db_row_date, after that click Import then locate the database file inside the folder of the application then click ok.
Creating the database connection
Open your any kind of text editor(notepad++, etc..). Then just copy/paste the code below then name it conn.php.- <?php
- if(!$conn){
- }
- ?>
Creating The Interface
This is where we will create a simple form for our application. To create the forms simply copy and write it into your text editor, then save it as index.php.- <!DOCTYPE html>
- <?php require'conn.php'?>
- <html lang="en">
- <head>
- <meta charset="UTF-8" name="viewport" content="width=device-width, initial-scale=1" />
- <link rel="stylesheet" type="text/css" href="css/bootstrap.css" />
- </head>
- <body>
- <nav class="navbar navbar-default">
- <div class="container-fluid">
- <a class="navbar-brand" href="https://sourcecodester.com">Sourcecodester</a>
- </div>
- </nav>
- <div class="col-md-3"></div>
- <div class="col-md-6 well">
- <h3 class="text-primary">PHP - Display MySQLi Result By Date</h3>
- <hr style="border-top:1px dotted #ccc;"/>
- <div class="col-md-4">
- <form method="POST" action="save.php">
- <div class="form-group">
- <label>Product Name</label>
- <input type="text" class="form-control" name="product_name" required="required"/>
- </div>
- <div class="form-group">
- <label>Price</label>
- <input type="number" min="0" class="form-control" name="price" required="required"/>
- </div>
- <div class="form-group">
- <label>Date</label>
- <input type="date" class="form-control" name="date" required="required"/>
- </div>
- <center><button class="btn btn-primary" name="save">Save</button></center>
- </form>
- </div>
- <div class="col-md-8">
- <form method="POST" action="">
- <div class="form-inline">
- <label>Display Row By Date: </label>
- <input type="date" class="form-control" name="filter_date" required="required"/>
- <button class="btn btn-success" name="filter">Filter</button>
- </div>
- </form>
- <br />
- <?php include'filter.php'?>
- </div>
- </div>
- </body>
- </html>
Creating PHP Query
This code contains the php query of the application. This code will store the form inputs to the MySQLi server. To do that just copy and write this block of codes inside the text editor, then save it as save.php.- <?php
- require_once'conn.php';
- $product_name=$_POST['product_name'];
- $price=$_POST['price'];
- mysqli_query($conn, "INSERT INTO `product` VALUES('', '$product_name', '$price', '$date')") or die(mysqli_error());
- }
- ?>
Creating the Main Function
This code contains the main function of the application. This code will display a specific table row base on date when the button is clicked. To make this just copy and write these block of codes below inside the text editor, then save it as filter.php- <?php
- require_once'conn.php';
- $filter_date=$_POST['filter_date'];
- ?>
- <table class="table table-bordered">
- <thead class="alert-info">
- <tr>
- <th>Product Name</th>
- <th>Price</th>
- <th>Date</th>
- </tr>
- </thead>
- <tbody>
- <?php
- $query=mysqli_query($conn, "SELECT * FROM `product` WHERE `date`='$filter_date'") or die(mysqli_error());
- ?>
- <tr>
- <td><?php echo $fetch['product_name']?></td>
- <td><?php echo $fetch['price']?></td>
- <td><?php echo $fetch['date']?></td>
- </tr>
- <?php
- }
- ?>
- </tbody>
- </table>
- <?php
- }else{
- ?>
- <table class="table table-bordered">
- <thead class="alert-info">
- <tr>
- <th>Product Name</th>
- <th>Price</th>
- <th>Date</th>
- </tr>
- </thead>
- <tbody>
- <?php
- ?>
- <tr>
- <td><?php echo $fetch['product_name']?></td>
- <td><?php echo $fetch['price']?></td>
- <td><?php echo $fetch['date']?></td>
- </tr>
- <?php
- }
- ?>
- </tbody>
- </table>
- <?php
- }
- ?>