PHP - Drag And Drop Multiple Files Using jQuery
Submitted by razormist on Saturday, July 7, 2018 - 22:51.
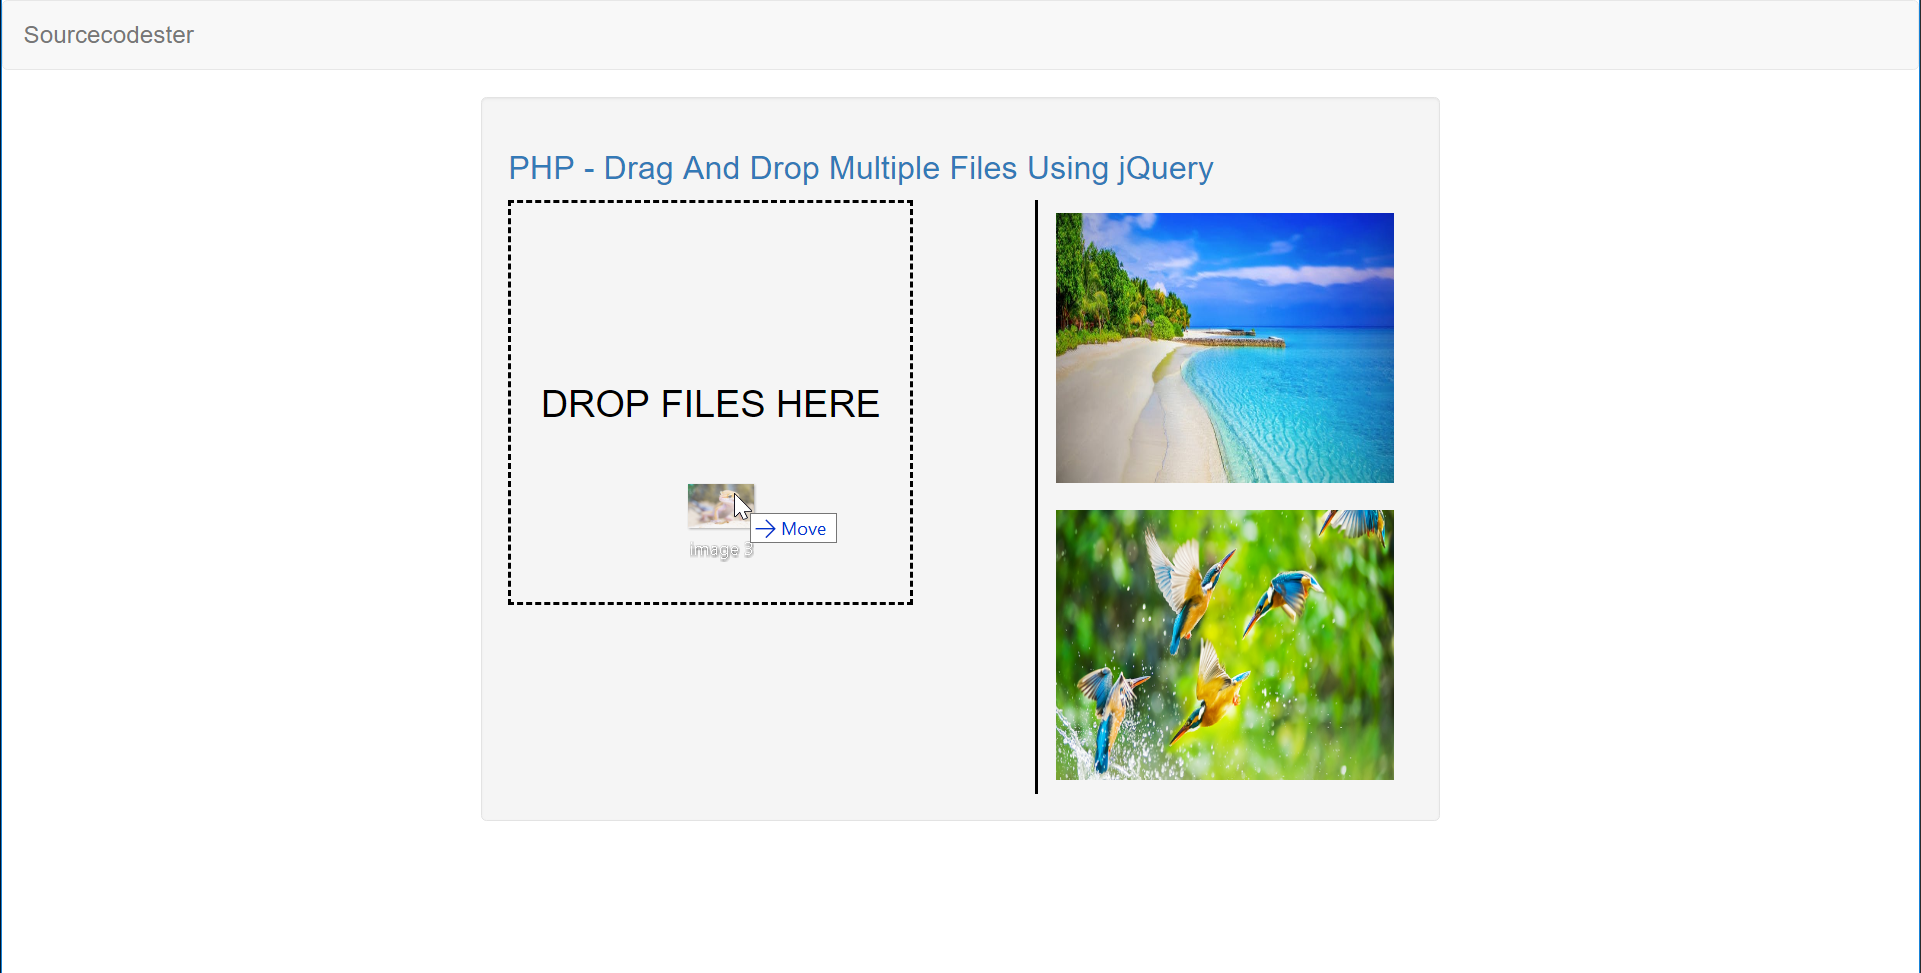
In this tutorial we will create a Drag And Drop Multiple Files Using jQuery. PHP is a server-side scripting language designed primarily for web development. Using PHP, you can let your user directly interact with the script and easily to learned its syntax. The jQuery is a fast, reliable kind of cross-platform javascript library. It is designed to simplify the traditional way of coding in javascript. So Let's do the coding...
 data.php
There you have it we successfully created Drag And Drop Multiple Files Using jQuery. I hope that this simple tutorial help you to what you are looking for. For more updates and tutorials just kindly visit this site. Enjoy Coding!!!
data.php
There you have it we successfully created Drag And Drop Multiple Files Using jQuery. I hope that this simple tutorial help you to what you are looking for. For more updates and tutorials just kindly visit this site. Enjoy Coding!!!
Before we get started:
First you have to download & install XAMPP or any local server that run PHP scripts. Here's the link for XAMPP server https://www.apachefriends.org/index.html. And this is the link for the jquery that i used in this tutorial https://jquery.com/. Lastly, this is the link for the bootstrap that i used for the layout design https://getbootstrap.com/.Creating Database
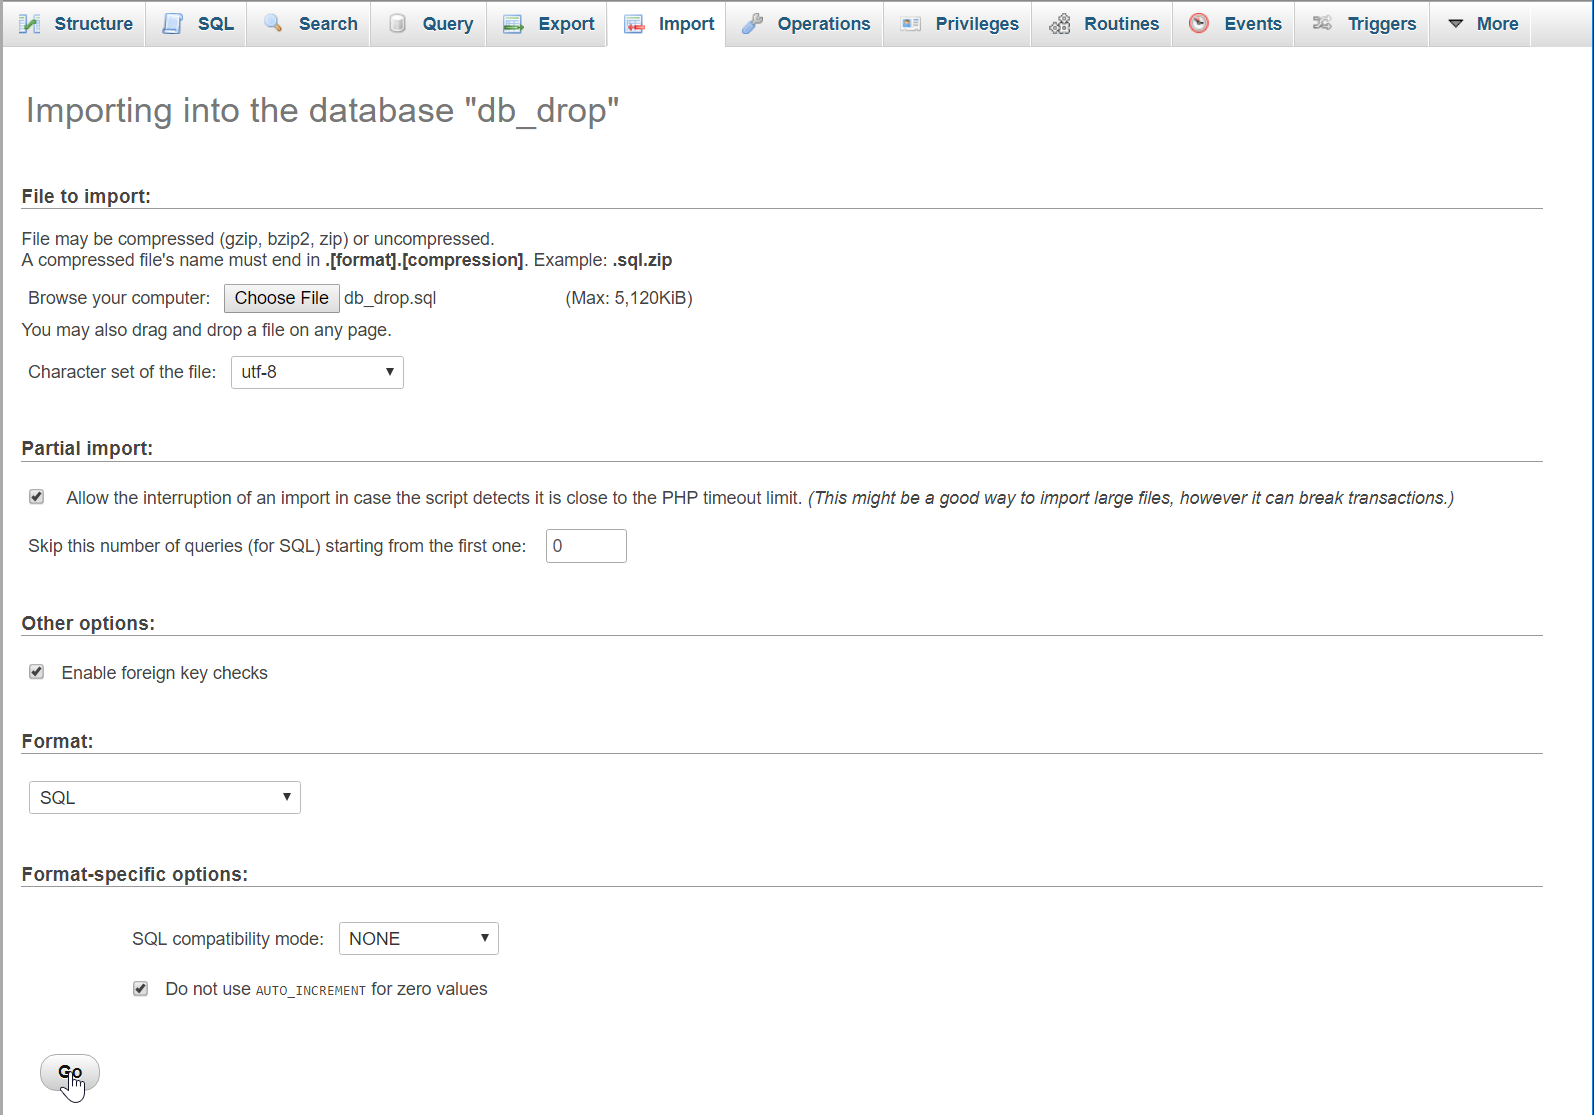
Open your database web server then create a database name in it db_drop, after that click Import then locate the database file inside the folder of the application then click ok.
Creating the database connection
Open your any kind of text editor(notepad++, etc..). Then just copy/paste the code below then name it conn.php.- <?php
- $conn = new mysqli('localhost', 'root', '', 'db_drop');
- if(!$conn){
- }
- ?>
Creating The Interface
This is where we will create a simple form for our application. To create the forms simply copy and write it into your text editor, then save it as shown below.- <!DOCTYPE html>
- <html lang="en">
- <head>
- <meta charset="UTF-8" name="viewport" content="width=device-width, initial-scale=1"/>
- <style>
- .file_zone{
- width:300px;
- height:300px;
- border:2px dashed #ccc;
- line-height:300px;
- text-align:center;
- font-size:28px;
- float:left;
- }
- .file_drag{
- color:#000;
- border-color:#000;
- }
- </style>
- </head>
- <body>
- <nav class="navbar navbar-default">
- <div class="container-fluid">
- <a class="navbar-brand" href="https://sourcecodester.com">Sourcecodester</a>
- </div>
- </nav>
- <div class="col-md-3"></div>
- <div class="col-md-6 well">
- <h3 class="text-primary">PHP - Drag And Drop Multiple Files Using jQuery</h3>
- <div class="file_zone">DROP FILES HERE</div>
- <div style="border-left:2px solid #000; width:280px;" align="center" id="uploaded_file" class="pull-right">
- </div>
- </div>
- </body>
- <script src="js/jquery-3.2.1.min.js"></script>
- <script src="js/bootstrap.js"></script>
- <script src="js/script.js"></script>
- </html>
Creating PHP Query
This code contains the php query of the application. This code will store the file to the database server, and also display the data at the same time. To do that just copy and write this block of codes inside the text editor, then save it as shown below. upload.php- <?php
- require_once 'conn.php';
- foreach($_FILES['file']['name'] as $key => $values){
- $file_name = $file[0].'.'.$file[1];
- $tmp_file = $_FILES['file']['tmp_name'][$key];
- $location = "upload/".$file_name;
- $conn->query("INSERT INTO `upload` VALUES('', '$file_name', '$location')");
- }
- }
- }
- }
- ?>
- <?php
- require_once 'conn.php';
- $query = $conn->query("SELECT * FROM `upload`");
- while($fetch = $query->fetch_array()){
- echo '<img src="'.$fetch['location'].'" width="250px" height="200px" style="margin-top:10px; margin-bottom:10px;"/>';
- }
- ?>
Creating jQuery Script
This is where the main function of the application.This code will allow the user to drag image file zone and will send the image data with ajax request. To do this just copy and write these block of codes inside the text editor, then save it as script.js inside the js folder.- $(document).ready(function(){
- DisplayImage();
- function DisplayImage(){
- $.ajax({
- url: 'data.php',
- type: 'POST',
- data: {res:1},
- success: function(data){
- $('#uploaded_file').html(data);
- }
- });
- }
- $('.file_zone').on('dragleave', function(){
- $(this).removeClass('file_drag');
- });
- $('.file_zone').on('dragover', function(){
- $(this).addClass('file_drag');
- return false;
- });
- $('.file_zone').on('drop', function(e){
- e.preventDefault();
- $(this).removeClass('file_drag');
- var formData = new FormData();
- var file_list = e.originalEvent.dataTransfer.files;
- for(var i=0; i<file_list.length; i++){
- formData.append('file[]', file_list[i]);
- }
- $.ajax({
- url: 'upload.php',
- method: "POST",
- data: formData,
- contentType: false,
- cache: false,
- processData: false,
- success: function(){
- DisplayImage();
- }
- });
- });
- });