Cursor and Combo Box Demo in Java
Submitted by mehfuza on Sunday, September 15, 2013 - 11:01.
Introduction:
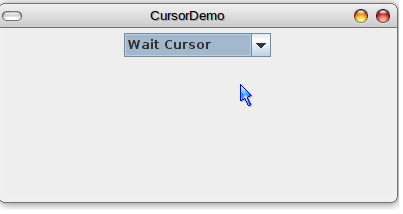
In this tutorial we will see changing cursor when it is selected from Combo Box in Java. You will learn about cursor as well as JComboBox. The position of the mouse is represented on the computer's screen by a small image called a cursor. It has a hot spot, which is a Point that specifies the pixel within the image that corresponds to the exact point on the screen where the mouse is pointing. The Cursor class has many predefined cursor which can be used with Cursor.getPredefinedCursor(code) method. Where code represent type of cursor.Implementation
Step 1: Designing GUI & adding ItemListener We need JComboBox for listing the four cursor types. We set the row count as 3 so that only three items of the combo box are displayed at a time, for more than three items, scroll bar is created. In the constructor of the class JCombo Box is created with the String array which contain the list items. Combo Box is registered with ItemListener for handling item events. The array of String looks like below. Switch statement is used to execute the action based on item selected from the combo box.JComboBox's getSelectedIndex() returns the index of selected item. setCursor() changes the cursor to specified cursor.- { "Crosshair Cursor", "Wait Cursor", "Move Cursor", "Custom Cursor" };
- public CursorComboBoxDemo(){
- combo.setMaximumRowCount( 3 );
- {
- {
- int choice=combo.getSelectedIndex();
- switch(choice){
- case 0:
- break;
- case 1:
- break;
- case 2:
- break;
- case 3:
- default:
- useCustomCursor("resources/TinySmiley.png");
- }
- }
- }
- });
- add(combo);
- }
- if (resourceURL != null) {
- Cursor cursor = toolkit.createCustomCursor(image, hotSpot, "smiley"); //creates a cursor with specified image, hotspot and name of the cursor.
- setCursor(cursor); //change the curremt cursor
- }
- }
- CursorComboBoxDemo content = new CursorComboBoxDemo();
- window.setContentPane(content);
- window.setSize(400,200); //sets size of the frame
- window.setResizable(false);
- window.setLocation( (screenSize.width - window.getWidth())/2,
- (screenSize.height - window.getHeight())/2 );
- window.setVisible(true);
- }