Mini Cashiering System Using C#
Submitted by janobe on Thursday, July 11, 2019 - 21:24.
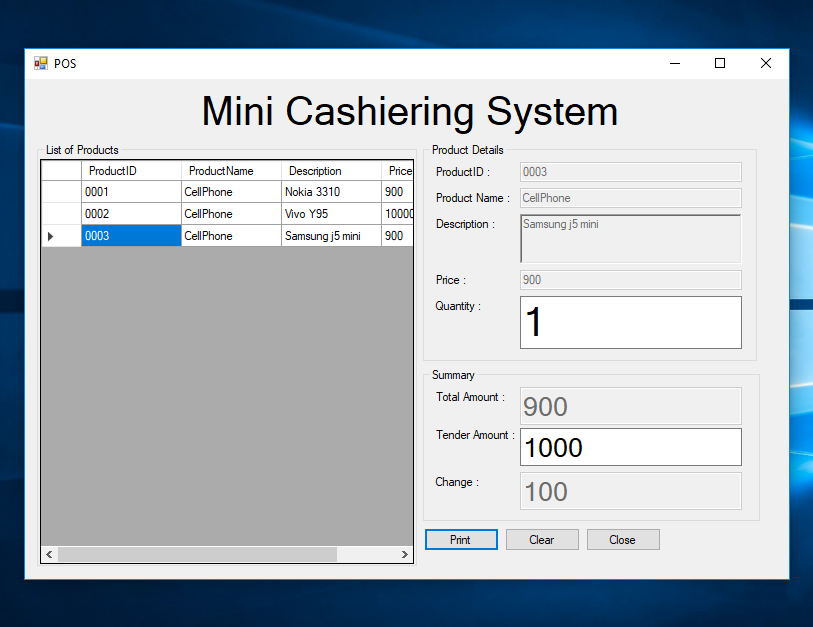
In this tutorial, I will teach you how to create a mini cashiering system using c#. This system can be used for the school project, it is simple that can be done in no time. This system has a function that can display the product in the datagridview. It also has the calculation of the total amount and change of the tender amount.
 The “Add New Item” windows dialog will be shown. After that, click add.
 Design the form just like shown below
 Download the complete source code and run it on your computer.
For any questions about this article. You can contact me @
Email – [email protected]
Mobile No. – 09305235027 – TNT
Or feel free to comment below
Download the complete source code and run it on your computer.
For any questions about this article. You can contact me @
Email – [email protected]
Mobile No. – 09305235027 – TNT
Or feel free to comment below
Creating an Application
Step 1
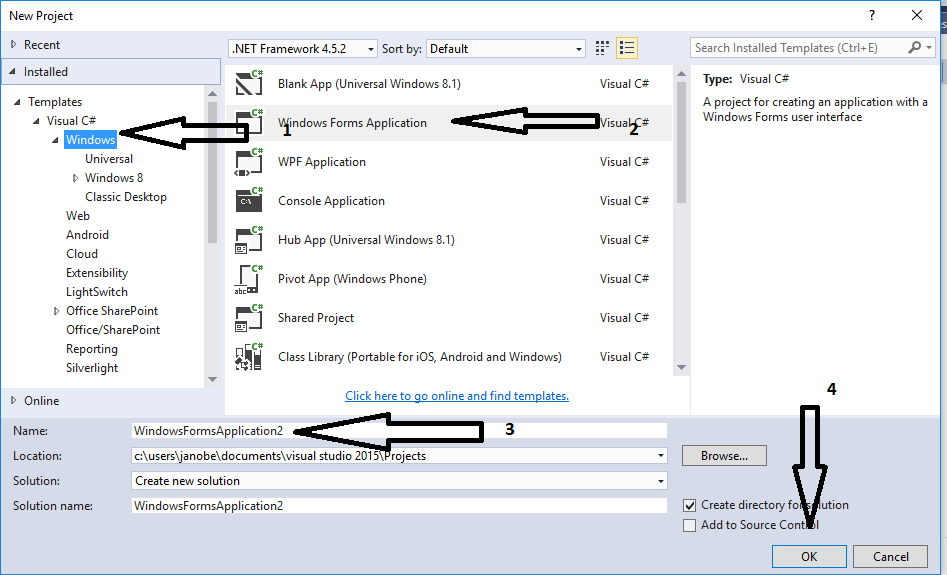
Open Microsoft Visual Studio 2015 and create a new windows form application in C#.
Step 2
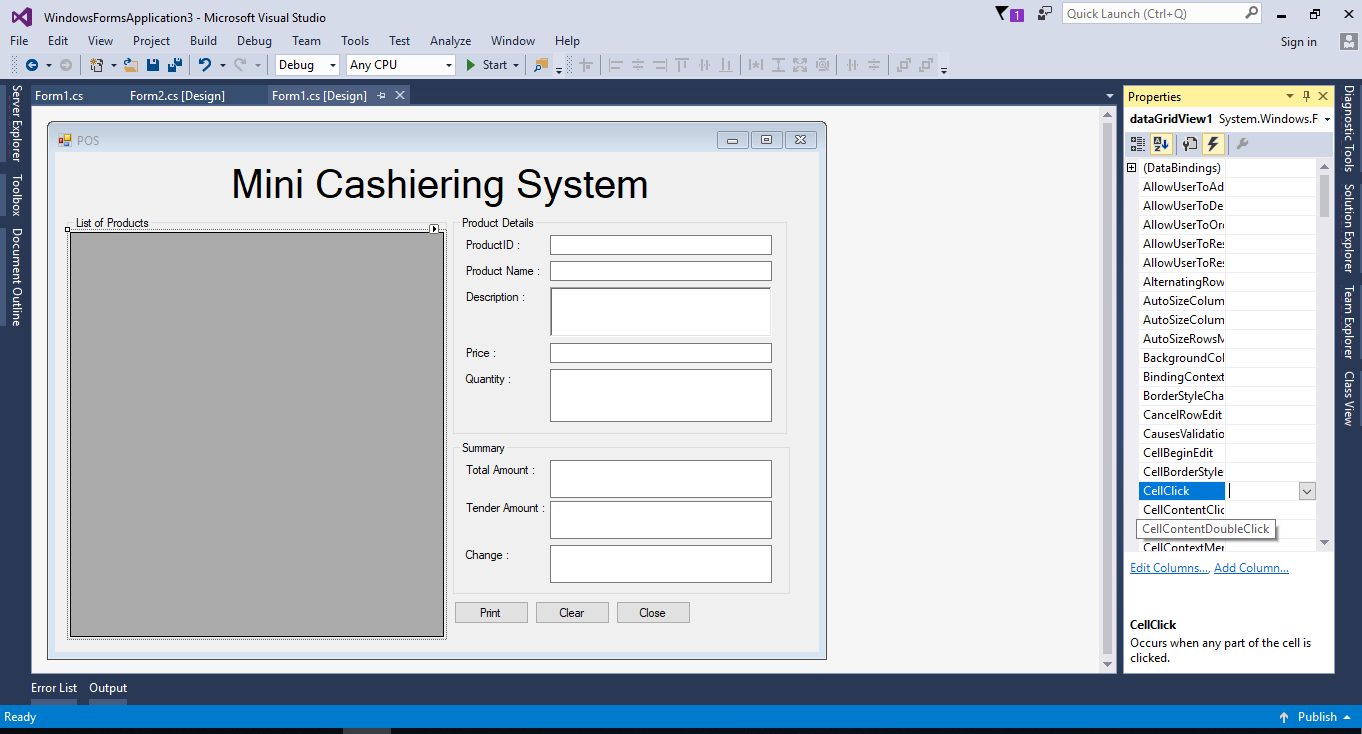
Do the form just like shown below.
Step 3
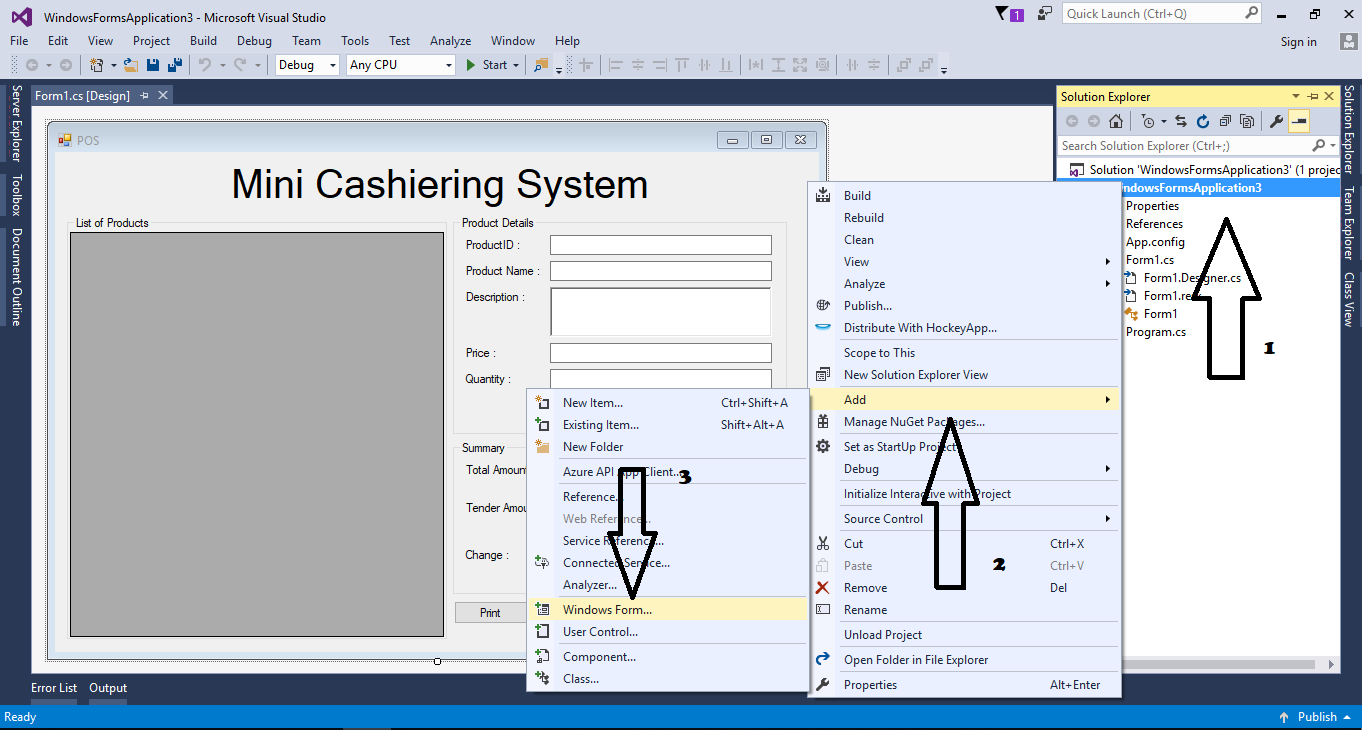
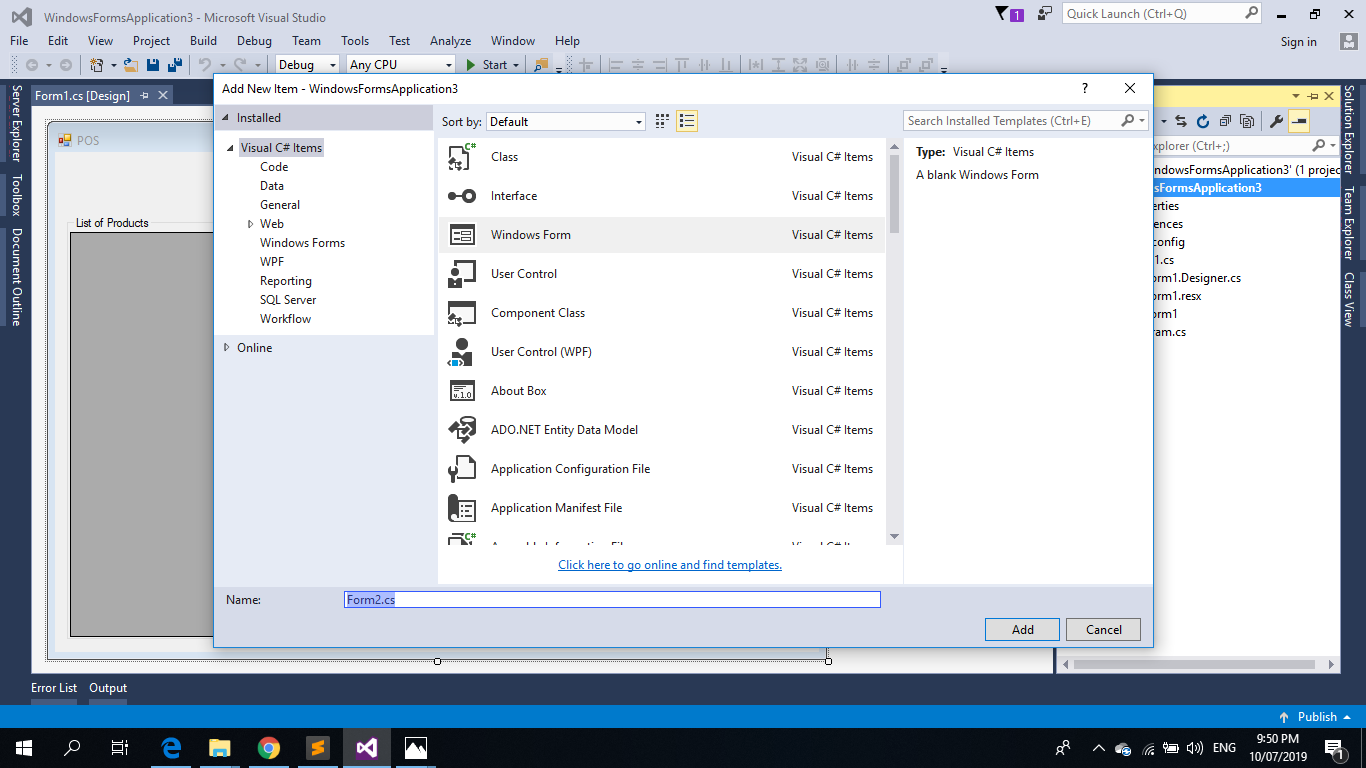
Add another form. In order to add another form, you have to go to the solution explorer, right-click the application name, click add and select the window form.
The “Add New Item” windows dialog will be shown. After that, click add.
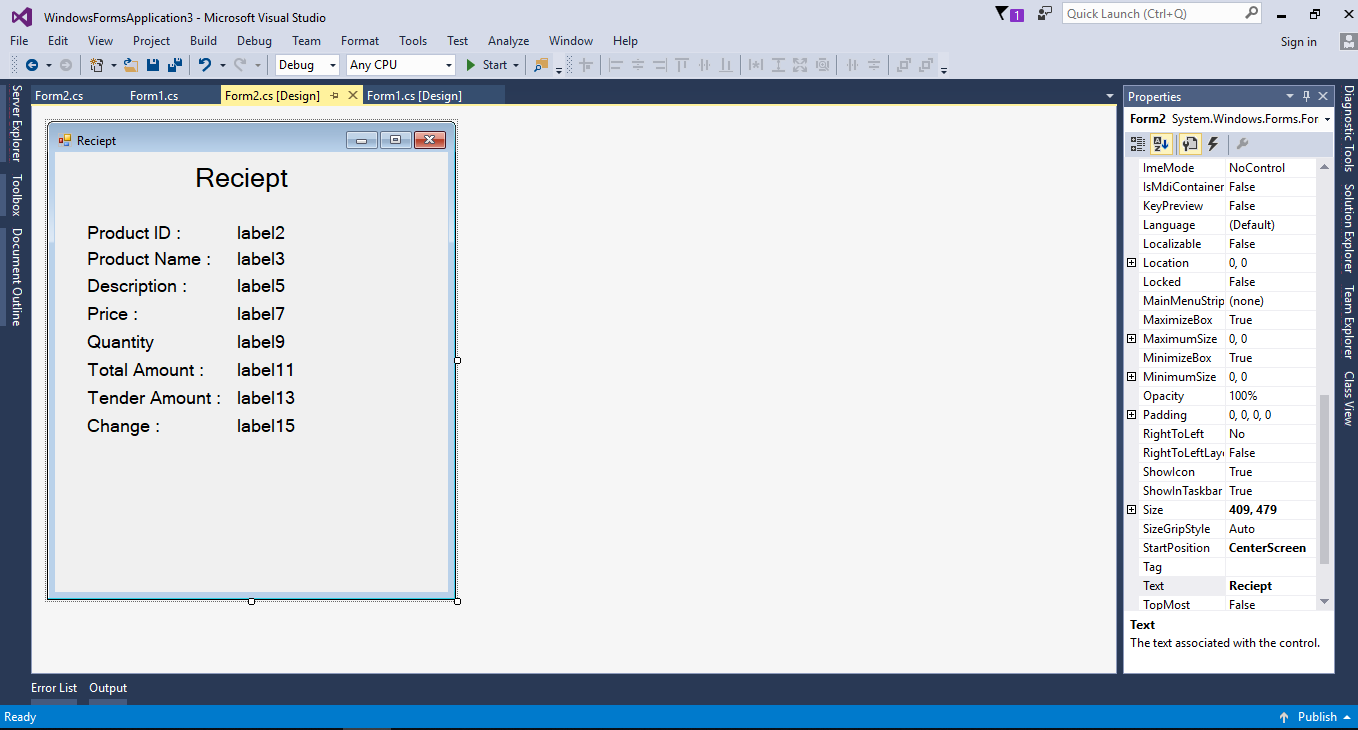
Design the form just like shown below
Step 4
Go back to the Form1 and double click it. After that, write the following code for setting up the properties of the textboxes, add the columns, rows and set the properties of the datagridview,- txtProduct.Enabled = false;
- txtID.Enabled = false;
- txtDesc.Enabled = false;
- txtPrice.Enabled = false;
- txtQuantity.Focus();
- txtTotal.Enabled = false;
- txtChange.Enabled = false;
- col1.Name = "ProductID";
- col1.HeaderText = "ProductID";
- col2.Name = "ProductName";
- col2.HeaderText = "ProductName";
- col3.Name = "Description";
- col3.HeaderText = "Description";
- col4.Name = "Price";
- col4.HeaderText = "Price";
- dataGridView1.Rows.Add(row1);
- dataGridView1.Rows.Add(row2);
- dataGridView1.Rows.Add(row3);
- dataGridView1.AllowUserToAddRows = false;
- dataGridView1.EditMode = DataGridViewEditMode.EditProgrammatically;
Step 5
Write the following code for passing the data from the datagridview to the textbox.- private void dataGridView1_CellClick(object sender, DataGridViewCellEventArgs e)
- {
- txtID.Text = dataGridView1.CurrentRow.Cells[0].Value.ToString();
- txtProduct.Text = dataGridView1.CurrentRow.Cells[1].Value.ToString();
- txtDesc.Text = dataGridView1.CurrentRow.Cells[2].Value.ToString();
- txtPrice.Text = dataGridView1.CurrentRow.Cells[3].Value.ToString();
- txtQuantity.Focus();
- }
Step 6
Write the following codes for the calculation of the total amount and the change.- private void txtQuantity_TextChanged(object sender, EventArgs e)
- {
- try
- {
- double total;
- if(txtQuantity.Text == "")
- {
- total = 0;
- }
- else
- {
- total = double.Parse(txtPrice.Text) * double.Parse(txtQuantity.Text);
- }
- txtTotal.Text = total.ToString();
- }
- catch
- {
- }
- }
- private void txtTender_TextChanged(object sender, EventArgs e)
- {
- try
- {
- double change;
- if (txtTender.Text == "" || txtTotal.Text == "0")
- {
- change = 0;
- }
- else
- {
- change = double.Parse(txtTender.Text) - double.Parse(txtTotal.Text);
- }
- txtChange.Text = change.ToString();
- }
- catch
- {
- }
- }
Step 7
Double click the button (clear) and write the following code for clearing all the textboxes.Step 8
Double click the button(close) again and write the following code for closing the form.- private void button3_Click(object sender, EventArgs e)
- {
- this.Close();
- }
Step 9
Go to the Form2 and press the F7 on the keyboard to open the code editor. Create a method for getting the data from Form1 to Form2.- private void print(string id,string product,string desc, string price,string qty,string total,string tender,string change)
- {
- lblID.Text = id;
- lblProduct.Text = product;
- lblDesc.Text = desc;
- lblPrice.Text = price;
- lblQty.Text = qty;
- lblTotal.Text = total;
- lblTenderAmount.Text = tender;
- lblChange.Text = change;
- }
Step 10
Write the following code to execute the method that you have created.- public Form2(string id,string product,string desc, string price,string qty,string total,string tender,string change)
- {
- InitializeComponent();
- print(id, product, desc, price, qty, total, tender, change);
- }
Step 11
Go back to Form1 and double click the "Print" button and write the following code to perform the print function.- txtDesc.Text, txtPrice.Text, txtQuantity.Text, txtTotal.Text,
- txtTender.Text, txtChange.Text);
- frm.ShowDialog();