Creating a Download Image from URL Form with Preview using PHP and JS Tutorial

In this tutorial, you can learn how to create an Image Preview and Download from an Image URL using PHP and JavaScript. The tutorial aims to provide students and beginners with a reference for learning some useful techniques and features for developing effective web applications. Here, I will be providing the scripts of a simple program that I created that demonstrate the creation of an Image Download and Preview form.
What is an Image Preview?
In a website or web application, Image Preview is a frontend feature that allows the users to view the image first before continuing or proceeding to execute the process that needs to be done. For example, a web application has a form that allows the user to upload images with an image preview container or a panel will output or display the chosen of the user so that the user can confirm it before proceeding with the upload execution.
How to Download and Preview the Image from URL using PHP and JS?
PHP comes with multiple built-in functions or methods that are useful and allow the developer to achieve their desired feature for their requirements. Downloading an Image from an Image URL can be done using the PHP's cURL (Client URL) Library which enables the application to transfer data using various protocols. For the Image Preview, we can simply achieve this using Pure JavaScript. Validating the Image URL is also one of the processes that you have to ensure to avoid or prevent any errors upon downloading and previewing the images. Check out the sample program scripts that I provided below to have a better idea.
Sample Program
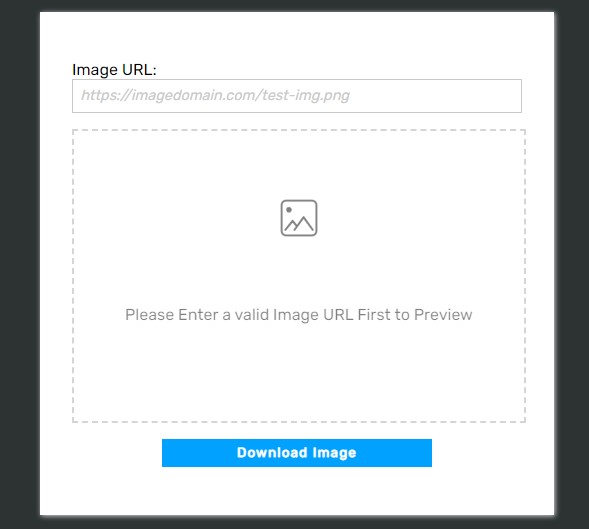
The below scripts output a sample web application's form page that allows users to enter the Image URL and preview the images before downloading it. The URL will be validated first before the user can proceed with the download action.
Interface
The following file script is an HTML containing the elements that are needed for the form such as the input field, image preview panel/container, and the download button. Save the file as index.html
- <!DOCTYPE html>
- <html lang="en">
- <head>
- <meta charset="UTF-8">
- <meta http-equiv="X-UA-Compatible" content="IE=edge">
- <meta name="viewport" content="width=device-width, initial-scale=1.0">
- <link rel="preconnect" href="https://fonts.googleapis.com">
- <link rel="preconnect" href="https://fonts.gstatic.com" crossorigin>
- <link rel="stylesheet" href="https://fonts.googleapis.com/css2?family=Material+Symbols+Outlined:opsz,wght,FILL,[email protected],100..700,0..1,-50..200" />
- <link rel="stylesheet" href="style.css">
- </head>
- <body>
- <main>
- <section>
- </section>
- <!-- Form Wrapper -->
- <div class="wrapper">
- <form action="download.php" method="POST">
- <div class="form-field">
- <input type="url" class="form-field-input" name="image_url" id="image_url" placeholder="https://imagedomain.com/test-img.png" required>
- </div>
- <div id="img-preview-panel" class="">
- <div class="img-prev-holder">
- </div>
- <div class="img-prev-default">
- </div>
- </div>
- <div class="form-btn">
- </div>
- </form>
- </div>
- <!-- Form Wrapper -->
- </main>
- </body>
- </html>
Stylesheet
Here is the CSS script that contains the style scripts of the page layout and form. Save the file as style.css and it is loaded at the index page.
- @import url('https://fonts.googleapis.com/css2?family=Rubik&display=swap');
- body *{
- font-family: 'Rubik', sans-serif;
- }
- /**
- Page Design
- */
- body,
- html{
- height: 100%;
- width: 100%;
- margin: 0;
- padding: 0;
- }
- body{
- background-color: #2C3333;
- }
- main{
- height: 100%;
- width: 100%;
- display: flex;
- flex-direction: column;
- justify-content: center;
- align-items: center;
- padding: 1em 0px;
- }
- section{
- width:760px;
- padding: 1em 2em;
- text-align: center;
- }
- @media (max-width: 760px) {
- section{
- width:100%;
- }
- }
- .page-title{
- color: #fff;
- text-shadow: 1px 1px 3px #000;
- font-size: 35px;
- }
- /*
- Form Design
- */
- .wrapper{
- width: 450px;
- padding: 3em 2em;
- background: #fff;
- box-shadow: 1px 1px 5px #dadada;
- }
- @media (max-width:450px){
- .wrapper{
- width: 100%;
- }
- }
- .form-field{
- width: 100%;
- display: flex;
- flex-direction: column;
- justify-content: center;
- margin-bottom: 1em;
- }
- .form-field label > *{
- width: 100%;
- }
- .form-field input {
- outline: none;
- background: padding-box;
- padding: 0.5em 0.5em;
- border: 1px solid #c9c9c9;
- font-size: .9rem;
- transition: border .3s ease;
- }
- .form-field input::placeholder{
- color: #cacaca;
- font-style: italic;
- }
- .form-field input:focus {
- border: 1px solid #1c9ff97a;
- box-shadow: 1px 1px 5px #1c9ff97a;
- }
- form[disabled] input,
- form[disabled] button
- {
- pointer-events:none;
- filter: opacity(0.6);
- }
- /* Image Preview Panel */
- #img-preview-panel{
- width: 100%;
- height: 40vh;
- border: 2px dashed #d5d5d5;
- position: relative;
- display: flex;
- flex-direction: column;
- align-items: center;
- justify-content: center;
- margin-bottom: 1em;
- }
- #img-preview-panel .prev-close-btn{
- position: absolute;
- top: 5px;
- right: 5px;
- text-decoration: none;
- color: #9d9d9d;
- text-shadow: 0px 0px 2px #1a1a1aba;
- display: none;
- }
- #img-preview-panel .prev-close-btn .material-symbols-outlined
- {
- font-weight: bolder;
- font-size: 1.2rem;
- }
- #img-preview-panel .prev-close-btn:hover,
- #img-preview-panel .prev-close-btn:focus{
- color: #b7b7b7;
- }
- #img-preview-panel.filled .prev-close-btn{
- display: block;
- }
- /* Image preview */
- #img-preview-panel .img-prev-holder{
- width: 100%;
- height: 100%;
- top: 0;
- left: 0;
- background-color: #252525;
- overflow: hidden;
- display: none;
- }
- #img-preview-panel.filled .img-prev-holder{
- display: block;
- }
- #img-preview-panel.filled .img-prev-holder>img{
- width: 100%;
- height: 100%;
- object-fit: scale-down;
- object-position: center center;
- }
- /* Image Preview Default*/
- #img-preview-panel:before {
- content: "";
- background-image: url(./image-icon.png);
- background-size: 80px;
- background-repeat: no-repeat;
- background-position: center center;
- position: absolute;
- height: 60%;
- width: 100%;
- top: 0;
- left: 0;
- z-index: 1;
- }
- #img-preview-panel:after {
- content: "Please Enter a valid Image URL First to Preview";
- position: absolute;
- height: 40%;
- width: 100%;
- bottom: 0;
- left: 0;
- text-align: center;
- z-index: 1;
- }
- #img-preview-panel:before,
- #img-preview-panel:after{
- filter: opacity(.5);
- }
- #img-preview-panel.filled:before,
- #img-preview-panel.filled:after{
- display: none;
- }
- /*Form Button*/
- .form-btn{
- display: flex;
- justify-content: center;
- }
- .form-btn button{
- width: 60%;
- padding: .5em .5em;
- text-align: center;
- border: unset;
- border-radius: 0;
- background: #00a1ff;
- color:#fff;
- font-weight: bolder;
- letter-spacing: .09em;
- cursor: pointer;
- outline: none;
- }
- .form-btn button:hover,
- .form-btn button:focus,
- .form-btn button:active
- {
- background: #009dff;
- box-shadow: 1px 1px 3px #009dff;
- }
- .form-btn button[disabled]{
- pointer-events: none;
- }
JavaScript
The script below is the JavaScript code which allows the preview feature functional. It also contains the scripts that reset the form. The file script is named preview-img-js.js and loads this file on the index page.
- //Selecting the Image URL Input
- const URLinput = document.getElementById('image_url')
- //Selecting the Image Preview Panel Element
- const ImagePreviewEl = document.getElementById('img-preview-panel')
- //Selecting the Image Preview Container Element
- const previewContainer = ImagePreviewEl.querySelector('.img-prev-holder')
- //Selecting the Form Element
- const form = document.querySelector('form')
- //Selecting the Form Download button
- const DownloadButton = form.querySelector('button[type="submit"]')
- //Selecting the Image Preview Close/Reset Button
- const resetPreviewBtn = ImagePreviewEl.querySelector('.prev-close-btn')
- /** Event Listener when URL Input is updated */
- URLinput.addEventListener('input', async e => {
- // Getting the Image URL Input Value
- var _url = URLinput.value
- // Regular Expresion for validating the Image URL
- var validURLRegEx = /^(http|https)\:\/\/(.*?)\.(jpe?g|png|gif)$/i;
- //Validating the Image URL
- var _urlIsValid = validURLRegEx.test(_url)
- if(_urlIsValid){
- // IF URL is valid Then preview Image
- var _img = document.createElement('img')
- _img.setAttribute('alt', 'Image to Download')
- _img.src = _url
- previewContainer.innerHTML = ''
- previewContainer.appendChild(_img)
- if(!ImagePreviewEl.classList.contains('filled'))
- ImagePreviewEl.classList.add('filled');
- }
- //Removing the disabled attribute from the Download Button
- if(DownloadButton.hasAttribute('disabled'))
- DownloadButton.removeAttribute('disabled')
- })
- /** Event Listener to reset the form */
- resetPreviewBtn.addEventListener('click', e => {
- e.preventDefault()
- //Disabling the download button
- DownloadButton.setAttribute('disabled','')
- //Remove the url from input
- URLinput.value = ''
- //Mark Preview panel as unfilled by removing the filled class
- if(ImagePreviewEl.classList.contains('filled'))
- ImagePreviewEl.classList.remove('filled');
- URLinput.focus()
- })
PHP Script
Here's the PHP script that contains the cURL request for retrieving the image from the given URL and downloading it if the image URL is valid. Save this file as download.php.
- <?php
- if($_SERVER['REQUEST_METHOD'] == "POST"){
- //Image URL from Request
- $imgURL = $_POST['image_url'];
- //Initializing cURL
- //cURL option for capturing or retrieving the image content
- //storing the image content to variable
- //cURL options to retrieve the HTTP response code
- //Getting the HTTP code status of the request
- //closing the cURL
- if($httpcode == 200){
- //Downloading the Image if the request response is OK
- echo $content;
- }else{
- //Returning Message if the Given Image URL is Invalid
- echo "<script>alert('Image URL is not Valid!')</script>";
- }
- }
- ?>
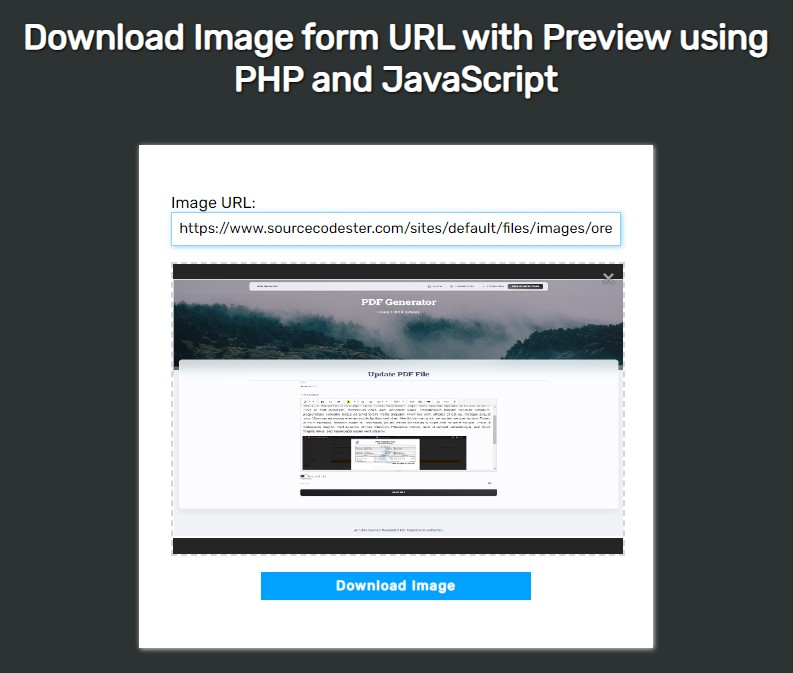
Snapshots
Here are the snapshots of the sample program using the scripts I provided above.
DEMO VIDEO
There you go! I have also provided the complete source code zip file of the sample program I created for this tutorial on this site. The file is free to download. The download button is located below this tutorial's content. Feel free to download and modify the program source code to do some experiments to enhance your programming capabilities.
That's it! I hope this Creating a Download Image from URL Form with Preview using PHP and JS Tutorial will help you with what you are looking for and will be useful for your current and future PHP Projects.
Explore more on this website for more Tutorials and Free Source Codes.