Creating a Database in SQL Server and Connect it to Visual Studio
Submitted by donbermoy on Wednesday, November 11, 2015 - 13:56.
In this tutorial, I will teach you how to create a database in SQL Server using the Microsoft SQL Server 2008 and Connect this database in the Visual Studio 2010.
So, now let's start this tutorial!
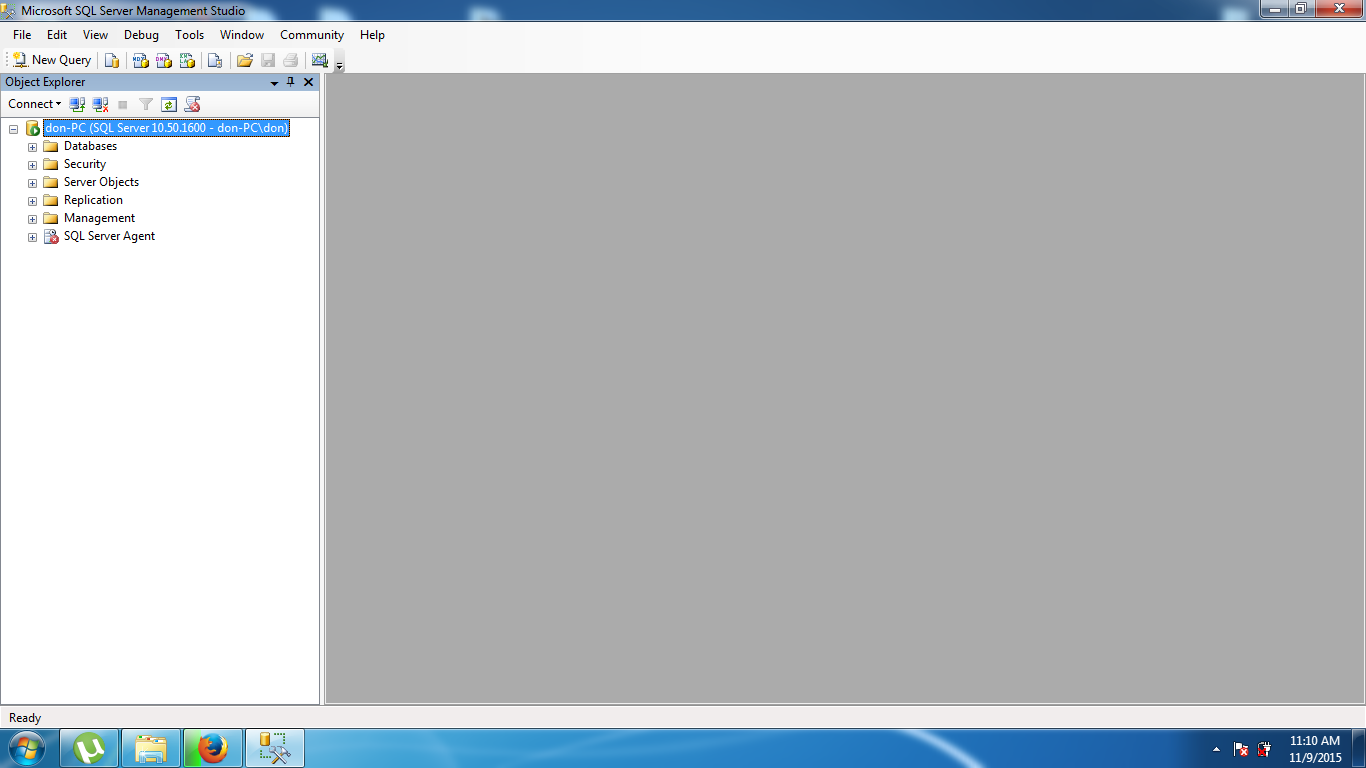
1. Open the SQL Server Management Studio for the first step on creating a database.
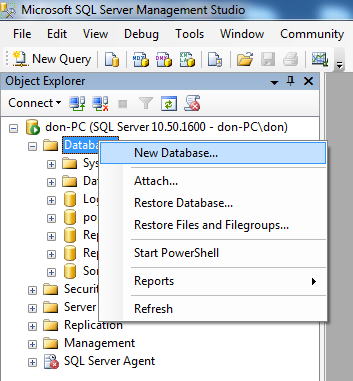
 2. Right Click on the Database Folder and then click New Database.
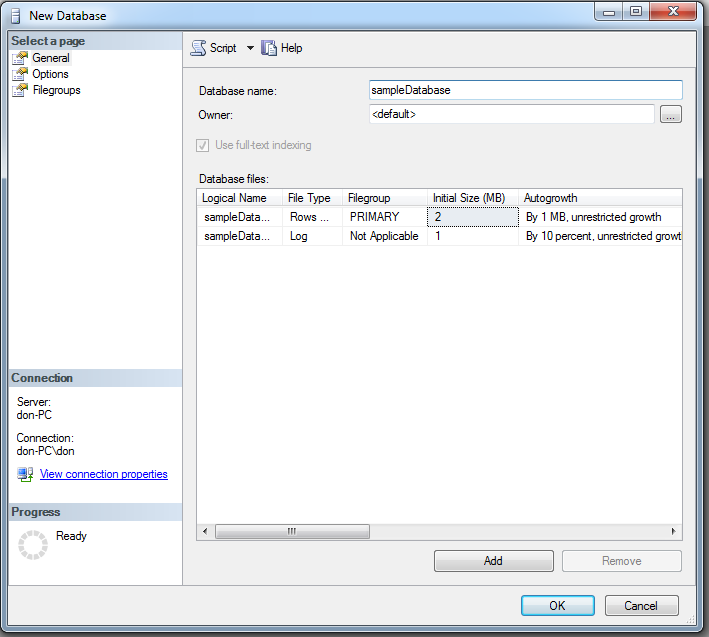
 3. Create a database name, input a name on it. Then click ok.
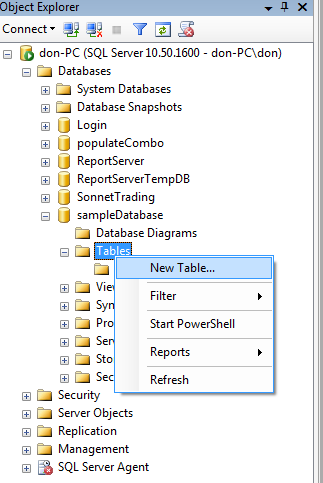
 4. Then after creating it, it can now seen on the list of database. Click on its dropdown, right-click the Tables, and click on the New Table.
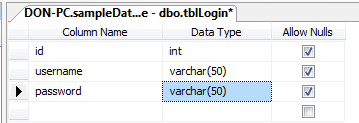
 5. Create entities on it. And rename your table as anything you would like to name it.
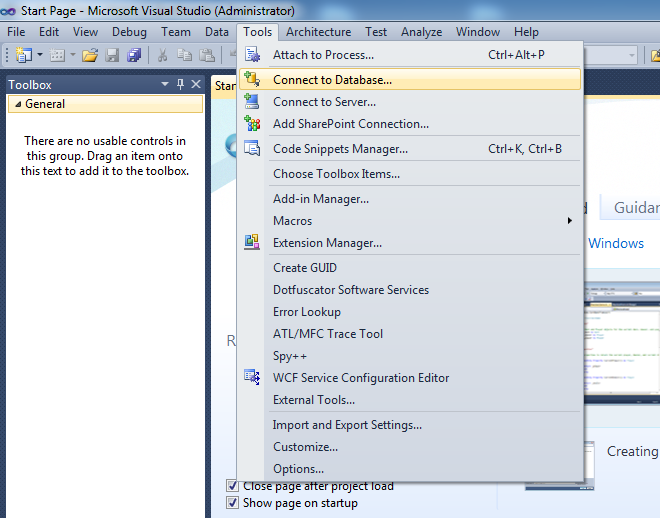
 6. Now, open your Visual Studio application, click Tools, and then choose Connect to Database.
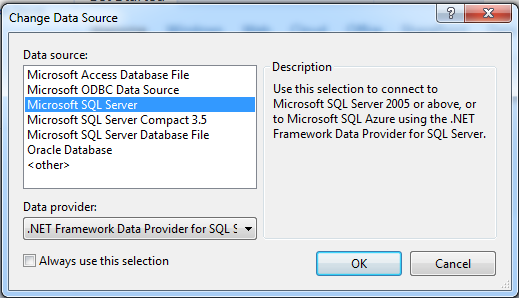
 7. You are now on choosing the Data Source. Choose Microsoft SQL Server for us to access the database in SQL Server.
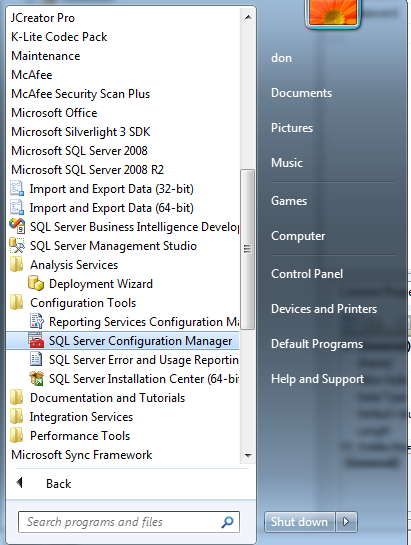
 8. Now, Click Start. Find SQL Server Configuration Manager and then Open it.
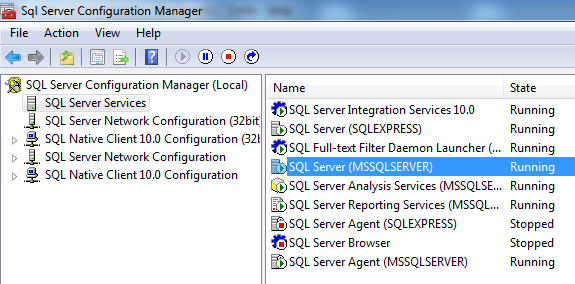
 9. On the SQL Server Services, Right-Click on the SQL Server(MSSQLSERVER), and then click Start to run and start your SQL Server.
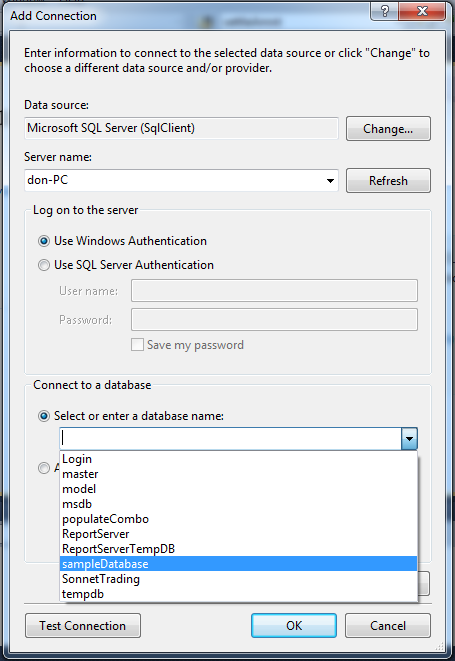
 10. Going back to the Visual Studio. Type your server name in it and then Click the button Refresh. And then in the Select or enter database name, find and click your created database. And then click OK.
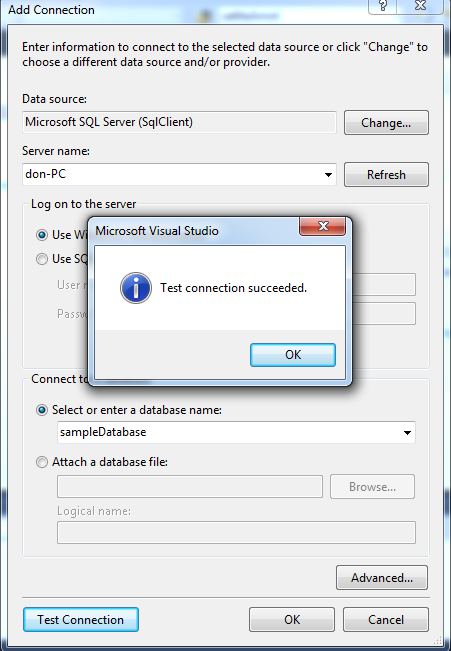
 11. To check if the database is connected to Visual Studio, click the Test Connection Button.
 For more inquiries and need programmer for your thesis systems in any kind of programming languages, just contact my number below.
Best Regards,
Engr. Lyndon Bermoy
IT Instructor/System Developer/Android Developer/Freelance Programmer
If you have some queries, feel free to contact the number or e-mail below.
Mobile: 09488225971
Landline: 826-9296
E-mail:[email protected]
Add and Follow me on Facebook: https://www.facebook.com/donzzsky
Visit and like my page on Facebook at: https://www.facebook.com/BermzISware
For more inquiries and need programmer for your thesis systems in any kind of programming languages, just contact my number below.
Best Regards,
Engr. Lyndon Bermoy
IT Instructor/System Developer/Android Developer/Freelance Programmer
If you have some queries, feel free to contact the number or e-mail below.
Mobile: 09488225971
Landline: 826-9296
E-mail:[email protected]
Add and Follow me on Facebook: https://www.facebook.com/donzzsky
Visit and like my page on Facebook at: https://www.facebook.com/BermzISware
2. Right Click on the Database Folder and then click New Database.
3. Create a database name, input a name on it. Then click ok.
4. Then after creating it, it can now seen on the list of database. Click on its dropdown, right-click the Tables, and click on the New Table.
5. Create entities on it. And rename your table as anything you would like to name it.
6. Now, open your Visual Studio application, click Tools, and then choose Connect to Database.
7. You are now on choosing the Data Source. Choose Microsoft SQL Server for us to access the database in SQL Server.
8. Now, Click Start. Find SQL Server Configuration Manager and then Open it.
9. On the SQL Server Services, Right-Click on the SQL Server(MSSQLSERVER), and then click Start to run and start your SQL Server.
10. Going back to the Visual Studio. Type your server name in it and then Click the button Refresh. And then in the Select or enter database name, find and click your created database. And then click OK.
11. To check if the database is connected to Visual Studio, click the Test Connection Button.
For more inquiries and need programmer for your thesis systems in any kind of programming languages, just contact my number below.
Best Regards,
Engr. Lyndon Bermoy
IT Instructor/System Developer/Android Developer/Freelance Programmer
If you have some queries, feel free to contact the number or e-mail below.
Mobile: 09488225971
Landline: 826-9296
E-mail:[email protected]
Add and Follow me on Facebook: https://www.facebook.com/donzzsky
Visit and like my page on Facebook at: https://www.facebook.com/BermzISware