PayPal Express Client-Side Checkout in PHP
This tutorial tackles on how to integrate Paypal Express Checkout using Client-Side API. Most E-commerce sites' payment method is with the use of credit card but if you want to integrate another payment method which is using Paypal, this tutorial will surely help you out. Paypal, as per the site description, is the faster, safer way to send money, make an online payment, receive money or set up a merchant account.
Getting Started
First, we need the jQuery library, Bootstrap for a better design to our app and Sweet Alert for a successful transaction alert. I've included these files in the downloadable of this tutorial but if you want, you can download them yourself using the links below:
Preparing our Sandbox Accounts
We need to prepare two sandbox accounts (merchant and buyer). Sandbox accounts are PayPal development accounts that you can use to test the integration of PayPal payments before going live.
If you haven't created the accounts yet, please refer to my tutorial, How to Create Paypal Sandbox Accounts.
We are going to use our created merchant account to create our App and the buyer account to buy products to our App.
Creating our App
- Go to Paypal Developer Page and login with your paypal account.
- After a successful login, on Dashboard menu, click My Apps & Credentials, input necessary info and click Create App button.
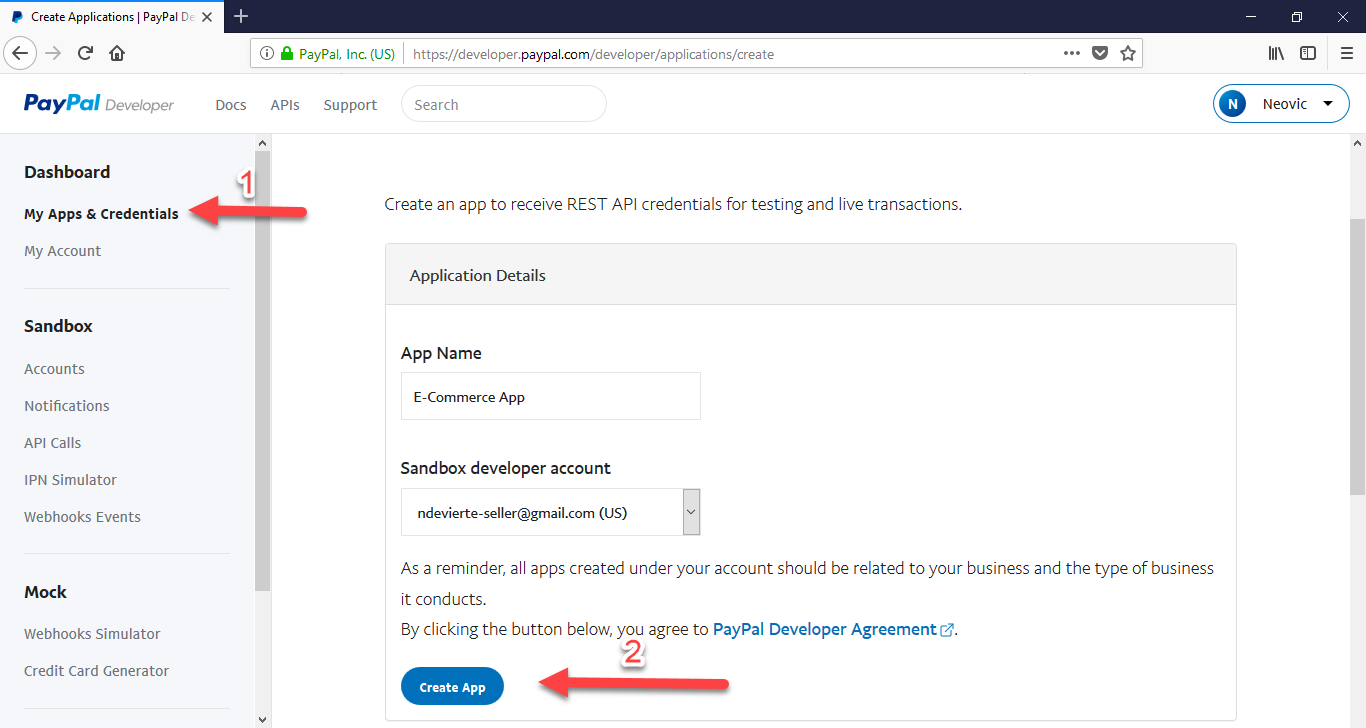
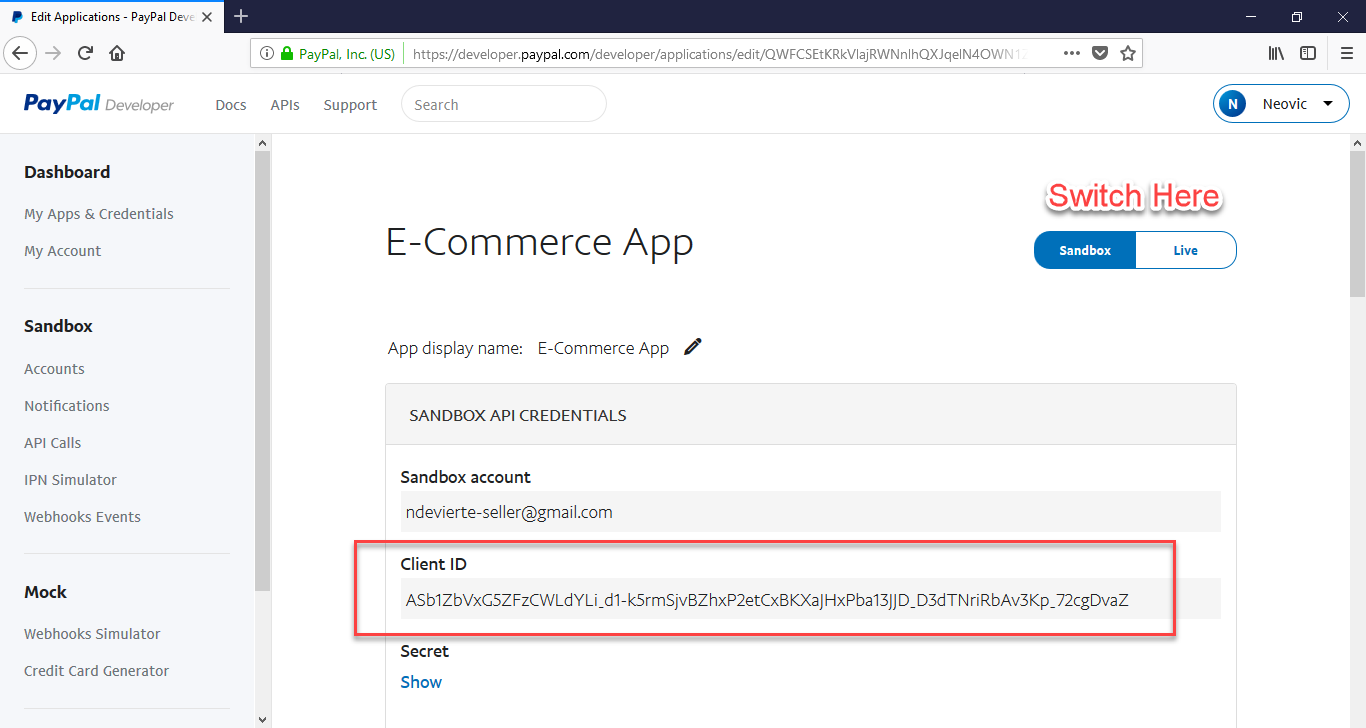
- After successfully creating the App, please take note of the App's Client ID in both the sandbox and live production.
Creating our Sample E-Commerce
Next is we are going to create a simple e-commerce app to test our PayPal integration by creating a new project in our localhost server. In my case, I've name the app as paypal_client.
Creating our Database
First, we create the database of our sample app. You should be able to create a database named dbtest. Then copy the code below and paste it into the SQL page of PHPMyAdmin to create a table for products in the database and also populating the table with some sample data.
- (1, 'Dell XPS', 1),
- (2, 'Notebook UX310 ', 2),
- (3, 'Lenovo Yoga Book', 3);
I Have also included a SQL file in the downloadable of this tutorial. All you have to do is import the said file. If you have no idea on how to import, please visit my tutorial How import .sql file to restore MySQL database.
Displaying our Products
Next, we display our sample products that our sandbox buyer account will purchase. Create a new file, name it as index.php and paste the codes below.
- <!DOCTYPE html>
- <html>
- <head>
- <meta charset="utf-8">
- <title>Paypal Express Client-Side Checkout</title>
- <link rel="stylesheet" type="text/css" href="asset/bootstrap4/css/bootstrap.min.css">
- <style type="text/css">
- .mt20{
- margin-top:20px;
- }
- </style>
- </head>
- <body>
- <div class="container">
- <h1 class="text-center mt20">Paypal Express Client-Side Checkout</h1>
- <div class="row justify-content-center">
- <div class="col-sm-8">
- <table class="table table-bordered mt20">
- <thead>
- <th>Product Name</th>
- <th>Price</th>
- <th></th>
- </thead>
- <tbody>
- <?php
- //connection
- $conn = new mysqli('localhost', 'root', '', 'dbtest');
- $sql = "SELECT * FROM products";
- $query = $conn->query($sql);
- while($row = $query->fetch_assoc()){
- echo "
- <tr>
- <td>".$row['product_name']."</td>
- <td>".$row['product_price']."</td>
- <td><a href='checkout.php?id=".$row['id']."' class='btn btn-primary btn-sm'>Order</a></td>
- </tr>
- ";
- }
- ?>
- </tbody>
- </table>
- </div>
- </div>
- </div>
- </body>
- </html>
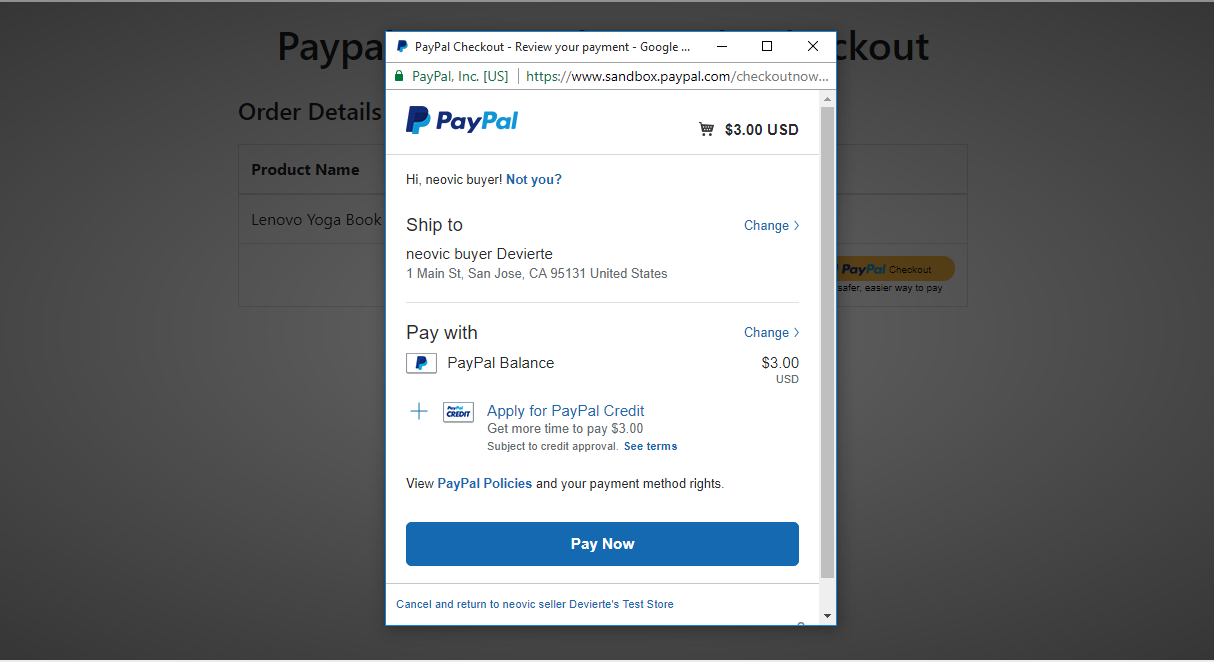
Creating our Checkout Script
Lastly, we create the page for our checkout and also our client side checkout script. Create a new file, name it as checkout.php and paste the codes below. Make sure to change the Client ID in the sandbox value on the PayPal Script. Just copy the Client ID from your created app in the PayPal Developer Dashboard.
- <!DOCTYPE html>
- <head>
- <meta http-equiv="X-UA-Compatible" content="IE=edge" />
- <meta name="viewport" content="width=device-width, initial-scale=1">
- <link rel="stylesheet" type="text/css" href="asset/bootstrap4/css/bootstrap.min.css">
- <link rel="stylesheet" type="text/css" href="asset/swal2/sweetalert2.min.css">
- <script src="https://www.paypalobjects.com/api/checkout.js"></script>
- <style type="text/css">
- .mt20{
- margin-top:20px;
- }
- </style>
- </head>
- <body>
- <div class="container">
- <h1 class="text-center mt20">Paypal Express Client-Side Checkout</h1>
- <div class="row justify-content-center">
- <div class="col-sm-8 mt20">
- <h4>Order Details</h4>
- <table class="table table-bordered mt20">
- <thead>
- <th>Product Name</th>
- <th>Price</th>
- </thead>
- <tbody>
- <?php
- //connection
- $conn = new mysqli('localhost', 'root', '', 'dbtest');
- $sql = "SELECT * FROM products WHERE id='".$_GET['id']."'";
- $query = $conn->query($sql);
- $row = $query->fetch_assoc();
- echo "
- <tr>
- <td>".$row['product_name']."</td>
- <td>".$row['product_price']."</td>
- </tr>
- ";
- ?>
- <tr>
- <td colspan="2" align="right"><span id="paypal-button"></span></td>
- </tr>
- </tbody>
- </table>
- </div>
- </div>
- </div>
- <script src="asset/jquery.min.js"></script>
- <script src="asset/bootstrap4/js/bootstrap.min.js"></script>
- <script src="asset/swal2/sweetalert2.min.js"></script>
- <script>
- paypal.Button.render({
- env: 'sandbox', // change for production if app is live,
- //app's client id's
- client: {
- sandbox: 'ASb1ZbVxG5ZFzCWLdYLi_d1-k5rmSjvBZhxP2etCxBKXaJHxPba13JJD_D3dTNriRbAv3Kp_72cgDvaZ',
- //production: 'AaBHKJFEej4V6yaArjzSx9cuf-UYesQYKqynQVCdBlKuZKawDDzFyuQdidPOBSGEhWaNQnnvfzuFB9SM'
- },
- commit: true, // Show a 'Pay Now' button
- style: {
- color: 'gold',
- size: 'small'
- },
- payment: function(data, actions) {
- return actions.payment.create({
- payment: {
- transactions: [
- {
- //total purchase
- amount: {
- total: '<?php echo $row['product_price']; ?>',
- currency: 'USD'
- }
- }
- ]
- }
- });
- },
- onAuthorize: function(data, actions) {
- return actions.payment.execute().then(function(payment) {
- //sweetalert for successful transaction
- swal('Thank you!', 'Paypal purchase successful.', 'success');
- });
- },
- }, '#paypal-button');
- </script>
- </body>
- </html>
That ends this tutorial. I hope that this tutorial will help you with what you are looking for and for your future PHP Project with Online Payment using PayPal.
Happy Coding :)