Android - Inserting Data to SQLite
Submitted by razormist on Monday, February 19, 2018 - 00:00.
In this tutorial we will try to create a Inserting Data to SQLite using Android. This simple application will create a database and then will insert a data at the same time. Android also provide an adaptive framework that allow the developer to develop an apps in a simpler way. It used in several gadget like smartphone, tablet, and even television. Android is open source to developers who has an interest in developing mobile apps. So let's now do the coding...
Then write this method to make to code work correctly.
Finally, initialize the require methods inside the onCreate method to run the application.
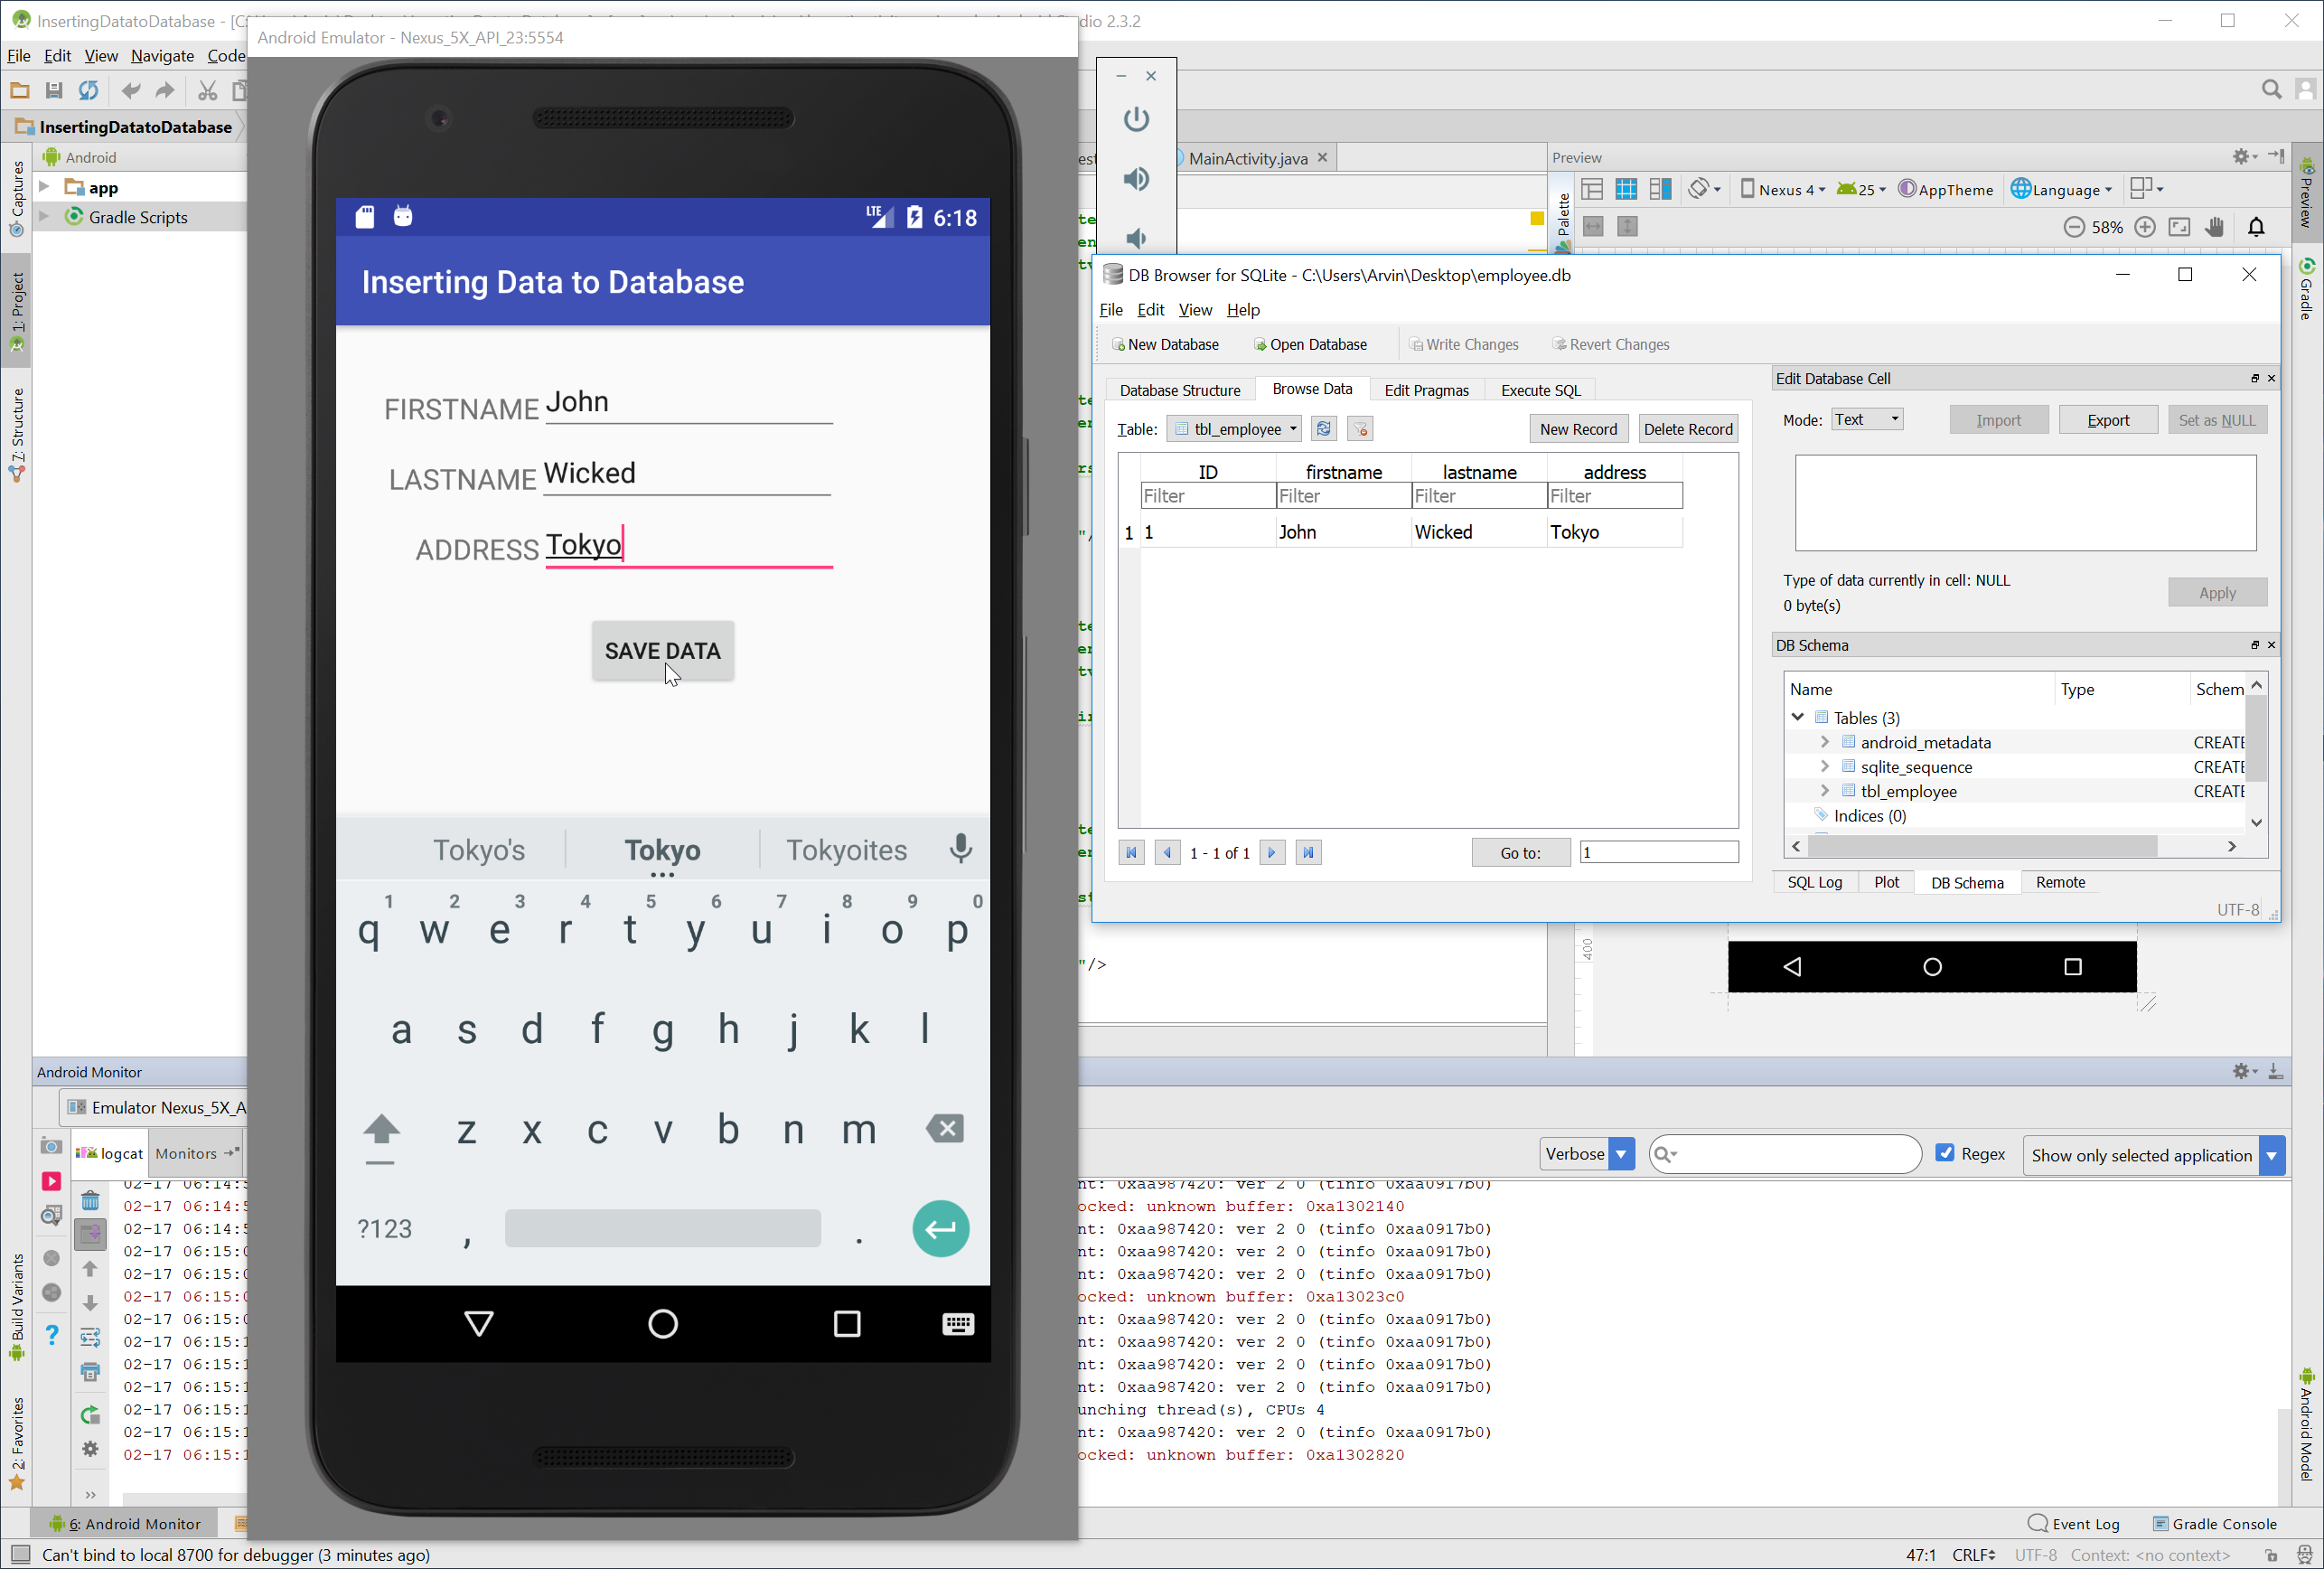
Try to run the app and see if it worked.
There you have it we have created a Inserting Data to SQLite using Android. I hope that this tutorial help you to what you are looking for. For more updates and tutorials just kindly visit this site. Enjoy Coding!!!
Getting Started:
First you will have to download & install the Android Development IDE (Android Studio or Eclipse). Android Studio is an open source development feel free to develop your things. Here's the link for the Android Studio https://developer.android.com/studio/index.html.Layout Design
We will now create the design for the application, first locate the layout file called activity_main.xml, this is the default name when create a new activity. Then write these codes inside your layout file.- <?xml version="1.0" encoding="utf-8"?>
- <RelativeLayout xmlns:android="http://schemas.android.com/apk/res/android"
- xmlns:app="http://schemas.android.com/apk/res-auto"
- xmlns:tools="http://schemas.android.com/tools"
- android:layout_width="match_parent"
- android:layout_height="match_parent"
- tools:context="com.razormist.insertingdatatodatabase.MainActivity">
- <TextView
- android:id="@+id/tv_firstname"
- android:layout_height="wrap_content"
- android:layout_width="wrap_content"
- android:text="FIRSTNAME"
- android:textSize="18sp"
- android:layout_alignParentTop="true"
- android:layout_marginTop="40dp"
- android:layout_marginLeft="30dp"/>
- <EditText
- android:id="@+id/et_firstname"
- android:layout_height="wrap_content"
- android:layout_width="wrap_content"
- android:layout_toRightOf="@+id/tv_firstname"
- android:layout_marginTop="25dp"
- android:ems="9"/>
- <TextView
- android:id="@+id/tv_lastname"
- android:layout_height="wrap_content"
- android:layout_width="wrap_content"
- android:text="LASTNAME"
- android:layout_below="@id/tv_firstname"
- android:textSize="18sp"
- android:layout_marginTop="20dp"
- android:layout_marginLeft="33dp"/>
- <EditText
- android:id="@+id/et_lastname"
- android:layout_height="wrap_content"
- android:layout_width="wrap_content"
- android:layout_toRightOf="@+id/tv_lastname"
- android:layout_marginTop="0dp"
- android:layout_below="@+id/et_firstname"
- android:ems="9"/>
- <TextView
- android:id="@+id/tv_address"
- android:layout_height="wrap_content"
- android:layout_width="wrap_content"
- android:text="ADDRESS"
- android:layout_below="@id/tv_lastname"
- android:textSize="18sp"
- android:layout_marginTop="20dp"
- android:layout_marginLeft="50dp"/>
- <EditText
- android:id="@+id/et_address"
- android:layout_height="wrap_content"
- android:layout_width="wrap_content"
- android:layout_toRightOf="@+id/tv_address"
- android:layout_marginTop="0dp"
- android:layout_below="@+id/et_lastname"
- android:ems="9"/>
- android:id="@+id/btn_add"
- android:layout_height="wrap_content"
- android:layout_width="wrap_content"
- android:text="SAVE DATA"
- android:layout_below="@+id/et_address"
- android:layout_marginTop="20dp"
- android:layout_centerHorizontal="true"/>
- </RelativeLayout>
Android Manifest File
The Android Manifest file provides essential information about your app to the Android system in which the system must required before running the code. It describe the overall information about the application. It contains some libraries that needed to access the several method within the app.- <?xml version="1.0" encoding="utf-8"?>
- <manifest xmlns:android="http://schemas.android.com/apk/res/android"
- package="com.razormist.insertingdatatodatabase">
- <application
- android:allowBackup="true"
- android:icon="@mipmap/ic_launcher"
- android:label="@string/app_name"
- android:roundIcon="@mipmap/ic_launcher_round"
- android:supportsRtl="true"
- android:theme="@style/AppTheme">
- <activity android:name=".MainActivity"
- android:configChanges="orientation"
- android:screenOrientation="portrait">
- <intent-filter>
- <action android:name="android.intent.action.MAIN" />
- <category android:name="android.intent.category.LAUNCHER" />
- </intent-filter>
- </activity>
- </application>
- </manifest>
Creating The Database
This code contain the script for creating a database and a database connection. To create this first create a new java file called Database, open the newly created file then extend the class by adding SQLiteOpenHelper. After that write these variable inside the MainActivity class.
Then create the methods that handle the calling function.
- super(context, DATABASE_NAME, null, 1);
- }
- @Override
- public void onCreate(SQLiteDatabase db) {
- db.execSQL("CREATE TABLE " + TABLE_NAME + "(ID INTEGER PRIMARY KEY AUTOINCREMENT, firstname TEXT, lastname TEXT, address TEXT)");
- }
- @Override
- public void onUpgrade(SQLiteDatabase db, int oldVersion, int newVersion) {
- db.execSQL("DROP TABLE IF EXIST "+TABLE_NAME);
- onCreate(db);
- }
- SQLiteDatabase db = this.getWritableDatabase();
- ContentValues contentValues = new ContentValues();
- contentValues.put(COL_2, firstname);
- contentValues.put(COL_3, lastname);
- contentValues.put(COL_4, address);
- long result = db.insert(TABLE_NAME, null, contentValues);
- if(result == -1){
- return false;
- }else{
- return true;
- }
- }
The Main Function
This code contains the main function of the application. This code will store the data to the SQLite database when the button is clicked. To start with first locate your MainActivity java file and open it, then write this variable inside the MainActivity class.- Database database;
- EditText et_firstname, et_lastname, et_address;
- Button btn_add;
- public void AddData(){
- @Override
- boolean hasInserted = database.InsertData(et_firstname.getText().toString(), et_lastname.getText().toString(), et_address.getText().toString());
- if (hasInserted == true){
- Toast.makeText(MainActivity.this, "Successfully Inserted Data", Toast.LENGTH_SHORT).show();
- et_firstname.setText("");
- et_lastname.setText("");
- et_address.setText("");
- }
- }
- });
- }
- database = new Database(this);
- et_firstname = (EditText)findViewById(R.id.et_firstname);
- et_lastname = (EditText)findViewById(R.id.et_lastname);
- et_address = (EditText)findViewById(R.id.et_address);
- AddData();
Note: Due to the size or complexity of this submission, the author has submitted it as a .zip file to shorten your download time. After downloading it, you will need a program like Winzip to decompress it.
Virus note: All files are scanned once-a-day by SourceCodester.com for viruses, but new viruses come out every day, so no prevention program can catch 100% of them.
FOR YOUR OWN SAFETY, PLEASE:
1. Re-scan downloaded files using your personal virus checker before using it.
2. NEVER, EVER run compiled files (.exe's, .ocx's, .dll's etc.)--only run source code.