Creating a Simple Shopping Cart Application Using AngularJs

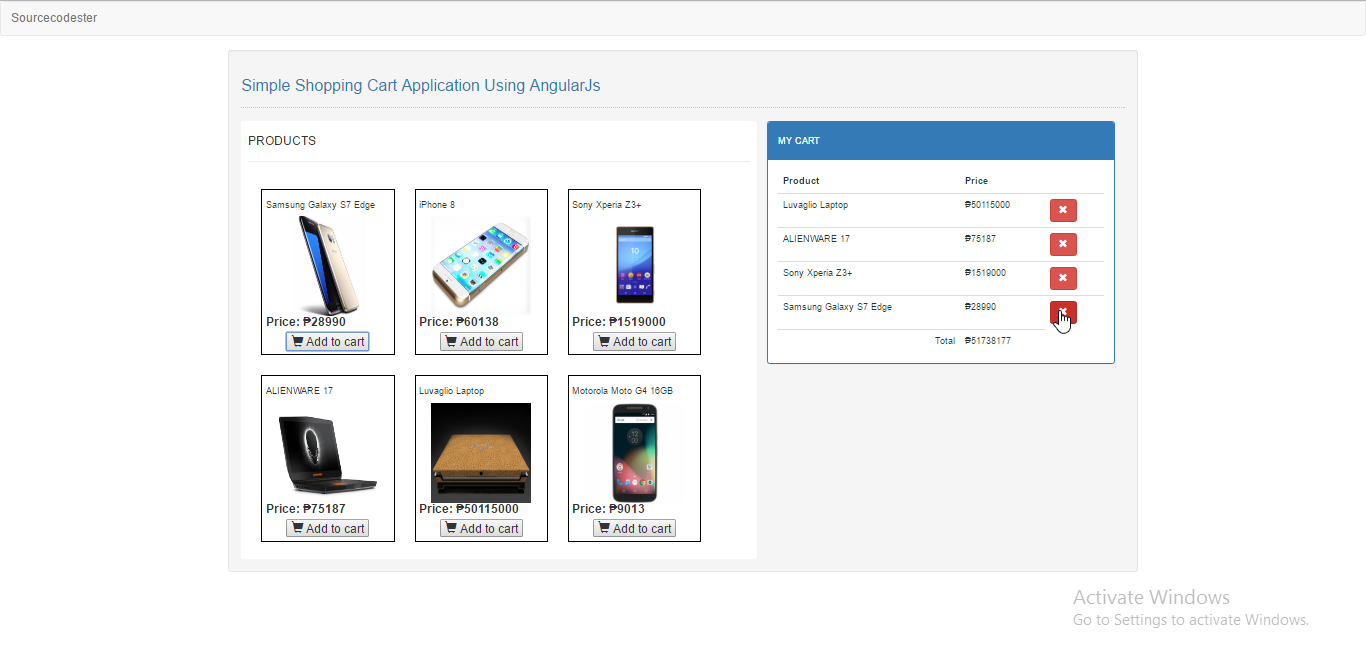
In this tutorial, we will create a simple Shopping Cart Using AngularJs. This simple application purpose is to add the product that the buyer wants to buy, and will be listed to the cart waiting to be paid. We will try to use angularJS to implement this simple task in a different way. The directives within the AngularJs made this application a little bit simpler but full of functions that can be declared like jquery libraries.

So let's now do the coding.

Getting Started

After downloading and Installing the said libraries/plugins, compile them to a single folder. Then create a new folder where you will store the images you want to use.

Creating the markup

Open your text editor, and try to copy/paste the code that I provided below. After that name it as 'index.html'.

Note: for the plugins/libraries, please check the path names in the code and replace it according to the location of the files. i.e. [<link rel = "stylesheet" type = "text/css" href = "css/bootstrap.css"/>] If your css folder is located inside the "assets" directory, replace the href into [<link rel = "stylesheet" type = "text/css" href = "assets/css/bootstrap.css"/>]

  1. <!DOCTYPE html>
  2. <html lang = "en">
  3. <head>
  4. <script src = "js/angular.js"></script>
  5. <script src = "js/app.js"></script>
  6. <meta charset = "UTF-8" name = "viewport" content = "width=device-width, initial-scale=1" />
  7. <link rel = "stylesheet" type = "text/css" href = "css/bootstrap.css"/>
  8. <link rel = "stylesheet" type = "text/css" href = "css/style.css"/>
  9. </head>
  10. <body ng-app = "myModule" ng-controller = "myController">
  11. <nav class = "navbar navbar-default">
  12. <div class = "container-fluid">
  13. <a class = "navbar-brand" href = "https://sourcecodester.com">Sourcecodester</a>
  14. </div>
  15. </nav>
  16. <div class = "col-md-2"></div>
  17. <div class = "col-md-8 well">
  18. <h3 class = "text-primary">Simple Shopping Cart Application Using AngularJs</h3>
  19. <hr style = "border-top:1px dotted #ccc;"/>
  20. <div id = "bg-background" class = "col-md-7">
  21. <h4>PRODUCTS<h4>
  22. <hr style = "border-top:1px groovy #ccc;">
  23. <div id = "product">
  24. <div id = "p_list" ng-repeat = "product in products ">
  25. <h5>{{product.p_name}}</h5>
  26. <center><img ng-src = "{{product.p_image}}"/></center>
  27. <div><label>Price: ₱{{product.p_price}}</label></div>
  28. <center><button type = "button" ng-click = "add_cart(product)"><span class = "glyphicon glyphicon-shopping-cart"></span> Add to cart</button></center>
  29. </div>
  30. </div>
  31. </div>
  32. <div class = "pull-right col-md-5">
  33. <div class = "panel panel-primary">
  34. <div class = "panel-heading">
  35. <h5>MY CART</h5>
  36. </div>
  37. <div class = "panel-body table-responsive">
  38. <table class = "table">
  39. <tr>
  40. <th>Product</th>
  41. <th>Price</th>
  42. <th></th>
  43. </tr>
  44. </thead>
  45. <tr ng-repeat = "cart in carts" ng-init = "setTotals(cart)">
  46. <td>{{cart.p_name}}</td>
  47. <td>₱{{cart.p_price}}</td>
  48. <td><button type = "button" ng-click = "remove_cart(cart)" class = "btn btn-danger"><span class = "glyphicon glyphicon-remove"></span></button></td>
  49. </tr>
  50. <tr>
  51. <td align = "right">Total</td>
  52. <td>₱{{total}}</td>
  53. </tr>
  54. </tbody>
  55. </table>
  56. </div>
  57. </div>
  58. </div>
  59. </div>
  60. </body>
  61. </html>

This code will display the design of your application.

Creating the directives

After creating the markup, we will now go to the directives of AngularJs. This will handle the main function of the application by adding the product to the cart. To create the function just copy/paste the code that I provided below, then save as 'app.js' and save it inside the js folder. The code below is the script that is written inside the included/imported javascript file in our mark up above (<script src = "js/app.js"></script>).

  1. var app = angular.module("myModule", [])
  2. .controller("myController", function($scope){
  3. $scope.carts=[]; //create a variable name carts, this will be the storage of the product that the buyer choose
  4. $scope.products = [
  5. {p_id: "1", p_name: "Samsung Galaxy S7 Edge", p_image: "images/1.jpg", p_price: 28990},
  6. {p_id: "2", p_name: "iPhone 8", p_image: "images/2.png", p_price: 60138},
  7. {p_id: "3", p_name: "Sony Xperia Z3+", p_image: "images/3.png", p_price: 1519000},
  8. {p_id: "4", p_name: "ALIENWARE 17", p_image: "images/4.png", p_price: 75187},
  9. {p_id: "5", p_name: "Luvaglio Laptop", p_image: "images/5.png", p_price: 50115000},
  10. {p_id: "6", p_name: "Motorola Moto G4 16GB", p_image: "images/6.png", p_price: 9013}
  11. ]; //this is an array of product that will be display in the mark uo
  12.  
  13. $scope.add_cart = function(product){ //set a function name add_cart
  14. if(product){ //check if the product is already declared within the function
  15. $scope.carts.push({p_id: product.p_id, p_name: product.p_name, p_price: product.p_price}); //pushes the chosen product into a new variable called carts when the add to cart button is clicked
  16. }
  17. }
  18.  
  19.  
  20. $scope.total = 0; //display the default value of total
  21.  
  22. $scope.setTotals = function(cart){ //set a function name setTotals
  23. if(cart){ //check if cart is already set in the function
  24. $scope.total += cart.p_price; //sum the total value of each product
  25. }
  26. }
  27.  
  28. $scope.remove_cart = function(cart){ //set a function called remove_cart
  29. if(cart){ //checked if the cart has a value
  30. $scope.carts.splice($scope.carts.indexOf(cart), 1); //delete a product based on the index
  31. $scope.total -= cart.p_price; //deduct the price of the product simultaneously when deleted
  32. }
  33. }
  34. });
DEMO

There you have it! We have created a simple shopping cart application using AngularJS. I hope that this tutorial will give you some thoughts on your future projects. For more updates, tutorials, and free project source codes, just kindly visit and explore this site.

Enjoy Coding!!

Comments

Submitted byMaxim (not verified)on Thu, 04/27/2017 - 18:25

Can you tell how to replase your scope.products by json file??? { "guides": [ { "location": { "city": "NY", "country": "USA" }, "title": "NY a Day", "price": 11, "qty" : 4 }, { "location": { "city": "Panama City", "country": "Panama" }, "title": "Beaches of Panama", "price": 15.00, "qty" : 3 }, { "location": { "city": "San Jose", "country": "Costa Rica" }, "title": "Life in San Jose", "price": 15.51, "qty": 1 }] }
Submitted byPearl Lusterio (not verified)on Sat, 10/14/2017 - 23:25

Hi razormist. I really want to connect this to my database. Like saving the selected products to one account. I badly need help on how to do that.

Add new comment