PACMAN Animation Programming part2

TUTORIAL NO 12

PACMAN Animation Programming part2

In this tutorial you will learn: 1. Game Programming 2. Swing Animations 3. Event handling 4. JAVA awt 5. JAVA swing 6. Adapters Now we will continue making our PacMan animation. In this tutorial we will write the functions and conditions for up , down ,left and right. Which we were calling in our detect collision function. If you haven’t read my previous tutorial please read that tutorial first http://www.sourcecodester.com/tutorials/java/7525/pacman-animation-programming-part1.html Basic step: Download and install ECLIPSE and set up a JAVA PROJECT. Then first go through my pacman tutorial part1 then follow this tutorial. Follow these steps 1.DIRECTION CONTROL FUNCTIONS: We will write the conditions for setting the directions according to the function name.
  1. void UP() {
  2.         if (s_angle >= 45 & s_angle < 90 & e_angle <= -270 & flag == 1) { // when mouth is open
  3.                 s_angle++;      //increasing starting angle
  4.                 e_angle -= 2; // increasing ending angle
  5.                 if (s_angle == 90) {
  6.                         s_angle = 90;
  7.                         e_angle = -360;
  8.                         flag = 2; // changing flag when mouth is closed making the other condition true
  9.                 }
  10.         }
  11.  
  12. if (s_angle > 45 & s_angle <= 90 & e_angle >= -360 & flag == 2) { // when mouth is closed
  13.         s_angle--; //decreasing starting angle
  14.         e_angle += 2; // increasing ending angle
  15.  
  16.         if (s_angle <= 45) {
  17.                 flag = 1;
  18.                 e_angle = -270;
  19.         }
  20.    }
  21. } // UP
In this function we will write two conditional statement one for the pacman mouth open animation and other one for pacman mouth close animation. In the first condition we check for the angles first that they satisfy the mouth up conditions then we start incrementing the starting angle and decrementing the ending angle. Then we check for the maximum mouth open limits , when they are satisfied then we set the angles to make the mouth close conditional statement to true. In the mouth close animation we start decrementing the starting angle and incrementing the ending angle. We again keep checking for the minimum limit, when that condition is satisfied then we simply simply make the other condition true. So that our animation remains smooth.
  1. void down() {
  2.         if (s_angle >= 225 & s_angle < 270 & e_angle <= -270 & flag == 1) { // when mouth is open
  3.                 s_angle++; //increasing starting angle
  4.                 e_angle -= 2; //decreasing ending angle
  5.  
  6.                 if (s_angle == 270) {
  7.                         s_angle = 270;
  8.                         e_angle = -360;
  9.                         flag = 2;//changing flag when mouth is closed making the other condition true
  10.                 }
  11.         }
  12.         if (s_angle > 225 & s_angle <= 270 & e_angle >= -360 & flag == 2) { // when mouth is closed
  13.                 s_angle--; //decreasing starting angle
  14.                 e_angle += 2; //increasing ending angle
  15.                 if (s_angle <= 225) {
  16.                         s_angle = 225;
  17.                         e_angle = -270;
  18.                         flag = 1; //changing flag when mouth is open making the mouth open condition true
  19. }
  20.         }
  21. } // down
Now in the second function we again do a similar thing first set the conditions for mouth open then for mouth close.
  1. void left() {
  2.         if (s_angle >= 135 & s_angle < 180 & e_angle <= -270 & flag == 1) { // when mouth is open
  3.                 s_angle++; //increasing starting angle
  4.                 e_angle -= 2; //decreasing ending angle
  5.  
  6.                 if (s_angle == 180) {
  7.                         e_angle = -360;
  8.                         flag = 2; //changing flag when mouth is closed making the other condition true
  9.                 }
  10.         }
  11.         if (s_angle > 135 & s_angle <= 180 & e_angle >= -360 & flag == 2) { // when mouth is closed
  12.                 s_angle--; //decreasing starting angle
  13.                 e_angle += 2; //increasing ending angle
  14.  
  15.                 if (s_angle <= 135) {
  16.                         s_angle = 135;
  17.                         e_angle = -270;
  18.                         flag = 1; //changing flag when mouth is open making the mouth open condition true
  19.                 }
  20.         }
  21. }
In this function again we write two conditional statements for mouth open and close animation but this is for when the pacman is moving in the left direction. In the first condition we will increment the starting angle and decrement the ending angle while in the second condition we do the opposite decrement the starting agnle and increment the ending angle.
  1. void right() {
  2.                 if (s_angle <= 45 & s_angle > 0 & e_angle < 360 & flag == 1) { // when mouth is open
  3.                         s_angle--; //decreasing starting angle
  4.                         e_angle += 2; //increasing ending angle
  5.  
  6.                         if (s_angle == 0) {
  7.                                 s_angle = 0;
  8.                                 e_angle = 360;
  9.                                 flag = 2; //changing flag when mouth is closed making the other condition true
  10.                         }
  11.                 }
  12.                 if (s_angle >= 0 & s_angle < 45 & e_angle > 270 & flag == 2) { // when mouth is closed
  13.                         s_angle++; //increasing starting angle
  14.                         e_angle -= 2; //decreasing ending angle
  15.  
  16.                         if (s_angle >= 45) {
  17.                                 s_angle = 45;
  18.                                 e_angle = 270;
  19.                                 flag = 1; //changing flag when mouth is open making the mouth open condition true
  20.                         }
  21.                 }
  22.         }// right
  23. }// class ends
Now the last function that we want to write is for right movement we again do the exact same thing. Two conditional statements, incrementing angles in the first one and decrementing in the second. Now all are conditions are complete now we want to make a class to implement the key listener for pacman’s movement using arrow keys. 3. WRITING THE PUBLIC PACMAN CLASS
  1.                
  2. public class PacMan implements KeyListener {
  3.  
  4.         PacPanel p = new PacPanel();
  5.         static JFrame jf = new JFrame();
  6.  
  7.         void setFrame() { // setting the frame and making it visible
  8.                 jf.setSize(800, 600);
  9.                 jf.setDefaultCloseOperation(JFrame.EXIT_ON_CLOSE);
  10.                 p.setBackground(Color.WHITE);
  11.                 jf.setVisible(true);
  12.         }
  13.  
  14.         void addComponents() { // adding  panel and keylistener in frame
  15.                 jf.add(p);
  16.                 jf.addKeyListener(this);
  17.         }
In our public class we first implement the keylistener interface then make our panel and frame object. We will add the pacman’s panel in the frame like we did in all previous animations. First of all setting the frame by making a setFrame function and calling the size , close operation ,background color and visibility functions in it. After that we make add components function in which we implement the key listener to the frame and add the pacman’s panel in it.
  1. @Override
  2.         public void keyPressed(KeyEvent kp) { // checking which key is pressed
  3.                 if (kp.getKeyCode() == KeyEvent.VK_UP) {
  4.                         PacPanel.s_angle = 45; //changing angles and making up condition true in PacPanels class
  5.                         PacPanel.e_angle = -270;
  6.                         PacPanel.direction = "up";
  7.                         PacPanel.flag = 1;
  8.  
  9.                 }
  10.                 if (kp.getKeyCode() == KeyEvent.VK_DOWN) {
  11.                         PacPanel.s_angle = 225; //changing angles and making down condition true in PacPanels class
  12.                         PacPanel.e_angle = -270;
  13.                         PacPanel.direction = "down";
  14.                         PacPanel.flag = 1;
  15.                 }
  16.  
  17.                 if (kp.getKeyCode() == KeyEvent.VK_LEFT) {
  18.                         PacPanel.s_angle = 135; //changing angles and making left condition true in PacPanels class
  19.                         PacPanel.e_angle = -270;
  20.                         PacPanel.direction = "left";
  21.                         PacPanel.flag = 1;
  22.                 }
  23.                 if (kp.getKeyCode() == KeyEvent.VK_RIGHT) {
  24.                         PacPanel.s_angle = 45; //changing angles and making down condition true in PacPanels class
  25.                         PacPanel.e_angle = 270;
  26.                         PacPanel.direction = "right";
  27.                         PacPanel.flag = 1;
  28.                 }
  29.         }
  30.        
Now we override the key pressed function and set the angles according to the key pressed. We make check which button is pressed and set the angles of the pacpanel class (Remember: The angles are declared static in our pacpanel class so that we can set them in another class like we are doing right here ). For any keypress we set the start angle , end angles , direction string and the flag. So that our animation becomes perfect.
  1. @Override
  2.         public void keyReleased(KeyEvent kr) {}
  3.         @Override
  4.         public void keyTyped(KeyEvent kt) {}
  5.        
  6.         public static void main(String[] args) {
  7.                 PacMan pc = new PacMan();
  8.                 pc.setFrame();  //setting frame for pacman object
  9.                 pc.addComponents(); // adding components in frame
  10.         } // end main
  11. }// end class
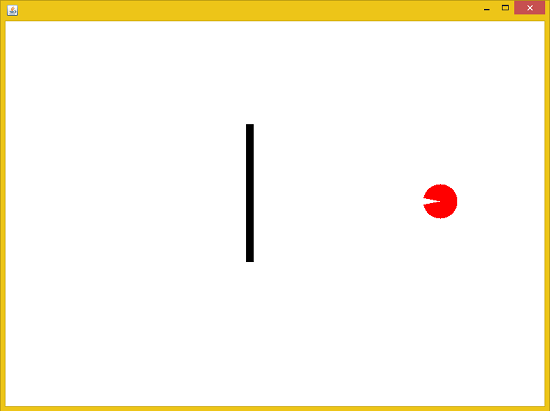
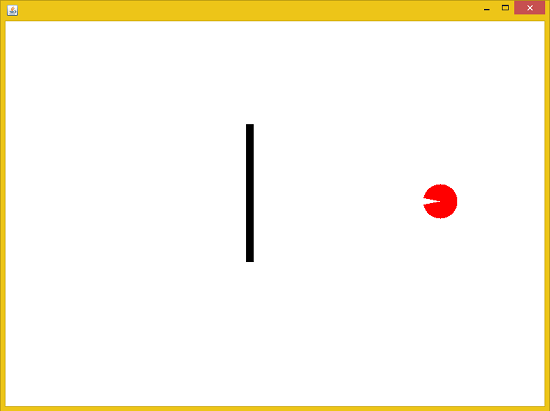
In the end we simply provide the null body implementation for the remaining functions of the keylistener interface and then write our main function in which we make our pacman object , set the frame and add the components in the frame. After that we close our main as followed by the class. Now our animation is complete OUTPUT: output
Add new comment