Python - Django Creating Models
Submitted by nurhodelta_17 on Saturday, October 21, 2017 - 14:56.
Getting Started
First we're gonna start a new project named samplesite. If you have no idea how to create a new project you may refer to my tutorial Python Getting Started with Django.Creating our App
Next, we're gonna create and install a new app named blog. If you have no idea on how to create and install a new app, you may visit my previous tutorial about Python - Django Creating New App.Creating our URLs
Go to your main app, which in my case named samplesite folder and open urls.py and change the content to:- from django.conf.urls import url, include
- from django.contrib import admin
- urlpatterns = [
- url(r'^admin/', admin.site.urls),
- url(r'^', include('blog.urls')),
- ]
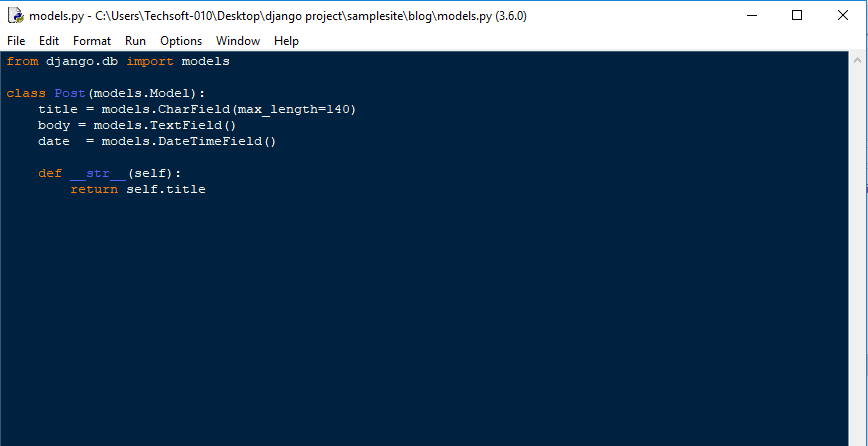
Creating our Models
Next, we're gonna create our models which is the database of our app by opening our app directory, blog, then open models.py and paste the ff codes:- from django.db import models
- class Post(models.Model):
- title = models.CharField(max_length=140)
- body = models.TextField()
- date = models.DateTimeField()
- def __str__(self):
- return self.title
Creating our Views
We're gonna create Generic View in this tutorial. Means that we are not going to use views.py to create our views. Open urls.py in our blog app directory and paste the ff codes:- from django.conf.urls import url, include
- from django.views.generic import ListView, DetailView
- from blog.models import Post
- urlpatterns = [
- url(r'^$', ListView.as_view(queryset=Post.objects.all().order_by("-date")[:25],template_name="blog/blog.html"))
- ]
Creating the Pages of our App
First, in our blog app, we create templates directory. Then, inside templates, we create another directory named blog. This is to avoid conflicts between our templates. Then, create the following html files inside the blog. header.html
blog.html