Dynamically Add and Remove Element using AngularJS and PHP Tutorial
Introduction
In this tutorial, you will learn how to Dynamically Add and Remove an Element using AngularJS and Data Batch Insertion using PHP and MySQL Database. The tutorial aims to provide a reference or guide to students or new programmers on manipulating DOM using AngularJS and inserting multiple data in the database at once. Here are snippets and a simple web application source code zip file.
What is Dynamic Adding and Removing Element?
Dynamically Adding and Removing an Element is a form of manipulating DOM (Document Object Model). Implementing this kind of feature to your web project allows your end-users to add and remove HTML Elements without leaving the current page.
What is Batch Insertion?
Batch Insertion is the process of inserting multiple data into the database at once. This kind of feature is usually used when processing the insertion of data from a Form with Iterated input data.
For this tutorial, we will create a simple web application with a form that allows the users to dynamically add and remove input items and insert all the data on the database at once.
Methods and Functions
Here are the methods and functions that we will use to achieve the application that we want to create.
AngularJS
- module
- module.controller
- $scope service
- $http service
- ng-If
- ng-repeat
- ng-module
- ng-click
- ng-model
- ng-controller
- ng-app
- ng-show
Getting Started
Since we will use PHP Script and MySQL Database, Download and Install XAMPP or any equivalent software to allow your local machine to run the scripts.
Creating the Database
The below MySQL Script is a MySQL Schema of our sample application to develop.
Database Connection
Next, we will create a PHP script that handles the connection of our app to the database. Create a PHP File named db-connect.php.
- <?php
- $host = "localhost";
- $username = "root";
- $pw = "";
- $db_name = "dummy_db";
- $conn = new mysqli($host, $username, $pw, $db_name);
- if(!$conn){
- }
Creating the Interface
The snippet below is an HTML Scripts that also contains the AngularJS attributes that are needed for the app. This page contains the form panel and the table for displaying the inserted data. Save the snippet below as index.php
- <!DOCTYPE html>
- <html lang="en">
- <head>
- <meta charset="UTF-8">
- <meta http-equiv="X-UA-Compatible" content="IE=edge">
- <meta name="viewport" content="width=device-width, initial-scale=1.0">
- <title>Angular JS Dynamic Add & Delete Element</title>
- <link rel="stylesheet" href="https://cdnjs.cloudflare.com/ajax/libs/font-awesome/6.2.0/css/all.min.css" integrity="sha512-xh6O/CkQoPOWDdYTDqeRdPCVd1SpvCA9XXcUnZS2FmJNp1coAFzvtCN9BmamE+4aHK8yyUHUSCcJHgXloTyT2A==" crossorigin="anonymous" referrerpolicy="no-referrer" />
- <link rel="stylesheet" href="https://cdn.jsdelivr.net/npm/[email protected]/dist/css/bootstrap.min.css" integrity="sha384-Zenh87qX5JnK2Jl0vWa8Ck2rdkQ2Bzep5IDxbcnCeuOxjzrPF/et3URy9Bv1WTRi" crossorigin="anonymous">
- <script src="https://cdnjs.cloudflare.com/ajax/libs/font-awesome/6.2.0/js/all.min.js" integrity="sha512-naukR7I+Nk6gp7p5TMA4ycgfxaZBJ7MO5iC3Fp6ySQyKFHOGfpkSZkYVWV5R7u7cfAicxanwYQ5D1e17EfJcMA==" crossorigin="anonymous" referrerpolicy="no-referrer"></script>
- <script src="https://cdnjs.cloudflare.com/ajax/libs/angular.js/1.8.3/angular.js" integrity="sha512-klc+qN5PPscoGxSzFpetVsCr9sryi2e2vHwZKq43FdFyhSAa7vAqog/Ifl8tzg/8mBZiG2MAKhyjH5oPJp65EA==" crossorigin="anonymous" referrerpolicy="no-referrer"></script>
- <script src="https://cdn.jsdelivr.net/npm/[email protected]/dist/js/bootstrap.bundle.min.js" integrity="sha384-OERcA2EqjJCMA+/3y+gxIOqMEjwtxJY7qPCqsdltbNJuaOe923+mo//f6V8Qbsw3" crossorigin="anonymous"></script>
- <style>
- html, body{
- min-height:100%;
- width:100%;
- }
- tbody:empty:after{
- content:'No records found'
- }
- </style>
- </head>
- <body>
- <nav class="navbar navbar-expand-lg navbar-dark bg-primary bg-gradient">
- <div class="container">
- <a class="navbar-brand" href="./">Angular JS Dynamic Add & Delete Element</a>
- <div>
- <a href="https://sourcecodester.com" class="text-light fw-bolder h6 text-decoration-none" target="_blank">SourceCodester</a>
- </div>
- </div>
- </nav>
- <div class="container-fluid px-5 my-3" ng-app="SampleApp" ng-controller="FormController">
- <div class="col-lg-6 col-md-8 col-sm-12 mx-auto">
- <div class="card rounded-0 shadow mb-3">
- <div class="card-header">
- <div class="card-title"><b>Dynamic Form</b></div>
- </div>
- <div class="card-body">
- <div class="container-fluid">
- <form ng-submit="formSubmit()">
- <div class="alert alert-success mb-3" ng-show="success_msg">{{success_msg}}</div>
- <div class="alert alert-danger mb-3" ng-show="error_msg">{{error_msg}}</div>
- <div id="item-list">
- <div class="d-flex w-100 mb-3 justify-content-between align-items-end input-item" ng-repeat="item in items">
- <div class="col-auto flex-shrink-1 flex-grow-1 pe-4">
- <label class="form-label">Full Name</label>
- <input type="text" class="form-control form-control-sm rounded-0" ng-model="fData.name[item.id]" name="name[]" required>
- </div>
- <div class="col-auto">
- <button class="btn btn-sm btn-danger rounded-0" type="button" ng-click="item_remove($index)" tabindex = '-1'><i class="fa-solid fa-trash"></i></button>
- </div>
- </div>
- </div>
- <div class="mb-3 d-grid gap-2">
- <button class="btn btn-sm btn-light border btn-block rounded-pill" type="button" ng-click="item_add()" ><i class="fa-solid fa-plus"></i> Add Item</button>
- <button type="submit" class="btn btn-primary btn-block rounded-pill"><i class="fa-solid fa-save"></i> Save</button>
- </div>
- </form>
- </div>
- </div>
- </div>
- <div class="card rounded-0 shadow">
- <div class="card-header">
- <div class="card-title"><b>Name Lists</b></div>
- </div>
- <div class="card-body">
- <div class="container-fluid">
- <div class="alert alert-danger mb-3" ng-show="tbl_error_msg">{{tbl_error_msg}}</div>
- <table class="table table-striped table-bordered">
- <colgroup>
- <col width="10%">
- <col width="90%">
- </colgroup>
- <thead>
- <tr>
- <th class="text-center">#</th>
- <th class="text-center">Name</th>
- </tr>
- </thead>
- <tbody>
- <tr ng-repeat="nameobj in dataNames">
- <td class="text-center">{{$index + 1}}</td>
- <td class="">{{nameobj.name}}</td>
- </tr>
- <tr ng-if="dataNames.length <= 0">
- <th class="text-center" colspan="2">No records found</th>
- </tr>
- </tbody>
- </table>
- </div>
- </div>
- </div>
- </div>
- </div>
- <script src="app.js"></script>
- </body>
- </html>
Creating the AngularJS Script
The below snippet is a JavaScript file containing the AngularJS script. The script initiates the functionalities we need for the app. Save the file as the app. This file must be loaded on the main page after the AngularJS Library.
- var mymodule = angular.module("SampleApp",[]);
- /**
- * Angular Controller
- */
- mymodule.controller("FormController", function ($scope, $http){
- $scope.items = [{id:1, name:''}];
- $scope.fData={}
- $scope.success_msg = "";
- $scope.error_msg = "";
- $scope.tbl_error_msg = "";
- /**
- * Add Button Function
- */
- $scope.item_add = function(){
- var key = $scope.items.length + 1;
- $scope.items.push({id:key, name:''})
- console.log($scope.items)
- }
- /**
- *
- * Remove Item Function
- */
- $scope.item_remove = function(itemIndex){
- $scope.items.splice(itemIndex, 1)
- console.log($scope.items)
- }
- /**
- * Form Submit
- */
- $scope.formSubmit = function(){
- $http.post('insertData.php',$scope.fData,{})
- .then(
- function (response){
- if(response.status == 200){
- var data = response.data
- if(data.status == 'success'){
- $scope.success_msg = "Data has been added successfully."
- $scope.items = [{id:1, name:''}];
- $scope.fData={}
- $scope.getAllData()
- }else if(!!data.error){
- $scope.error_msg = data.error
- }else{
- console.error(response)
- $scope.error_msg = "Data has failed to insert due to some reasons."
- }
- }else{
- $scope.error_msg = "Data has failed to insert due to some reasons."
- console.error(response)
- }
- },
- function (error){
- $scope.error_msg = "Data has failed to insert due to some reasons."
- console.error(error)
- }
- )
- }
- /**
- * Retrieve Data
- */
- $scope.getAllData = function(){
- $http.get('retrieve.php', {})
- .then(
- function (response){
- if(response.status == 200){
- var data = response.data
- $scope.dataNames = data
- }else{
- $scope.tbl_error_msg = "Retrieving Data Failed."
- console.error(response)
- }
- },
- function (error){
- $scope.tbl_error_msg = "Retrieving Data Failed."
- console.error(error)
- }
- )
- }
- $scope.getAllData()
- })
Inserting Data
The snippet below is a PHP Script. The code itself executes the batch insertion of the data submitted from the form. Save the file as insertData.php.
- <?php
- require_once("db-connect.php");
- // Data
- $dataToInsert = [];
- foreach($data['name'] as $name){
- }
- }else{
- $resp['status'] = 'failed';
- $resp['error'] = "There's no array of names given.";
- }
- $sql = "INSERT INTO `people` (`name`) VALUES ";
- $insert = $conn->query($sql);
- if($insert){
- $resp['status'] = 'success';
- }else{
- $resp['status'] = 'failed';
- $resp['error'] = $conn->error;
- }
- }else{
- $resp['status'] = 'failed';
- $resp['error'] = "There's no data to be inserted/save.";
- }
- // Return Response
- $conn->close();
Retrieving Data
The snippet below is also a PHP Script. The script fetches all the data from the database and returns it to AngularJS's HTTP Service Request as an object. Save the file as retrieve.php.
- <?php
- require_once('db-connect.php');
- $sql = "SELECT * FROM `people` order by `name` asc";
- $query = $conn->query($sql);
- $result = $query->fetch_all(MYSQLI_ASSOC);
- $conn->close();
That's it! You can now test the application source code on your end by browsing the main page using your preferred browser such as Chrome browser. I have also provided the complete source code file I created for this tutorial. The zip file is free to download on this site. The download button is located below this article.
Snapshots
Here are some Snapshots of the output of the source code I have provided.
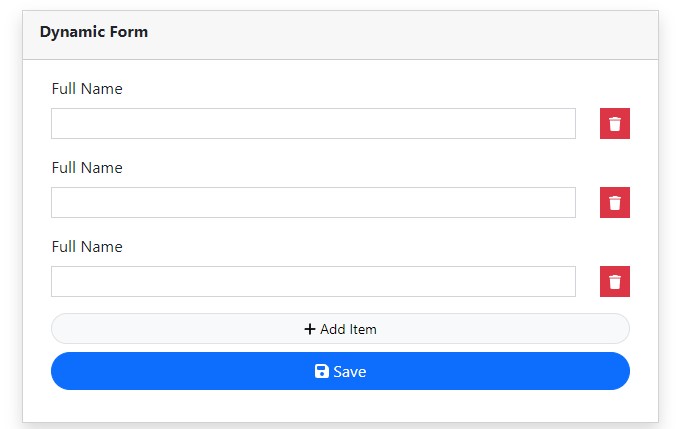
Form Panel
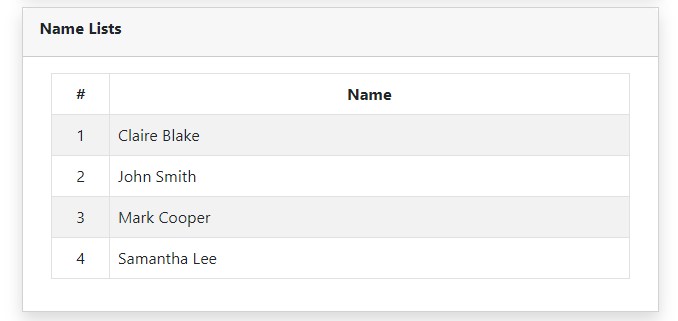
Data Table Panel
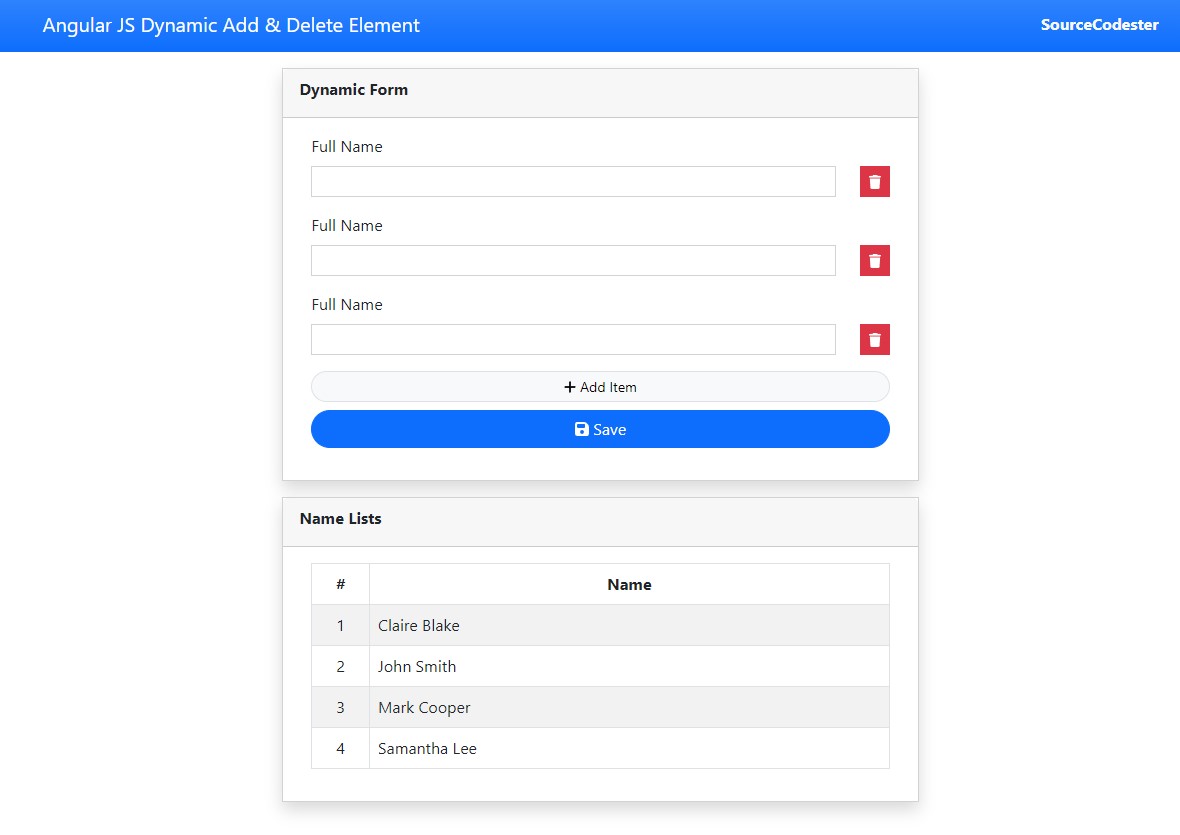
Main Page
DEMO VIDEO
That's the end of this tutorial. I hope this Dynamically Add and Remove Element using AngularJS and PHP/MySQL Batch Insertion Tutorial will help you with what you are looking for and that you'll find this useful for your current and future projects.
Explore more on this website for more Tutorials and Free Source Codes.