Creating a Video Tag's Custom Controls using jQuery Tutorial
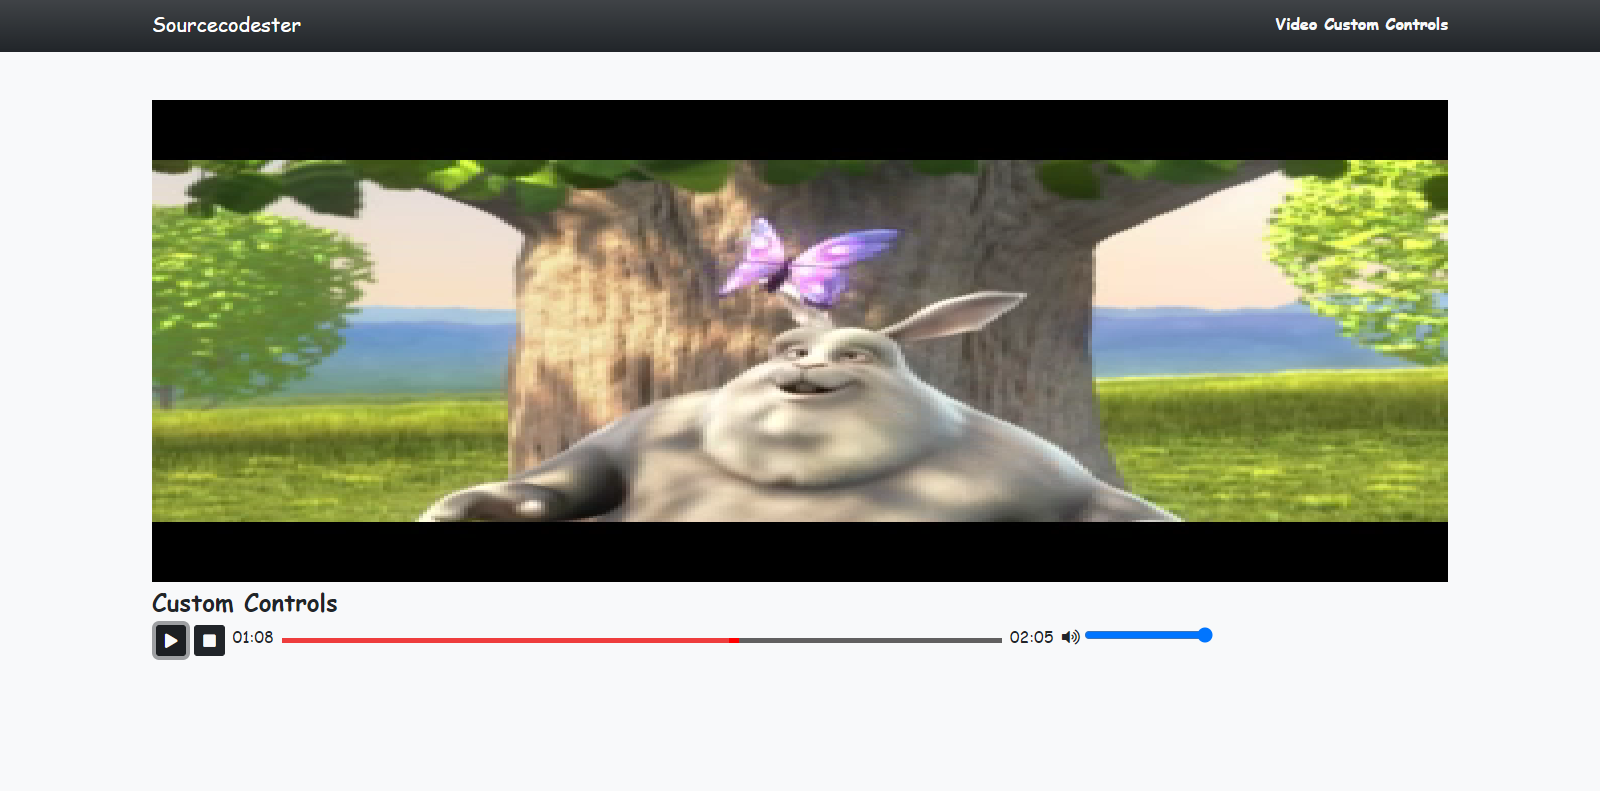
In this tutorial, you will learn how to create a Custom Controls for the HTML Video Elements. here, you will know how to create a custom play/pause button, stop button, playback slider, and volume slider. The custom controls functionalities can be achieve using JavaScript and jQuery Library.
Getting Started
Download Bootstrap v5 and jQuery Library. After that compile the libraries in a directory that you will use for storing your source code.
Creating The Custom Style Sheet
Below is the a simple CSS (Cascading Style Sheet) script for the custom design of some part of the application. Save this file as custom.css
- :root {
- --bs-success-rgb: 71, 222, 152 !important;
- }
- html,
- body {
- height: 100%;
- width: 100%;
- font-family: Apple Chancery, cursive;
- }
- .btn-info.text-light:hover,
- .btn-info.text-light:focus {
- background: #000;
- }
- #vid-el {
- height: 60vh;
- background: linear-gradient(0deg, #3c3b3b, #424242, #000000);
- object-fit: unset;
- object-position: center center;
- }
- #range-holder {
- width: 45vw;
- }
- #playBackSlider {
- overflow: hidden;
- height: 5px;
- -webkit-appearance: none !important;
- width: 100%;
- background: #616060;
- }
- #playBackSlider::-webkit-slider-thumb {
- -webkit-appearance: none;
- width: 10px;
- height: 10px;
- cursor: e-resize;
- background: #ff0000;
- box-shadow: -45vw 1px 1px 45vw #ee3d3d;
- }
Creating The Interface
In the script below, it contains all the elements code script such as the video, buttons, range/slider, and more. Save this file as index.html.
- <!DOCTYPE html>
- <html lang="en">
- <head>
- <meta charset="UTF-8">
- <meta http-equiv="X-UA-Compatible" content="IE=edge">
- <meta name="viewport" content="width=device-width, initial-scale=1.0">
- <link rel="stylesheet" href="./Font-Awesome-master/css/all.min.css">
- <link rel="stylesheet" href="./css/bootstrap.min.css">
- <link rel="stylesheet" href="./css/custom.css">
- </head>
- <body class="bg-light">
- <nav class="navbar navbar-expand-lg navbar-dark bg-dark bg-gradient" id="topNavBar">
- <div class="container">
- <a class="navbar-brand" href="https://sourcecodester.com">
- Sourcecodester
- </a>
- <div>
- </div>
- </div>
- </nav>
- <div class="container py-5" id="page-container">
- <!-- Video Container -->
- <div id="vid-container">
- <video src="sample-mp4-file.mp4" id="vid-el" class="w-100"></video>
- <!-- Controls -->
- <div class="d-flex">
- <div class="mx-1">
- </div>
- <div class="mx-1">
- </div>
- <div class="mx-1">
- </div>
- <div id="range-holder" class="mx-1">
- <input type="range" id="playBackSlider" value="0">
- </div>
- <div class="mx-1">
- </div>
- <div class="mx-1">
- </div>
- </div>
- <!-- End of Controls -->
- </div>
- <!-- End of Video Container -->
- </div>
- </body>
- </html>
Creating the Main Functions
Below are the codes that makes the video buttons and controls functional. Save this file as script.js.
- var _video_el;
- var slider;
- $(function() {
- _video_el = $('#vid-el')[0]
- setTimeout(() => {
- $('#duration').text(String(Math.floor(_video_el.duration / 60)).padStart(2, '0') + ":" + String(Math.floor(60 * Math.abs((_video_el.duration / 60) - Math.floor(_video_el.duration / 60)))).padStart(2, '0'))
- }, 500)
- // Pause/Play Video
- $('#play-btn').click(function() {
- var val = $(this).attr('data-value')
- if (val == 'play') {
- _video_el.play()
- slider = setInterval(() => {
- var current_slide = (_video_el.currentTime / _video_el.duration) * 100;
- $('#playBackSlider').val(current_slide)
- $('#currentTime').text(String(Math.floor(_video_el.currentTime / 60)).padStart(2, '0') + ":" + String(Math.floor(60 * Math.abs((_video_el.currentTime / 60) - Math.floor(_video_el.currentTime / 60)))).padStart(2, '0'))
- }, 500)
- $(this).html('<i class="fa fa-pause"></i>')
- $(this).attr('data-value', 'pause');
- } else {
- _video_el.pause()
- $(this).html('<i class="fa fa-play"></i>')
- $(this).attr('data-value', 'play');
- clearInterval(slider)
- }
- })
- // Stop Video
- $('#stop-btn').click(function() {
- $('#play-btn').html('<i class="fa fa-play"></i>')
- $('#play-btn').attr('data-value', 'play');
- _video_el.pause()
- _video_el.currentTime = 0;
- $('#playBackSlider').val(0)
- clearInterval(slider)
- $('#currentTime').text(String(Math.floor(_video_el.currentTime / 60)).padStart(2, '0') + ":" + String(Math.floor(60 * Math.abs((_video_el.currentTime / 60) - Math.floor(_video_el.currentTime / 60)))).padStart(2, '0'))
- })
- // Playback Slider Moved Function
- $('#playBackSlider').on('mousedown', function() {
- $(this).on('mousemove', function() {
- _video_el.pause()
- _video_el.currentTime = (_video_el.duration * ($(this).val() / 100));
- $('#currentTime').text(String(Math.floor(_video_el.currentTime / 60)).padStart(2, '0') + ":" + String(Math.floor(60 * Math.abs((_video_el.currentTime / 60) - Math.floor(_video_el.currentTime / 60)))).padStart(2, '0'))
- clearInterval(slider)
- })
- })
- $('#playBackSlider').on('mouseup', function() {
- $(this).off('mousemove')
- _video_el.currentTime = (_video_el.duration * ($(this).val() / 100));
- $('#currentTime').text(String(Math.floor(_video_el.currentTime / 60)).padStart(2, '0') + ":" + String(Math.floor(60 * Math.abs((_video_el.currentTime / 60) - Math.floor(_video_el.currentTime / 60)))).padStart(2, '0'))
- if ($('#play-btn').attr('data-value') == 'pause') {
- _video_el.play()
- slider = setInterval(() => {
- var current_slide = (_video_el.currentTime / _video_el.duration) * 100;
- $('#playBackSlider').val(current_slide)
- }, 500)
- }
- })
- // volume slider
- $('#volume').on('mousedown', function(e) {
- $(this).on('mousemove', function() {
- var vol = $(this).val() / 100
- _video_el.volume = vol
- if (vol == 0) {
- $('#vol-icon').html('<i class="fa fa-volume-off"></i>')
- } else if (vol < .5) {
- $('#vol-icon').html('<i class="fa fa-volume-down"></i>')
- } else {
- $('#vol-icon').html('<i class="fa fa-volume-up"></i>')
- }
- })
- })
- $('#volume').on('mouseup', function(e) {
- $(this).off('mousemove')
- })
- })
That's it! You can now test the application in your browser and see if we have met our goal on this tutorial. If ever you have encountered any errors, please review your source code by differentiating it from the source code I provided above. You can also test the working source code I created for this tutorial. You can download the source code zip file below this article.
DEMO VIDEO
That is the end of this tutorial. I hope you'll find this Video Element's Custom Controls useful for your current and future projects.