Creating a Responsive Custom ToolTips using HTML, CSS, and JavaScript Tutorial
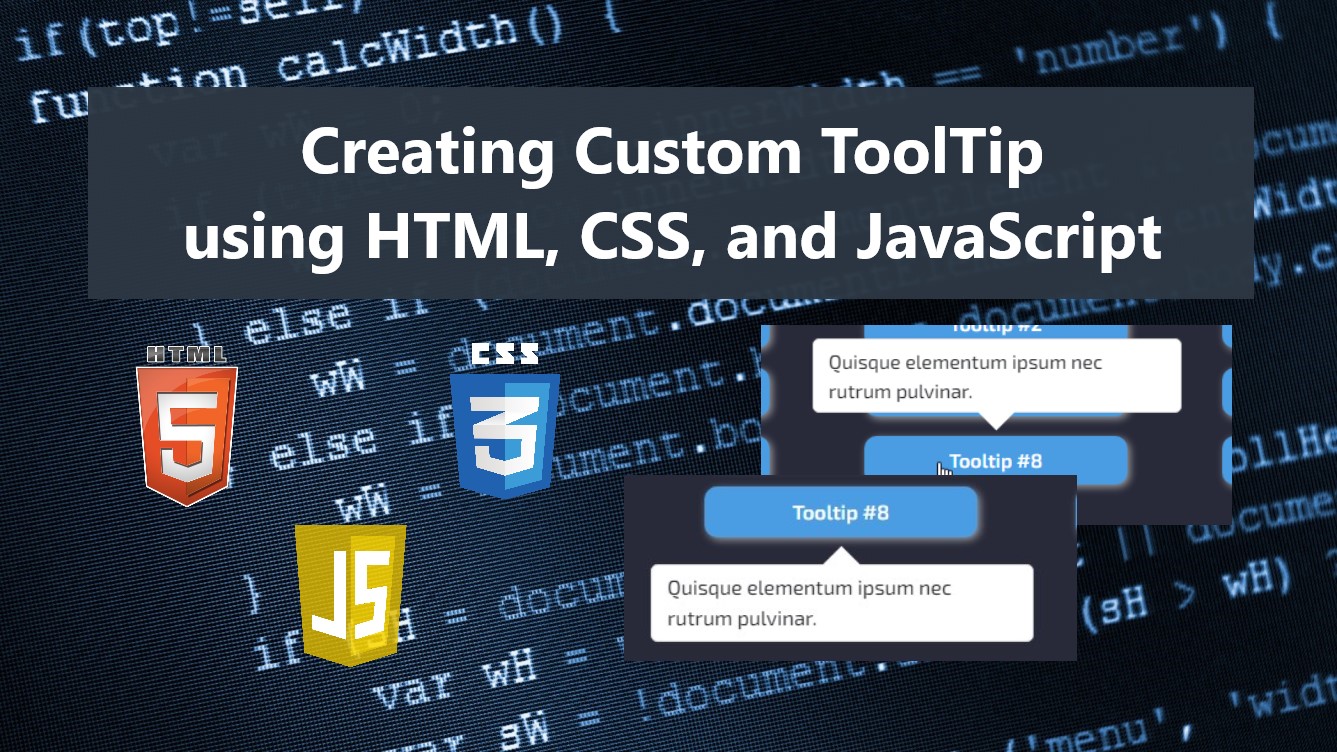
In this tutorial, you can learn how to create a Responsive Custom ToolTip using HTML, CSS, and JavaScript. The tutorial aims to provide students and beginners with a reference for learning to create or looking for a script of the Responsive ToolTip Component. Here, I will be providing reusable scripts of this component and a sample web page that demonstrate the Custom Tooltip Component.
What is ToolTip?
A ToolTip is sort of a popup message or text content describing the hovered element or the cursor is positioned over the element. For example, a program page has multiple buttons that show only icons or images and developers often implement a tooltip component to the buttons to describe the purpose/name/action of the button.
How to Create a Responsive Custom ToolTip?
In HTML, there is a built-in tag or element attribute called title which is used for describing the link, icon, etc. But some developers often use a custom tooltip so they can design the tooltip element that suits the design of their program or so they can use HTML string. We can simply create a custom ToolTip by creating an HTML element for the wrapper or container of the tooltip content, design the tooltip element with CSS, and make it function using Pure JavaScript. Check out the following reusable scripts that I created to understand it more.
Reusable Scripts
The scripts below are the reusable scripts that I created the result into a custom ToolTip for websites or web applications. It outputs a responsive tooltip that automatically repositions for any device screen (desktop, laptop, and mobile)
Stylesheet Script
Here's the CSS file script that designs the Tooltip Wrapper/Container and content elements.
- /* Tooltip Wrapper */
- .tooltip-wrapper {
- position: absolute;
- background: #ffffff;
- padding: 0.35em 0.75em;
- border: 1px solid #e3e2e2;
- box-shadow: 0px 0px 3px #7e7e7e26;
- max-width: 300px;
- min-width: 50px;
- border-radius: 5px;
- z-index: 99;
- }
- /* Tooltip pointer */
- .tooltip-wrapper:before {
- content: "";
- position: absolute;
- width: 1.3rem;
- height: 1.3rem;
- z-index: 99;
- background: #fff;
- rotate: 45deg;
- }
- /* Tooltip pointer for Right Position */
- .tooltip-wrapper[data-position="right"]:before{
- left: -0.65rem;
- top: calc(50% - 1.3rem + 0.7em);
- }
- /* Tooltip pointer for Left Position */
- .tooltip-wrapper[data-position="left"]:before{
- right: -0.65rem;
- top: calc(50% - 1.3rem + 0.7em);
- }
- /* Tooltip pointer for Top Position */
- .tooltip-wrapper[data-position="top"]:before{
- bottom: -0.65rem;
- right: calc(50% - 1.3rem + 0.7em);
- }
- /* Tooltip pointer for Bottom Position */
- .tooltip-wrapper[data-position="bottom"]:before{
- top: -0.65rem;
- right: calc(50% - 1.3rem + 0.7em);
- }
- /* Tooltip Content Block */
- .tooltip-wrapper .tooltip-content {
- position: relative;
- backface-visibility: hidden;
- z-index: 100;
- }
JavaScript
Here's the JavaScript file script that makes the tooltip functional and creates the elements tooltips.
- /**
- * Creating Tooltip Wrapper Element
- */
- const tooltipWrapper = document.createElement('div')
- tooltipWrapper.classList.add('tooltip-wrapper')
- tooltipWrapper.innerHTML = `<div class="tooltip-content"></div>`
- /**
- * Selecting all elements that has tooltip Attribute
- */
- const tooltipEls = document.querySelectorAll('[data-tooltip]')
- /**
- * Show Tootlip of the Element
- * @param {dom} el - selected comment
- * @param {dom} toolTipEl - cloned ToolTip Element
- */
- const showToolTip = (el, toolTipEl) =>{
- // Getting the Element Tooltip Element
- var _content = el.dataset.tooltip || "";
- // Getting the Element Tooltip Element Position
- var _pos = el.dataset.tooltipPosition || "right";
- // Getting the ViewPort Width
- var _vpWidth = window.outerWidth
- // Getting the ViewPort Height
- var _vpHeight = window.outerHeight
- // Setting up the Tooltip Content
- toolTipEl.querySelector('.tooltip-content').innerText = _content
- // Setting up the Tooltip Position Attribute
- toolTipEl.dataset.position = _pos
- // Getting the Element's Bounding Rectangle
- var rect = el.getBoundingClientRect()
- // Temporarily hide the tooltip
- toolTipEl.style.visibility = `hidden`
- // Append the Tooltip Element to the document body
- document.body.appendChild(toolTipEl)
- // Tooltip Height
- var tipHeight = toolTipEl.clientHeight
- // Tooltip Width
- var tipWidth = toolTipEl.clientWidth
- if(_pos == 'right'){
- // Setting Up the Tooltip Postion at the right side of the element
- toolTipEl.style.left = `calc(${rect.right}px + 1.3rem)`
- toolTipEl.style.top = `${(rect.top + (rect.height / 2)) - (tipHeight / 2)}px`
- }
- if(_pos == 'left'){
- // Setting Up the Tooltip Postion at the left side of the element
- toolTipEl.style.left = `calc(${rect.left - tipWidth}px - 1.3rem)`
- toolTipEl.style.top = `${(rect.top + (rect.height / 2)) - (tipHeight / 2)}px`
- }
- if(_pos == 'top'){
- // Setting Up the Tooltip Postion at the top side of the element
- toolTipEl.style.left = `${(rect.left + (rect.width / 2)) - (tipWidth / 2)}px`
- toolTipEl.style.top = `calc(${rect.top - tipHeight}px - 1.3rem)`
- }
- if(_pos == 'bottom'){
- // Setting Up the Tooltip Postion at the bottom side of the element
- toolTipEl.style.left = `${(rect.left + (rect.width / 2)) - (tipWidth / 2)}px`
- toolTipEl.style.top = `calc(${rect.bottom}px + 1.3rem)`
- }
- // Getting the Tooltip Element Bounding Rectangle
- var ttRect = toolTipEl.getBoundingClientRect()
- /**
- * Making the Tootltip Responsive
- */
- if((ttRect.left + ttRect.width) > _vpWidth || ttRect.left < 0 || (((ttRect.top + ttRect.height) > _vpHeight || ttRect.top < 0) && (_pos == "top" || _pos == "bottom"))){
- if((rect.top - ttRect.height) > 0 ){
- // Repositioning the Tooltip to the top of element becuase it overflows from the page viewport
- toolTipEl.dataset.position = `top`
- toolTipEl.style.left = `${(rect.left + (rect.width / 2)) - (tipWidth / 2)}px`
- toolTipEl.style.top = `calc(${rect.top - tipHeight}px - 1.3rem)`
- }else{
- // Repositioning the Tooltip to the bottom of element becuase it overflows from the page viewport
- toolTipEl.dataset.position = `bottom`
- toolTipEl.style.left = `${(rect.left + (rect.width / 2)) - (tipWidth / 2)}px`
- toolTipEl.style.top = `calc(${rect.bottom}px + 1.3rem)`
- }
- }
- toolTipEl.style.visibility = `visible`
- }
- /**
- * Closing the Tooltip
- * @param {dom} toolTipEl - tooltip element
- */
- const closeToolTip = (toolTipEl) =>{
- toolTipEl.remove()
- }
- tooltipEls.forEach(el =>{
- el.addEventListener('mouseenter', e=>{
- // Trigger tooltip element to show when the element is being hovered
- var toolTipEl = tooltipWrapper.cloneNode(true)
- showToolTip(el, toolTipEl)
- el.addEventListener('mouseout', e=>{
- closeToolTip(toolTipEl)
- })
- // Closing the tootlip if client press the 'Esc' (Escape) key
- document.body.addEventListener('keyup', e => {
- if(e.key == 'Escape' || e.code == 'Escape' || e.keyCode == 27 || e.which == 27)
- closeToolTip(toolTipEl)
- })
- // Closing the tootlip if the page is scrolled
- window.addEventListener('scroll', function(e) {
- closeToolTip(toolTipEl)
- }, true);
- // Closing the tootlip if the page is resized
- window.addEventListener('resize', function(e) {
- closeToolTip(toolTipEl)
- }, true);
- })
- })
Syntax
Here is the sample HTML syntax to implement the custom ToolTip to a certain element.
Sample Web Page
Here are the scripts that result in a simple web page that demonstrate the custom tooltip scripts that I provided above.
HTML
The following HTML script is known as index.html.
- <!DOCTYPE html>
- <html lang="en">
- <head>
- <meta charset="UTF-8">
- <meta http-equiv="X-UA-Compatible" content="IE=edge">
- <meta name="viewport" content="width=device-width, initial-scale=1.0">
- <link rel="preconnect" href="https://fonts.googleapis.com">
- <link rel="preconnect" href="https://fonts.gstatic.com" crossorigin>
- <link rel="stylesheet" href="https://fonts.googleapis.com/css2?family=Material+Symbols+Outlined:opsz,wght,FILL,GRAD@48,400,0,0" />
- <link rel="stylesheet" href="https://cdn.jsdelivr.net/npm/[email protected]/dist/css/bootstrap.min.css">
- <link rel="stylesheet" href="style.css">
- <script src="https://cdn.jsdelivr.net/npm/[email protected]/dist/js/bootstrap.bundle.min.js"></script>
- </head>
- <body>
- <div class="content-md-lg py-3">
- <div class="col-lg-8 col-md-10 col-sm-12 col-12 mx-auto">
- <hr style="margin:auto; width:25px" class="border-light opacity-100">
- </div>
- <!-- Sample Elements with Tooltips Wrapper -->
- <div class="col-lg-8 col-md-10 col-sm-12 col-12 mx-auto">
- <div class="row">
- <div class="col-lg-4 col-md-6 col-sm-12 col-12">
- </div>
- <div class="col-lg-4 col-md-6 col-sm-12 col-12">
- </div>
- <div class="col-lg-4 col-md-6 col-sm-12 col-12">
- </div>
- <div class="col-lg-4 col-md-6 col-sm-12 col-12">
- </div>
- <div class="col-lg-4 col-md-6 col-sm-12 col-12">
- </div>
- <div class="col-lg-4 col-md-6 col-sm-12 col-12">
- </div>
- <div class="col-lg-4 col-md-6 col-sm-12 col-12">
- </div>
- <div class="col-lg-4 col-md-6 col-sm-12 col-12">
- </div>
- <div class="col-lg-4 col-md-6 col-sm-12 col-12">
- </div>
- </div>
- </div>
- <!-- Sample Elements with Tooltips Wrapper -->
- </div>
- </body>
- </html>
CSS
The following CSS script is known as style.css.
- @import url('https://fonts.googleapis.com/css2?family=Exo+2:ital,wght@0,100;0,200;0,300;0,400;0,500;0,600;0,700;0,800;0,900;1,100;1,200;1,300;1,400;1,500;1,600;1,700;1,800;1,900&display=swap');
- *{
- box-sizing: border-box;
- font-family: 'Exo 2', sans-serif;
- }
- /**
- Page Design
- */
- body,
- html{
- height: 100%;
- width: 100%;
- margin: 0;
- padding: 0;
- overflow-x:hidden;
- }
- body{
- background-color: #282A3A;
- }
- .page-title{
- font-size: 2.5rem;
- font-weight: 500;
- color: #fff;
- letter-spacing: 3px;
- font-family: var(--secular-font);
- text-align: center;
- text-shadow: 0px 0px 3px #2020208c;
- }
- .border-dark-subtle{
- border-color: var(--border-dark-subtle) !important;
- }
- /* Sample Elements Design */
- .tootlip-sample-item {
- margin: 0.5em auto;
- width: 80%;
- padding: 0.5em 0.75em;
- background: #4a9de3;
- color: #fff;
- border-radius: 10px;
- box-shadow: 2px 2px 6px #9d9b9b;
- font-weight: 600;
- text-align: center;
- cursor: pointer;
- }
- /* Tooltip Wrapper */
- .tooltip-wrapper {
- position: absolute;
- background: #ffffff;
- padding: 0.35em 0.75em;
- border: 1px solid #e3e2e2;
- box-shadow: 0px 0px 3px #7e7e7e26;
- max-width: 300px;
- min-width: 50px;
- border-radius: 5px;
- z-index: 99;
- }
- /* Tooltip pointer */
- .tooltip-wrapper:before {
- content: "";
- position: absolute;
- width: 1.3rem;
- height: 1.3rem;
- z-index: 99;
- background: #fff;
- rotate: 45deg;
- }
- /* Tooltip pointer for Right Position */
- .tooltip-wrapper[data-position="right"]:before{
- left: -0.65rem;
- top: calc(50% - 1.3rem + 0.7em);
- }
- /* Tooltip pointer for Left Position */
- .tooltip-wrapper[data-position="left"]:before{
- right: -0.65rem;
- top: calc(50% - 1.3rem + 0.7em);
- }
- /* Tooltip pointer for Top Position */
- .tooltip-wrapper[data-position="top"]:before{
- bottom: -0.65rem;
- right: calc(50% - 1.3rem + 0.7em);
- }
- /* Tooltip pointer for Bottom Position */
- .tooltip-wrapper[data-position="bottom"]:before{
- top: -0.65rem;
- right: calc(50% - 1.3rem + 0.7em);
- }
- /* Tooltip Content Block */
- .tooltip-wrapper .tooltip-content {
- position: relative;
- backface-visibility: hidden;
- z-index: 100;
- }
JavaScript
The following JS script is known as script.js.
- /**
- * Creating Tooltip Wrapper Element
- */
- const tooltipWrapper = document.createElement('div')
- tooltipWrapper.classList.add('tooltip-wrapper')
- tooltipWrapper.innerHTML = `<div class="tooltip-content"></div>`
- /**
- * Selecting all elements that has tooltip Attribute
- */
- const tooltipEls = document.querySelectorAll('[data-tooltip]')
- /**
- * Show Tootlip of the Element
- * @param {dom} el - selected comment
- * @param {dom} toolTipEl - cloned ToolTip Element
- */
- const showToolTip = (el, toolTipEl) =>{
- // Getting the Element Tooltip Element
- var _content = el.dataset.tooltip || "";
- // Getting the Element Tooltip Element Position
- var _pos = el.dataset.tooltipPosition || "right";
- // Getting the ViewPort Width
- var _vpWidth = window.outerWidth
- // Getting the ViewPort Height
- var _vpHeight = window.outerHeight
- // Setting up the Tooltip Content
- toolTipEl.querySelector('.tooltip-content').innerText = _content
- // Setting up the Tooltip Position Attribute
- toolTipEl.dataset.position = _pos
- // Getting the Element's Bounding Rectangle
- var rect = el.getBoundingClientRect()
- // Temporarily hide the tooltip
- toolTipEl.style.visibility = `hidden`
- // Append the Tooltip Element to the document body
- document.body.appendChild(toolTipEl)
- // Tooltip Height
- var tipHeight = toolTipEl.clientHeight
- // Tooltip Width
- var tipWidth = toolTipEl.clientWidth
- if(_pos == 'right'){
- // Setting Up the Tooltip Postion at the right side of the element
- toolTipEl.style.left = `calc(${rect.right}px + 1.3rem)`
- toolTipEl.style.top = `${(rect.top + (rect.height / 2)) - (tipHeight / 2)}px`
- }
- if(_pos == 'left'){
- // Setting Up the Tooltip Postion at the left side of the element
- toolTipEl.style.left = `calc(${rect.left - tipWidth}px - 1.3rem)`
- toolTipEl.style.top = `${(rect.top + (rect.height / 2)) - (tipHeight / 2)}px`
- }
- if(_pos == 'top'){
- // Setting Up the Tooltip Postion at the top side of the element
- toolTipEl.style.left = `${(rect.left + (rect.width / 2)) - (tipWidth / 2)}px`
- toolTipEl.style.top = `calc(${rect.top - tipHeight}px - 1.3rem)`
- }
- if(_pos == 'bottom'){
- // Setting Up the Tooltip Postion at the bottom side of the element
- toolTipEl.style.left = `${(rect.left + (rect.width / 2)) - (tipWidth / 2)}px`
- toolTipEl.style.top = `calc(${rect.bottom}px + 1.3rem)`
- }
- // Getting the Tooltip Element Bounding Rectangle
- var ttRect = toolTipEl.getBoundingClientRect()
- /**
- * Making the Tootltip Responsive
- */
- if((ttRect.left + ttRect.width) > _vpWidth || ttRect.left < 0 || (((ttRect.top + ttRect.height) > _vpHeight || ttRect.top < 0) && (_pos == "top" || _pos == "bottom"))){
- if((rect.top - ttRect.height) > 0 ){
- // Repositioning the Tooltip to the top of element becuase it overflows from the page viewport
- toolTipEl.dataset.position = `top`
- toolTipEl.style.left = `${(rect.left + (rect.width / 2)) - (tipWidth / 2)}px`
- toolTipEl.style.top = `calc(${rect.top - tipHeight}px - 1.3rem)`
- }else{
- // Repositioning the Tooltip to the bottom of element becuase it overflows from the page viewport
- toolTipEl.dataset.position = `bottom`
- toolTipEl.style.left = `${(rect.left + (rect.width / 2)) - (tipWidth / 2)}px`
- toolTipEl.style.top = `calc(${rect.bottom}px + 1.3rem)`
- }
- }
- toolTipEl.style.visibility = `visible`
- }
- /**
- * Closing the Tooltip
- * @param {dom} toolTipEl - tooltip element
- */
- const closeToolTip = (toolTipEl) =>{
- toolTipEl.remove()
- }
- tooltipEls.forEach(el =>{
- el.addEventListener('mouseenter', e=>{
- // Trigger tooltip element to show when the element is being hovered
- var toolTipEl = tooltipWrapper.cloneNode(true)
- showToolTip(el, toolTipEl)
- el.addEventListener('mouseout', e=>{
- closeToolTip(toolTipEl)
- })
- // Closing the tootlip if client press the 'Esc' (Escape) key
- document.body.addEventListener('keyup', e => {
- if(e.key == 'Escape' || e.code == 'Escape' || e.keyCode == 27 || e.which == 27)
- closeToolTip(toolTipEl)
- })
- // Closing the tootlip if the page is scrolled
- window.addEventListener('scroll', function(e) {
- closeToolTip(toolTipEl)
- }, true);
- // Closing the tootlip if the page is resized
- window.addEventListener('resize', function(e) {
- closeToolTip(toolTipEl)
- }, true);
- })
- })
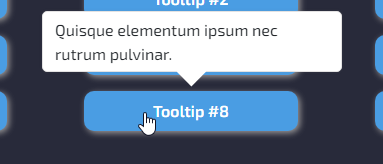
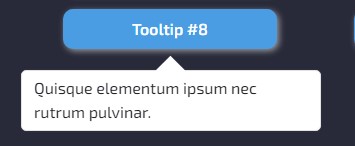
Snapshots
Here are the snapshots of the overall result of the sample web page scripts that I provided above.
Top Position
Bottom Position
Left Position

Right Position

There you go! I have provided also the complete source code zip file of the sample web page script I provided above on this website. Feel free to download and modify it to do some experiments. To download it, kindly click the download button located below this tutorial's content.
That's it! I hope this Creating a Responsive Custom ToolTips using HTML, CSS, and JavaScript Tutorial will help you with what you are looking for and will be useful for your current and future web application projects.
Explore more on this website for more Tutorials and Free Source Codes.
Happy Coding =)