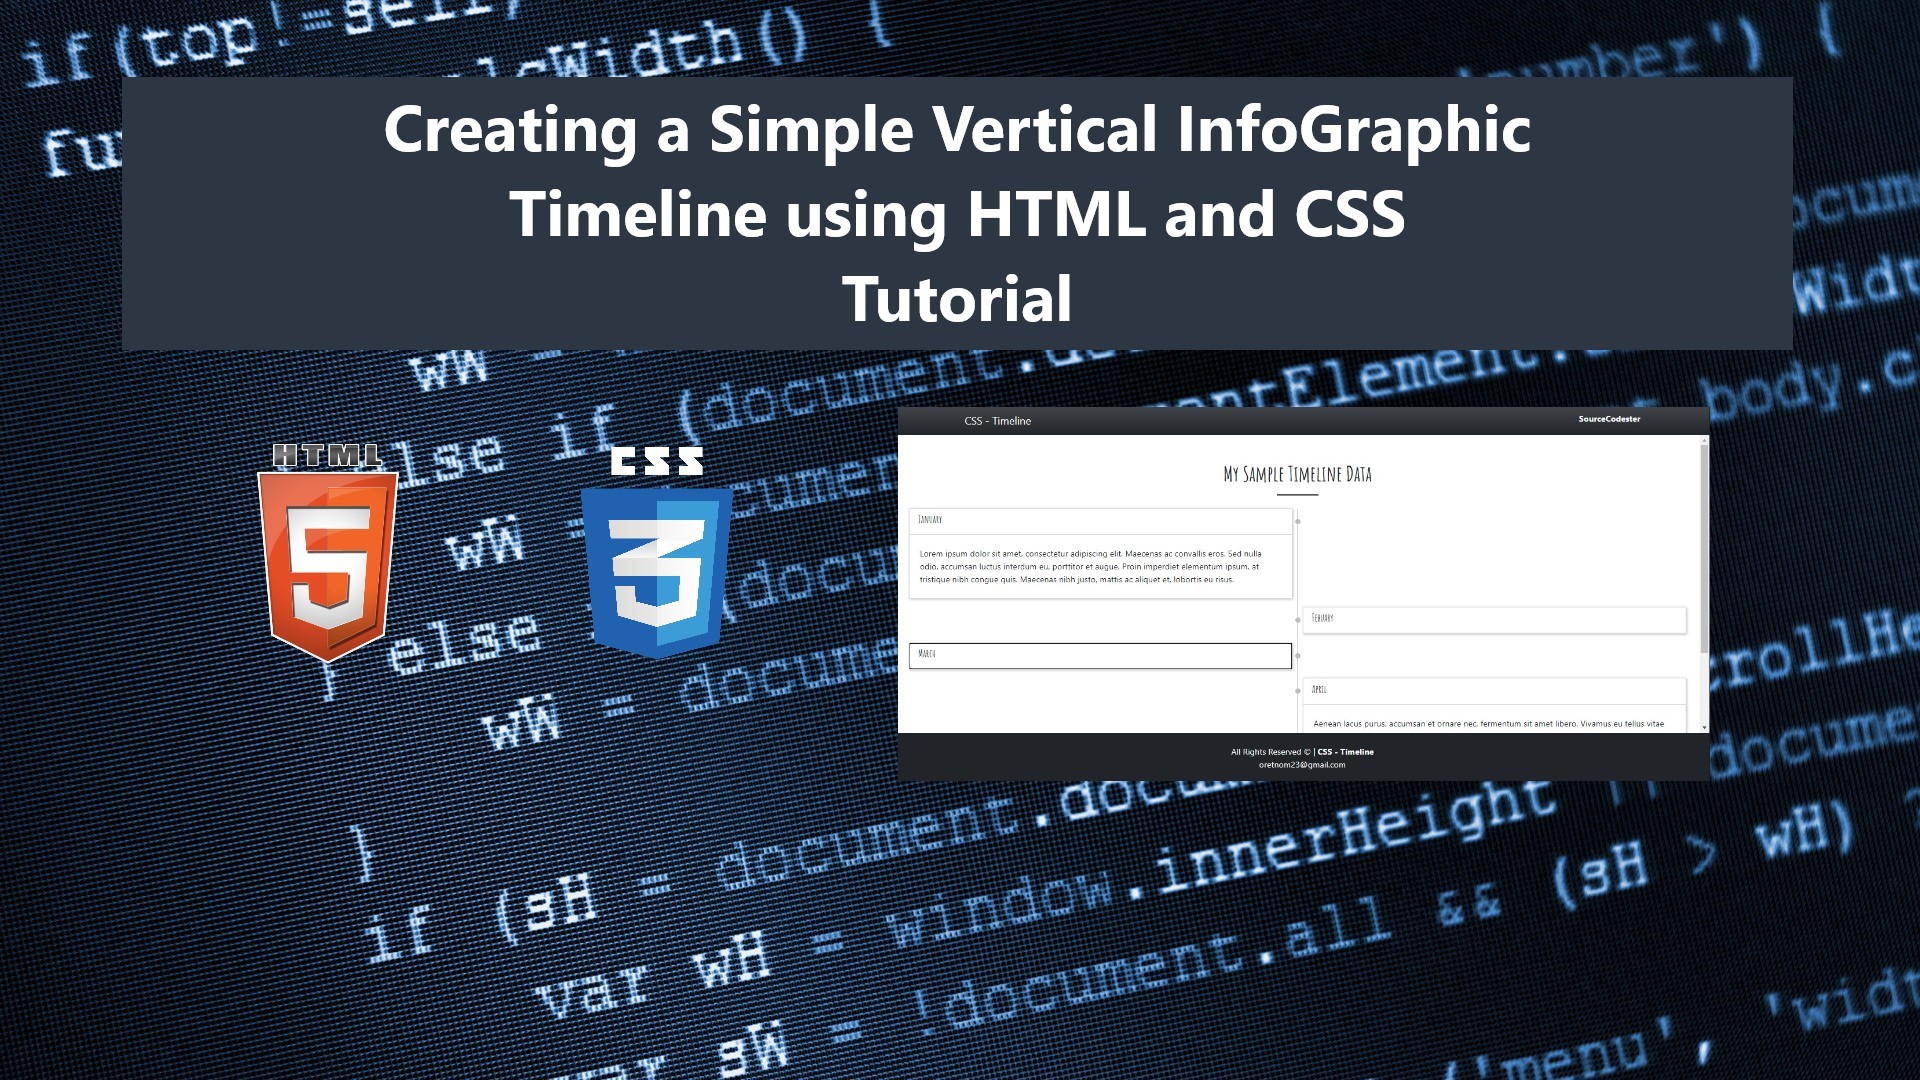
Creating a Simple Vertical Infographic Timeline using HTML and CSS Tutorial
In this tutorial, you will learn to create a Simple Vertical Infographic Timeline for your site using HTML and Pure CSS. The tutorial aims to provide the students, self-learners, and new programmers with a reference to guide them in creating their own timeline design using only CSS. Here, snippets and source code scripts for creating a vertical timeline are provided. The complete source code zip file is also provided and is free to download.
What is Infographic Timeline?
The Infographic Timeline is a visually represented information in the context of time progression. It is a highly common structure, particularly in presentations. It is used to list information to draw attention to certain facts by connecting them to a specific period of time while fulfilling the need for the facts to be described in detail.
How to create a Vertical Infographic Timeline using HTML and CSS?
We can create a Vertical Infographic Timeline using HTML and CSS. Here are the following HTML elements and CSS pseudo-element that are useful in creating the Timeline design.
- HTML Details <details></details> Element
- HTML Summary <summary></summary> Element
- HTML Unordered List <ul></ul> Element
- HTML List Item <li></li> Element
- CSS ::before pseudo-element
- CSS ::after pseudo-element
Using these HTML and CSS elements/pseudo-elements, we can create the design for timeline items containers, vertical lines, custom bullets, and more.
Example
Here are the snippets and scripts that demonstrate the creation of a simple vertical timeline.
Interface
The below script is an HTML file script that contains the timeline page interface elements. The script will output the page with a top navigation bar, footer, and timeline items.
index.html
- <!DOCTYPE html>
- <html lang="en">
- <head>
- <meta charset="UTF-8">
- <meta http-equiv="X-UA-Compatible" content="IE=edge">
- <meta name="viewport" content="width=device-width, initial-scale=1.0">
- <link rel="preconnect" href="https://fonts.googleapis.com">
- <link rel="preconnect" href="https://fonts.gstatic.com" crossorigin>
- <link href="https://fonts.googleapis.com/css2?family=Amatic+SC:wght@700&display=swap" rel="stylesheet">
- <link rel="stylesheet" href="https://cdn.jsdelivr.net/npm/[email protected]/dist/css/bootstrap.min.css">
- <link rel="stylesheet" href="assets/css/styles.css">
- <script src="https://cdn.jsdelivr.net/npm/[email protected]/dist/js/bootstrap.bundle.min.js"></script>
- </head>
- <body>
- <main>
- <nav class="navbar navbar-expand-lg navbar-dark bg-gradient bg-dark">
- <div class="container">
- </div>
- </nav>
- <div id="main-wrapper" class="py-5 px-3">
- <div class="container-fluid-md">
- <hr class="border-3 border-dark mx-auto opacity-100" style="width:80px">
- <div id="timeline-container" class="mt-4">
- <ul id="timeline-list">
- <li>
- <div class="timeline-item-container">
- <details open>
- </details>
- </div>
- </li>
- <li>
- <div class="timeline-item-container">
- <details>
- </details>
- </div>
- </li>
- <li>
- <div class="timeline-item-container">
- <details>
- </details>
- </div>
- </li>
- <li>
- <div class="timeline-item-container">
- <details open>
- </details>
- </div>
- </li>
- <li>
- <div class="timeline-item-container">
- <details>
- </details>
- </div>
- </li>
- </ul>
- </div>
- </div>
- </div>
- <footer class="shadow-top py-4 col-auto bg-dark text-light">
- <div class="">
- <div class="text-center">
- </div>
- <div class="text-center">
- </div>
- </div>
- </footer>
- </main>
- </body>
- </html>
Without CSS script for the Timeline design, the page will look like the following image by default:
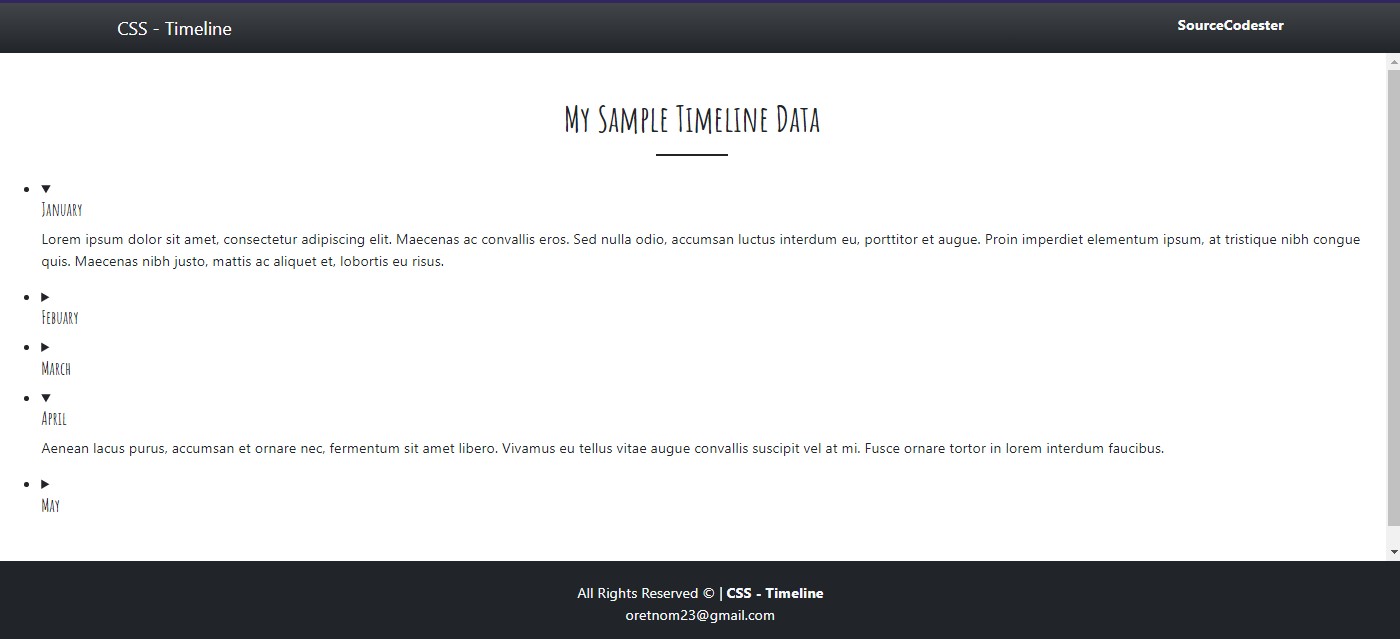
Unordered List and Items Design
Next, we will customize the design of the unordered list and list items.
- /** Timeline Design **/
- #timeline-container{
- width:100%;
- position: relative;
- display: flex;
- justify-content: center;
- }
- #timeline-list{
- margin-left: 0px;
- padding-left: 0px;
- width: 100%;
- }
- /** Removing List bullets */
- #timeline-list li {
- list-style: none;
- position: relative;
- }
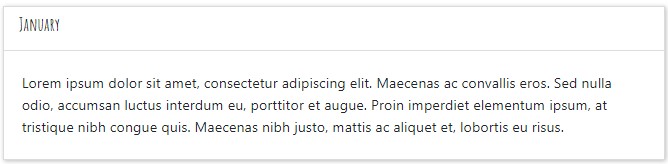
Customizing the Items Panel or Card
Next, customize the design of the list items panel or the container that holds the timeline items.
- /** Styling the list Card/Panel Container */
- #timeline-list li .timeline-item-container{
- padding-bottom: 1em;
- padding-left: 0px;
- }
- #timeline-list details {
- width: calc(50% - 20px);
- border: 1px solid #dbdbdb;
- box-shadow: 1px 1px 5px #bbb;
- position: relative;
- background:#fff;
- overflow: hidden;
- margin: 0 10px;
- }
- #timeline-list summary{
- padding: .5em 1em;
- list-style-type: none;
- border-bottom: 1px solid #dddddd;
- }
- #timeline-list details p{
- padding: .5em 1em;
- margin: 1em .2em ;
- }
- /** changing the even items to right-to-left direction */
- #timeline-list li:nth-child(even){
- direction: rtl;
- }
The below image is the output of the customized item panel.
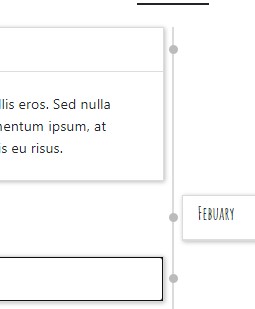
Creating the Timeline Vertical line and custom bullets
Next, let's create the vertical line and custom bullets of the timeline using the ::before and ::after pseudo-elements.
- /** Creating a Vertical line and custom bullets for each item */
- #timeline-list li:nth-child(odd):before{
- content: "";
- position: absolute;
- height: 100%;
- width: calc(50% + 1.5px);
- border-right: 3px solid #dbdbdb;
- }
- #timeline-list li:nth-child(even):before{
- content: "";
- position: absolute;
- height: 100%;
- width: calc(50% + 1.5px);
- border-right: 3px solid #dbdbdb;
- right: calc(50% - 1.5px);
- }
- #timeline-list li:after {
- content: "";
- position: absolute;
- height: 10px;
- width: 10px;
- border-radius: 50% 50%;
- background-color: #bbbbbb;
- left: calc(50% - 4.5px);
- top: 20px;
- }
Changing the Timeline Layout in Mobile View
Lastly, let's create the script that will change the layout of the time for mobile devices.
- /* If Device is Mobile */
- @media (max-width:480px){
- #timeline-list li:nth-child(even){
- direction: ltr;
- }
- #timeline-list details{
- width:calc(100% - 20px);
- }
- #timeline-list li:before
- {
- width: 0 !important;
- right: 100% !important;
- }
- #timeline-list li:after {
- left: -6.5px !important;
- }
- }
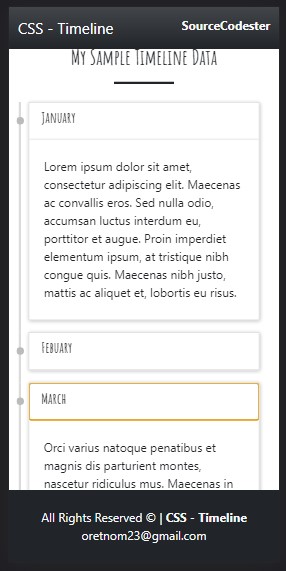
That's it! The timeline will look like the following image after we include the timeline CSS scripts for the design.
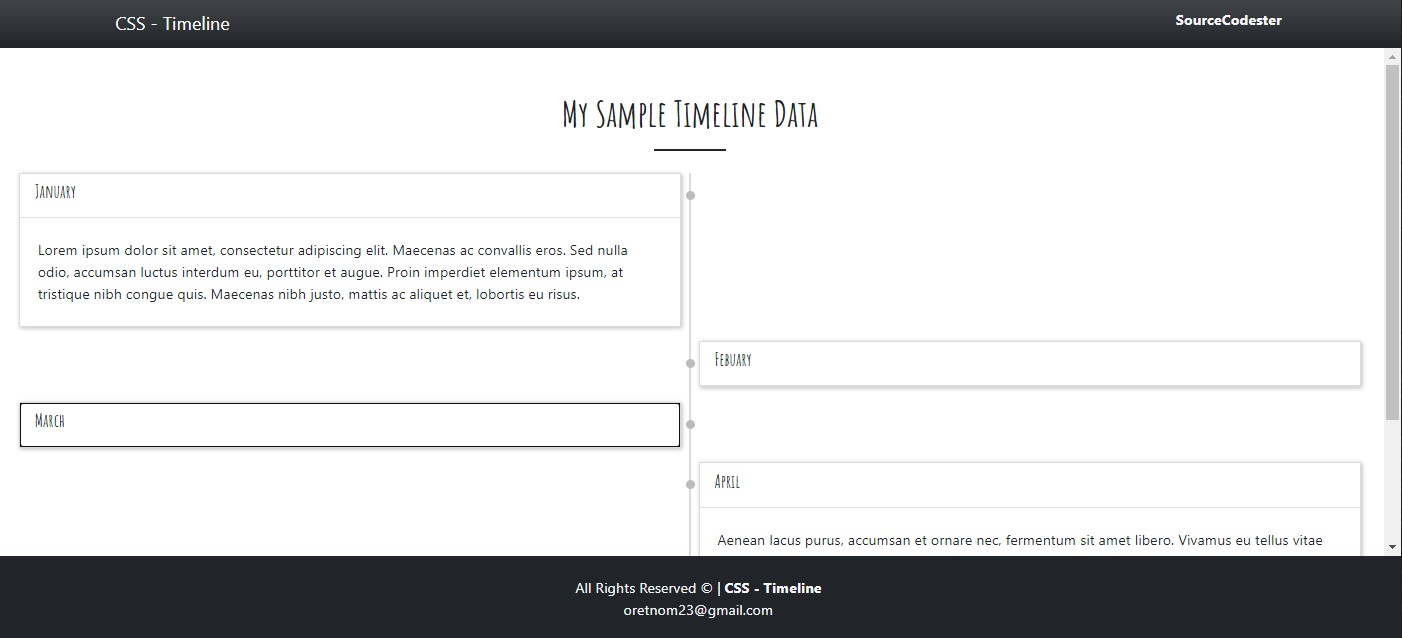
I have also provided the complete source code that I created for this tutorial on this website and it is free to download. You can download it by clicking the Download button located below this tutorial's content.
There you go! I hope this Creating a Simple Vertical Infographic Timeline using HTML and CSS Tutorial will help you with what you are looking for and will be useful for current and future web application projects.
Explore more on this website for more Tutorials and Free Source Codes.