Form Wizard with Progress Bar in Admin Bootstrap
Submitted by azalea zenith on Wednesday, October 12, 2016 - 09:27.
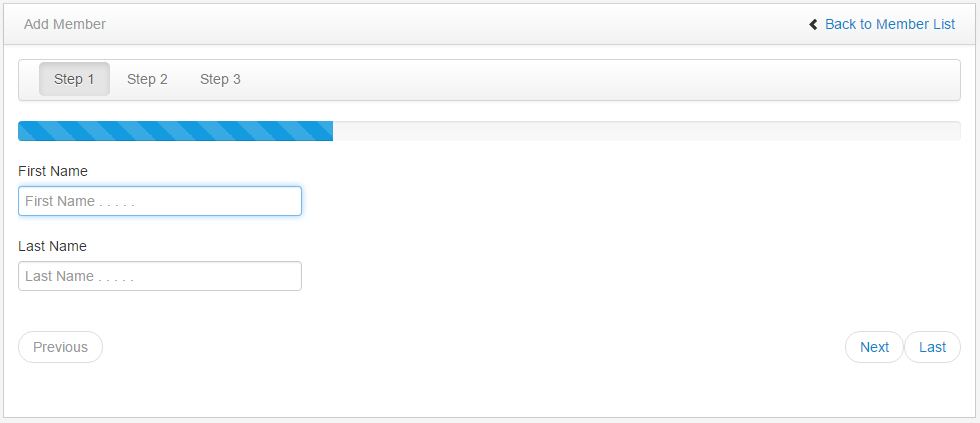
In this tutorial, we are going to learn how to use Form Wizard with Progress Bar in Admin Bootstrap. Using this kind of form, you can specify which information must be first to fill up to the user if we used as a registration form for them. This wizard form separated into a group. It has three steps to finish the wizard form. The user can navigate the form by using Previous, Next, and Last. It has a progress bar when the user finished to fill up the first step then the progress bar is going to fill in until it finished.
First, we are going to need the navbar layout for the wizard where it has three buttons such as Step 1, Step 2, and Step 3 controls.
And, let's create the Step 2 process in the Wizard Form which contains another field where the user continues to fill up the information to registered.
For the progress bar, copy and paste this source code.
After creating navbar for the buttons above, let's create in their corresponding form field where the user enters their information in every step.
This source code below, corresponding form for the Step 1 process in the Wizard Form.
Then, the Step 3.
Lastly, this source code below contains the other controls such as Previous, Next, and Last. Using these controls, the user can navigate easily in the Wizard Form.
For the full source code, kindly download the source code below. Enjoy coding. Thank you.