TUTORIAL NO 12
PACMAN Animation Programming part1
In this tutorial you will learn:
1.Game Programming
2.Swing Animations
3.Event handling
4.JAVA awt
5.JAVA swing
6.KeyListeners
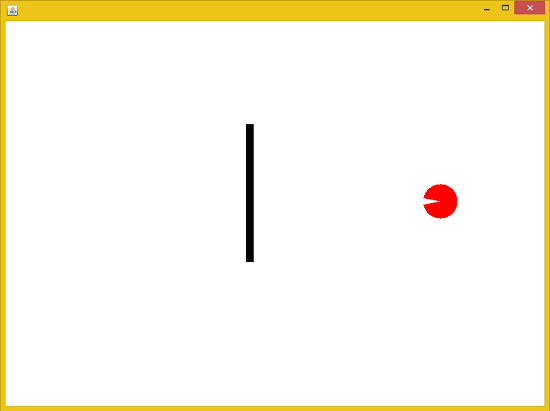
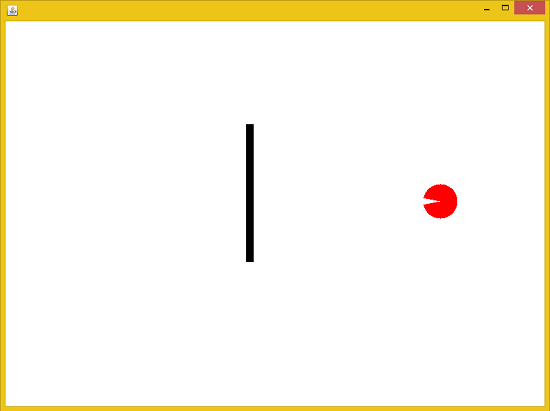
Today I am going to teach you how to make a simple PACMAN mockup. In this tutorial we will only set up the pacman character and will provide functionality to the character using arrow key. After that we will set up the pacman mouth open close animation. Then we will setup it’s collision with a wall. Later on you can use this mockup to make complete game.
In this tutorial we will be working with swing animations and we will draw the pacman using the arc function.
Basic step:
Download and install ECLIPSE and set up a JAVA PROJECT. Then create a new class and name it PacMan. Then follow the steps
1.IMPORT STATEMENTS
First of all write these import statements in your .java file
import java.awt.*;
import javax.swing.*;
import java.awt.event.KeyEvent;
import java.awt.event.KeyListener;
We require event import for key press, awt and swing imports for visual design and animation. We will be using separate class for JPanel and a public class for JFrame in which we will add the panel in the frame. First thing is setting up the panel and after that we will setup a class in which we will setup the frame. Then we will do composition i.e make and object of the panel class and add it to frame.
2.SETTING UP THE PACPANEL CLASS
class PacPanel
extends JPanel {
static int s_angle = 45, e_angle = 270; // starting and ending angle
static int x = 10, y = 150, flag = 1;
static String direction
= "right";
Here first we make references for starting angle, ending angle of the pacman. After that we make the variables for x and y coordinates, graphics2D reference for animation drawing and a rectangle which will serve as a wall. Note that all the variable we declare here are static because we need to access them from our frame class in which we will implement the keylistener.
public void paintComponent
(Graphics g
) { super.paintComponent(g);
g2d.
setColor(Color.
BLACK); g2d.draw(r);
g2d.fill(r); // black color rectangle
detectCollision(); // checking if the pacman collided with the wall or boundary
g2d.fillArc(x, y, 50, 50, s_angle, e_angle);
try {
repaint(14);
}
In the paintComponend we first type cast the graphics reference to 2D for swing animation. Then we set the color to black because we are going to draw a wall with black color. After that we will draw the wall by drawing a rectangle and fill it with black color. Now we set the color to red because we want the pacman to be of red color. Then we call a detectCollision function which will detect the pacman’s collision with the boundary of the frame as well as with the wall. Then we will draw the pacman character using the arc function and passing the starting and ending angles to it. Then we sleep our animation for few milliseconds to slow down the speed of our animations like mouth open close of the pacman character.
void detectCollision(){
if (direction.equals("up")) {
if (y <= 10 | r.intersects(x, y, 50, 50) & y >= 349) { //checking collision in upward direction
direction = "down"; // changing direction if collision happens
s_angle = 225;
e_angle = -270;
flag = 1;
} else {
UP(); //changing pacman face downwards
y--; // moving upwards
}
}//end up
In the detectCollision function we will write have to detect all the possible collisions pacman can suffer. So we first of all we will detect when the face is up. If the string variable is set to up then we first continue to check whether pacman hits the wall or not. If it does we simply change the direction of the pacman to down. In this way it will change its direction by 180 degrees. But after changing the direction we have to change the animation angles as well so we set the starting and ending angles. ( Angles can be calculated manually ). Then if that is not the case then we simply set the animation face upwards by calling the up function that we will define later on.
if (direction.equals("down")) {
if (y >= PacMan.jf.getHeight() - 100 | r.intersects(x, y, 50, 50)& y < 200) { //checking collision in downwards
direction = "up"; // changing direction if collision happens
PacPanel.s_angle = 45;
PacPanel.e_angle = -270;
flag = 1;
} else {
down(); //changing pacman face downwards
y++; // moving down
}
} //end down
}
Now we check if the pacman’s face is downwards or not. If it is then we first check the collision with the wall and after that with the boundary of the frame. For collision with the wall we simply use the .intersects function for rectangles. If the pacman hit the wall we simply set our string variable to up and set the angles accordingly. Otherwise what we do is simply calling the down function which we will define later on.
if (direction.equals("right")) {
if (x == PacMan.jf.getWidth() - 70 | (r.intersects(x, y, 50, 50))& x < 350) { //checking collision in right direction
direction = "left";// changing direction if collision happens
s_angle = 135;
e_angle = -270;
flag = 1;
} else {
right(); //changing pacman face rightwards
x++; // moving right
}
} //end right
Now we check the collision of the pacman in the right direction. First checking the collision with the wall using the intersects function and then setting the direction variable to left after that set the angles for animation to redraw the pacman with new angles. Otherwise we call the right function which will let the pacman move in the right direction.
if (direction.equals("left")) {
if (x <= 10 | r.intersects(x, y, 50, 50) & x > 350 & y > 100& y < 350) { //checking collision in left direction
direction = "right"; // changing direction if collision happens
s_angle = 45;
e_angle = 270;
flag = 1;
} else {
left(); //changing pacman face leftwards
x--; // moving left
}
} //end left
} // end detectCoillision
Now we check for the left collision. Like all other conditions we simply check for the left collisions with the wall if its true then set the angles for right face otherwise we keep moving left using the left function. Now our collision detection function is complete
We will continue the program in the next tutorial.
OUTPUT:


