Step-by-Step Installing JCreator and Connecting this Java Software to MS Access Database with Java GUI Login Tutorial
Submitted by donbermoy on Tuesday, April 29, 2014 - 14:39.
This is my own version of how to connect Java to MS Access database with a Login Tutorial. Because for now I will make tutorials for Java because my Facebook friends wanted me to have a tutorial about this programming language.
Software to be used: JCreator LE 4.50 or NetBeans but I preferred JCreator, JDK 7 Download here, and Microsoft Access software.
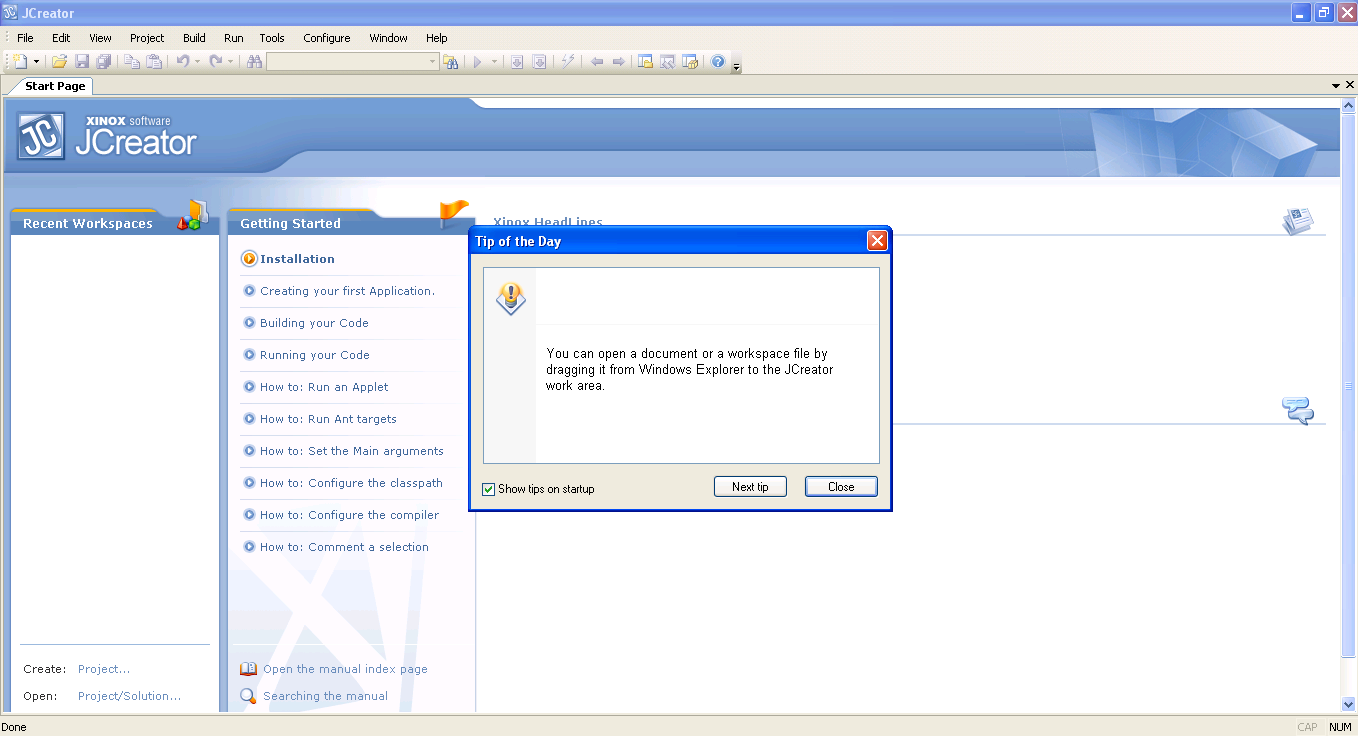
1. Now, after installing all of these requirements, you will see the User Interface of JCreator like the image below.
 2. Next, Go to File Menu, Click New, Choose File and Click it.
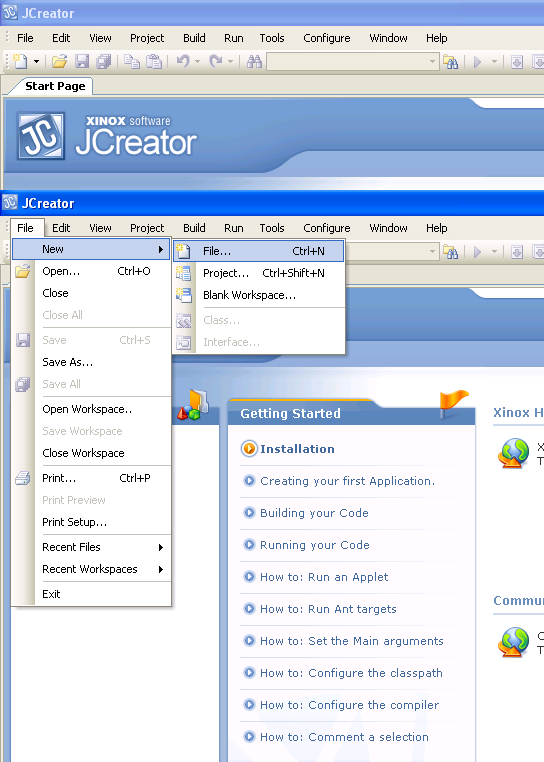 3. Now you will see the file wizard. Go to Java Classes, Click Java Class, and click Next.
 4. After clicking Next, create the filename "Login". Anyway you can change the filename of your project. Note: filename and class name must be the same text and letter case. Then click Finish.
 5. Now, delete the contents of your Login.java. Then copy/paste this code below.
Note: After putting the code, download the images below for the Login Button.
5. Now, delete the contents of your Login.java. Then copy/paste this code below.
Note: After putting the code, download the images below for the Login Button.

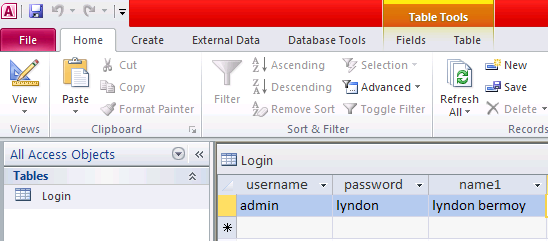
 6. Now, we will create next the Database and we will use MS Access. Go to any version of Microsoft Access higher or equal to 2003 version. Create a the file name of sample.mdb. mdb extension files are 2003 version of MS Access. Create this tables and entities.

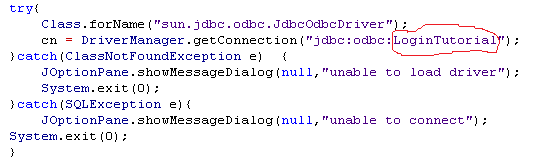
 7. Now, you will see the last text in our Driver Manager connection with this code below. Copy the text that I highlighted.
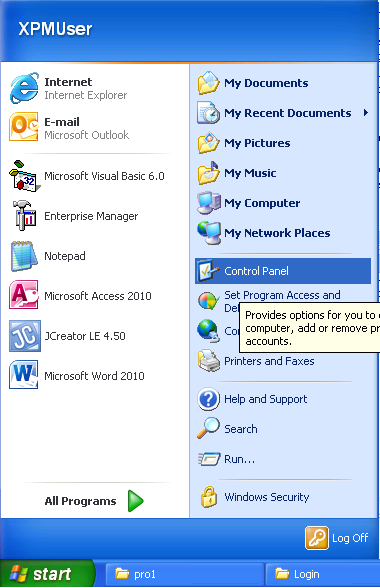
 8. Now, go to Start, then Click Control Panel. JCreator is also compatible to Windows 7 so no need to worry. I'm using Windows XP here. If you are using Windows 7 just find the Control Panel. I know you knew where it is :)
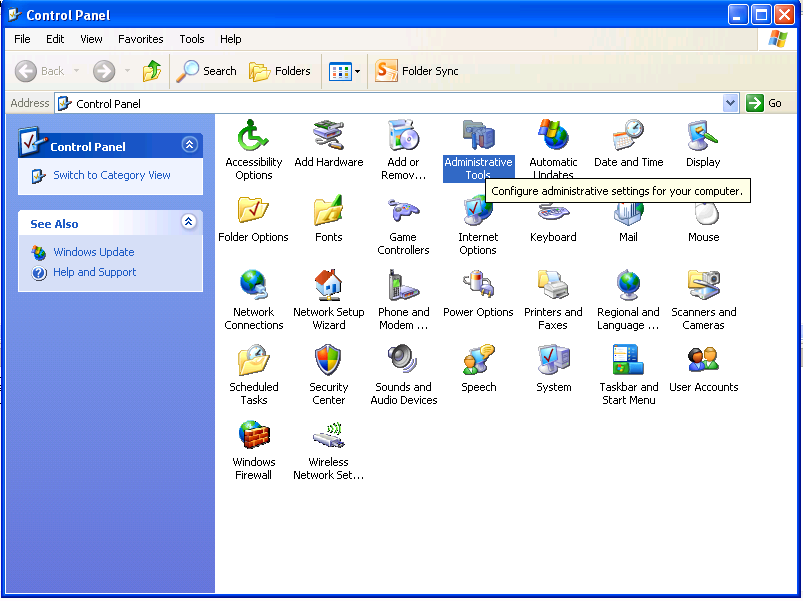
 9. Click the Administrative Tools.
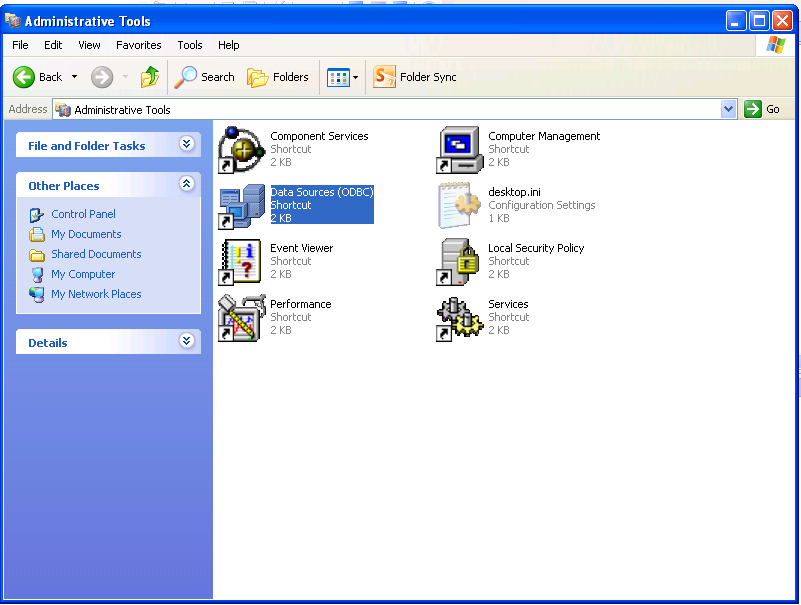
 10. Click the Data Sources (ODBC).
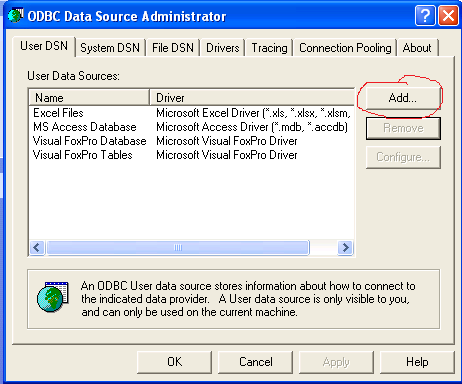
 11. In the ODBC Data Source Administrator, click the Add button.
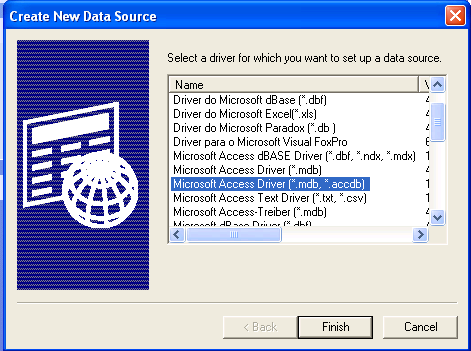
 12. Find Microsoft Access Driver (.mdb,.accdb) and then click Finish.
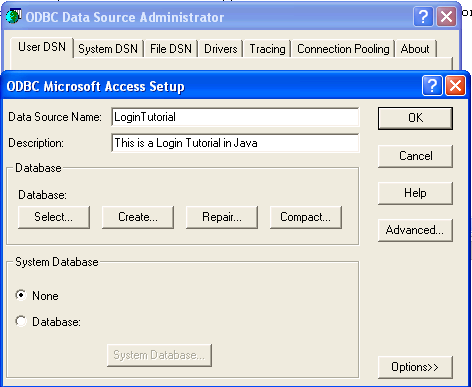
 13. In the Data Source Name, put LoginTutorial. This "LoginTutorial" was I told to be highlighted as this is the connection string of our program written in the code. Put also any description, and click Select button in the database tab.
 14. Locate the directory and Find the folder of your program if the database is in a folder. Just only click the folder or directory and it will come out in the database area. Then click Ok button.
15. Now, build the program by clicking the Build button. If there is no error, then click the Run Button!
14. Locate the directory and Find the folder of your program if the database is in a folder. Just only click the folder or directory and it will come out in the database area. Then click Ok button.
15. Now, build the program by clicking the Build button. If there is no error, then click the Run Button!
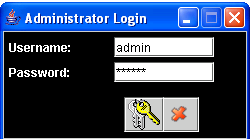
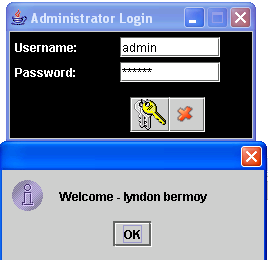
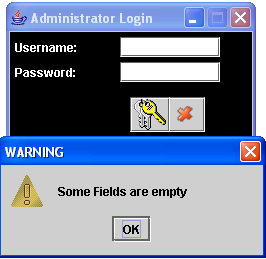
 You will see the following output:
 For more inquiries and need programmer for your thesis systems in any kind of programming languages, just contact my number below.
Best Regards,
Engr. Lyndon Bermoy
IT Instructor/System Developer/Android Developer/Freelance Programmer
Mobile: 09488225971
Landline: 826-9296
E-mail:[email protected]
Add and Follow me on Facebook: https://www.facebook.com/donzzsky
Visit and like my page on Facebook at: https://www.facebook.com/BermzISware
For more inquiries and need programmer for your thesis systems in any kind of programming languages, just contact my number below.
Best Regards,
Engr. Lyndon Bermoy
IT Instructor/System Developer/Android Developer/Freelance Programmer
Mobile: 09488225971
Landline: 826-9296
E-mail:[email protected]
Add and Follow me on Facebook: https://www.facebook.com/donzzsky
Visit and like my page on Facebook at: https://www.facebook.com/BermzISware
2. Next, Go to File Menu, Click New, Choose File and Click it.
3. Now you will see the file wizard. Go to Java Classes, Click Java Class, and click Next.
4. After clicking Next, create the filename "Login". Anyway you can change the filename of your project. Note: filename and class name must be the same text and letter case. Then click Finish.
5. Now, delete the contents of your Login.java. Then copy/paste this code below.
- import javax.swing.*;
- import java.awt.*;
- import java.awt.event.*;
- import java.sql.*;
- setLogin();
- }
- Connection cn;
- Statement st;
- ResultSet rs;
- public int cnt;
- String dialogmessage;
- String dialogs;
- public static void setLogin(){
- Login p1= new Login();
- p1.setSize(250,140);
- p1.setLocation(300,300);
- p1.setVisible(true);
- p1.setResizable(false);
- }
- public Login() {
- super("Administrator Login");
- pane.setLayout(null);
- pane.add(lbluser);
- lbluser.setBounds(5,5,100,20);
- pane.add(txtuser);
- txtuser.setBounds(110,5,100,20);
- pane.add(lblpass);
- lblpass.setBounds(5,30,100,20);
- pane.add(txtpass);
- txtpass.setBounds(110,30,100,20);
- pane.add(btnok);
- btnok.setBounds(120,65,40,35);
- btnok.addActionListener(this);
- pane.add(btnclose);
- btnclose.setBounds(155,65,40,35);
- btnclose.addActionListener(this);
- btnok.setToolTipText("Log-in");
- btnclose.setToolTipText("Exit");
- setContentPane(pane);
- try{
- Class.forName("sun.jdbc.odbc.JdbcOdbcDriver");
- }
- }
- if(source==btnok)
- {
- try{
- if((str1.length()==0 || str2.length()==0)){
- }
- else{
- st=cn.createStatement();
- rs=st.executeQuery("SELECT * from Login Where username like'" +txtuser.getText() + "'AND password='"+txtpass.getText()+"'");
- while(rs.next()){
- loginname=rs.getString("Username");
- loginpass=rs.getString("Password");
- loginname1=rs.getString("name1");
- }
- if((loginname.equalsIgnoreCase(txtuser.getText()))&&(loginpass.equalsIgnoreCase(txtpass.getText())))
- {
- dialogmessage = "Welcome - " +loginname1;
- txtuser.setText("");
- txtpass.setText("");
- dispose();
- }
- else
- {
- JOptionPane.showMessageDialog(null, "INVALID ID OR PASSWORD!","WARNING!!",JOptionPane.WARNING_MESSAGE);
- cnt=cnt+1;
- txtuser.setText("");
- txtpass.setText("");
- }
- if(cnt==3){
- frame.dispose();
- }
- }
- }
- }
- else
- {
- }
- if(source==btnclose){
- dispose();
- }
- }
- }
6. Now, we will create next the Database and we will use MS Access. Go to any version of Microsoft Access higher or equal to 2003 version. Create a the file name of sample.mdb. mdb extension files are 2003 version of MS Access. Create this tables and entities.
7. Now, you will see the last text in our Driver Manager connection with this code below. Copy the text that I highlighted.
8. Now, go to Start, then Click Control Panel. JCreator is also compatible to Windows 7 so no need to worry. I'm using Windows XP here. If you are using Windows 7 just find the Control Panel. I know you knew where it is :)
9. Click the Administrative Tools.
10. Click the Data Sources (ODBC).
11. In the ODBC Data Source Administrator, click the Add button.
12. Find Microsoft Access Driver (.mdb,.accdb) and then click Finish.
13. In the Data Source Name, put LoginTutorial. This "LoginTutorial" was I told to be highlighted as this is the connection string of our program written in the code. Put also any description, and click Select button in the database tab.
14. Locate the directory and Find the folder of your program if the database is in a folder. Just only click the folder or directory and it will come out in the database area. Then click Ok button.
15. Now, build the program by clicking the Build button. If there is no error, then click the Run Button!
You will see the following output:
For more inquiries and need programmer for your thesis systems in any kind of programming languages, just contact my number below.
Best Regards,
Engr. Lyndon Bermoy
IT Instructor/System Developer/Android Developer/Freelance Programmer
Mobile: 09488225971
Landline: 826-9296
E-mail:[email protected]
Add and Follow me on Facebook: https://www.facebook.com/donzzsky
Visit and like my page on Facebook at: https://www.facebook.com/BermzISware