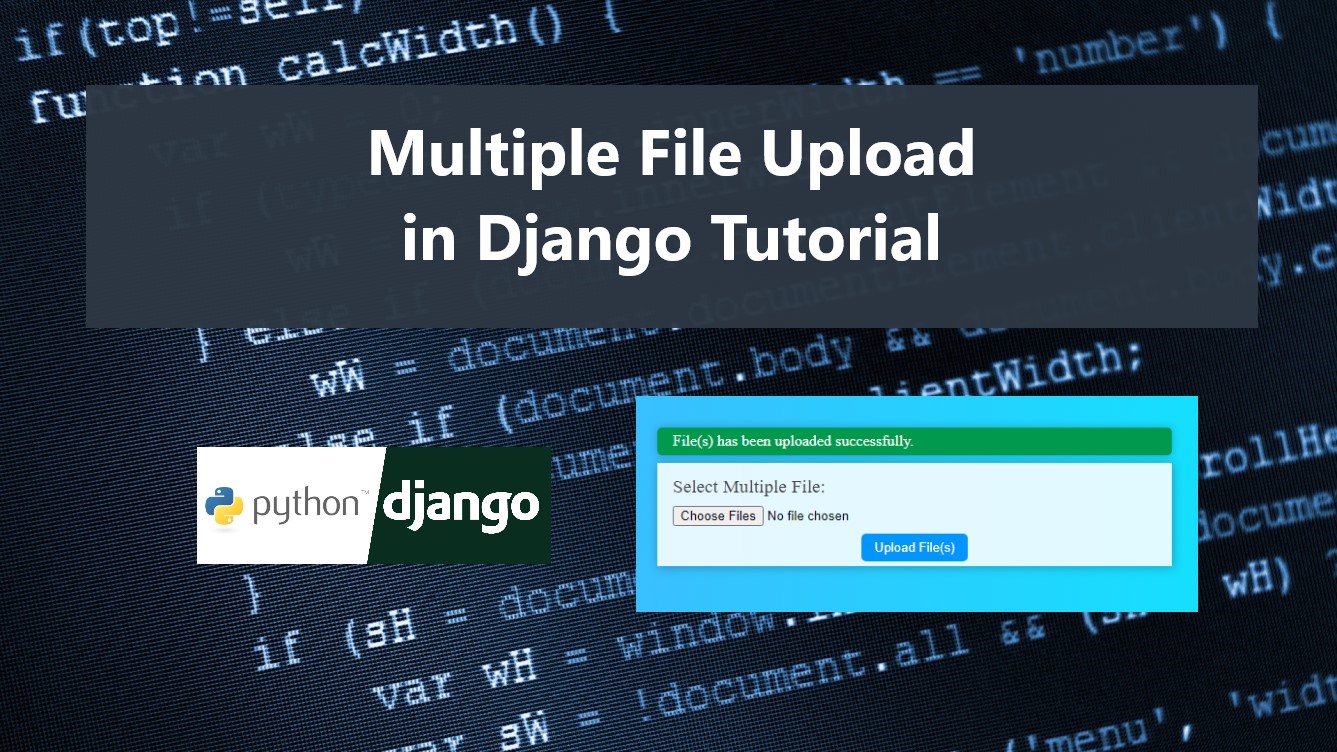
In this tutorial, you can learn to Iterate Request Files and Upload Multiple Files at once using Django in Python. This tutorial aims to provide students and beginners with a reference for learning to develop a dynamic website using Django. Here, I will be giving some steps for creating a simple web application that results in an App that allows users to upload multiple files at once.
Getting Started
Before we start the coding part, please download and install Python and Django on your local machine first.
Creating a Simple Django Project
Create a Django Project
Open your terminal or command prompt and run the following:
django-admin startproject multiplefilesubmit
The provided script provided above creates a new Django project which creates a new source code folder on the current directory. The project directory contains the default files of a Django Project.
Creating an App
Next, execute the following script on your terminal or command prompt. It will create the app in your Django Project containing the default files for the Django App.
python manage.py startapp sampleApp
Creating the App Routing File
Next on the sampleApp directory, create a new python file named urls.py. The file contains the Python scripts that help the Django Application routes.
from django.contrib import admin
from django.contrib.auth import views as auth_views
from django.urls import path
from . import views
urlpatterns = [
path('', views.formpage, name='home'),
path('uploadFiles', views.upload, name="upload-files")
]
Creating the Project Routing File
After we created the Application routing file, we need to update the project routing files. Update the multiplefilesubmit >> urls.py.
"""multiplefilesubmit URL Configuration
The `urlpatterns` list routes URLs to views. For more information please see:
https://docs.djangoproject.com/en/4.1/topics/http/urls/
Examples:
Function views
1. Add an import: from my_app import views
2. Add a URL to urlpatterns: path('', views.home, name='home')
Class-based views
1. Add an import: from other_app.views import Home
2. Add a URL to urlpatterns: path('', Home.as_view(), name='home')
Including another URLconf
1. Import the include() function: from django.urls import include, path
2. Add a URL to urlpatterns: path('blog/', include('blog.urls'))
"""
from django.contrib import admin
from django.urls import path, include
from django.conf import settings
from django.conf.urls.static import static
urlpatterns = [
path('admin/', admin.site.urls),
path('', include("sampleApp.urls")),
]+ static(settings.MEDIA_URL, document_root = settings.MEDIA_ROOT)
Update Settings
Next, open the multiplefilesubmit >> settings.py file and update the script like the following.
"""
Django settings for multiplefilesubmit project.
Generated by 'django-admin startproject' using Django 4.1.3.
For more information on this file, see
https://docs.djangoproject.com/en/4.1/topics/settings/
For the full list of settings and their values, see
https://docs.djangoproject.com/en/4.1/ref/settings/
"""
from pathlib import Path
import os
# Build paths inside the project like this: BASE_DIR / 'subdir'.
BASE_DIR = Path(__file__).resolve().parent.parent
# Quick-start development settings - unsuitable for production
# See https://docs.djangoproject.com/en/4.1/howto/deployment/checklist/
# SECURITY WARNING: keep the secret key used in production secret!
SECRET_KEY = 'django-insecure-r!z9-k!(-5dhtm@p!w$o8cgw8q)2brr4h@(-z!+=mf#gb5pi!_'
# SECURITY WARNING: don't run with debug turned on in production!
DEBUG = True
ALLOWED_HOSTS = []
# Application definition
INSTALLED_APPS = [
'django.contrib.admin',
'django.contrib.auth',
'django.contrib.contenttypes',
'django.contrib.sessions',
'django.contrib.messages',
'django.contrib.staticfiles',
'sampleApp.apps.SampleappConfig'
]
MIDDLEWARE = [
'django.middleware.security.SecurityMiddleware',
'django.contrib.sessions.middleware.SessionMiddleware',
'django.middleware.common.CommonMiddleware',
'django.middleware.csrf.CsrfViewMiddleware',
'django.contrib.auth.middleware.AuthenticationMiddleware',
'django.contrib.messages.middleware.MessageMiddleware',
'django.middleware.clickjacking.XFrameOptionsMiddleware',
]
ROOT_URLCONF = 'multiplefilesubmit.urls'
TEMPLATES = [
{
'BACKEND': 'django.template.backends.django.DjangoTemplates',
'DIRS': [],
'APP_DIRS': True,
'OPTIONS': {
'context_processors': [
'django.template.context_processors.debug',
'django.template.context_processors.request',
'django.contrib.auth.context_processors.auth',
'django.contrib.messages.context_processors.messages',
],
},
},
]
WSGI_APPLICATION = 'multiplefilesubmit.wsgi.application'
# Database
# https://docs.djangoproject.com/en/4.1/ref/settings/#databases
DATABASES = {
'default': {
'ENGINE': 'django.db.backends.sqlite3',
'NAME': BASE_DIR / 'db.sqlite3',
}
}
# Password validation
# https://docs.djangoproject.com/en/4.1/ref/settings/#auth-password-validators
AUTH_PASSWORD_VALIDATORS = [
{
'NAME': 'django.contrib.auth.password_validation.UserAttributeSimilarityValidator',
},
{
'NAME': 'django.contrib.auth.password_validation.MinimumLengthValidator',
},
{
'NAME': 'django.contrib.auth.password_validation.CommonPasswordValidator',
},
{
'NAME': 'django.contrib.auth.password_validation.NumericPasswordValidator',
},
]
# Internationalization
# https://docs.djangoproject.com/en/4.1/topics/i18n/
LANGUAGE_CODE = 'en-us'
TIME_ZONE = 'Asia/Manila'
USE_I18N = True
USE_TZ = True
# Static files (CSS, JavaScript, Images)
# https://docs.djangoproject.com/en/4.1/howto/static-files/
STATIC_URL = '/static/'
STATICFILES_DIRS = (
# location of your application, should not be public web accessible
'./static',
)
MEDIA_URL = "/media/"
MEDIA_ROOT = os.path.join(BASE_DIR, 'media')
# Default primary key field type
# https://docs.djangoproject.com/en/4.1/ref/settings/#default-auto-field
DEFAULT_AUTO_FIELD = 'django.db.models.BigAutoField'
Update Application Model
Open your sampleApp >> models.py file to create the database table for storing the file paths.
from django.db import models
# Create your models here.
class FileList(models.Model):
file_path = models.FileField(blank=True,null = True, upload_to='fileuploads/')
Migrations
Next, make migrations to execute the model changes on the database and run the migration. Execute the following script in your terminal or command prompt.
python manage.py makemigrations
python manage.py migrate
Creating the Form
On your sampleApp directory, create a new Python file named forms.py. The file contains the model forms scripts.
# Import forms of Django
from django import forms
# Import FileList Model
from sampleApp.models import FileList
# Upload File Form
class UploadFiles(forms.ModelForm):
file_path = forms.FileField(label="Select Multiple File", help_text="The Avatar field is required.", widget = forms.FileInput(attrs={'multiple':'multiple', 'class':'file-input'}))
class Meta:
model = FileList
fields = ('file_path',)
Creating the Base Template
Next, create a new directory inside the sampleApp folder named templates. Then inside the created folder, create files for the following HTML files. Save the files according to the filename I provided above each file.
base.html
{% load static %}
<!DOCTYPE html>
<meta http-equiv="X-UA-Compatible" content="IE=edge"> <meta name="viewport" content="width=device-width, initial-scale=1.0"> <link rel="stylesheet" href="{% static 'styles.css' %}"> {% block headerContent %} {% endblock headerContent %}
<main class="my-5">
{% if messages %}
{% for message in messages %}
<div class="alert alert-{{message.tags}}">{{ message }}
</div> {% endfor %}
{% endif %}
{% block pageContent %} {% endblock pageContent %}
</main>
{% block ScriptBlock %} {% endblock ScriptBlock %}
sampleform.html
{% extends 'base.html' %}
{% block pageContent %}
<form action="/uploadFiles" method="POST" enctype="multipart/form-data"> {% csrf_token %}
{% for field in form %}
{{ field.label_tag }}
{{ field }}
{% endfor %}
{% endblock pageContent %}
Update the View File
On your sampleApp directory, open the views.py file on your text editor and update the scripts like the following. It contains the Python script for rendering the form page and uploading the files to the database.
from django.shortcuts import render, redirect
from django.http import HttpResponse
from django.contrib import messages
from .models import FileList
from .forms import UploadFiles
# Create your views here.
def test(request):
return HttpResponse('<h1>Hello World!</h1>')
def formpage(request):
form = UploadFiles()
print(form.fields)
return render(request, "sampleform.html", {"form": form})
def upload(request):
if request.method == 'POST':
form = UploadFiles(request.POST, request.FILES)
if form.is_valid():
files = []
if 'file_path' in request.FILES:
for file in request.FILES.getlist('file_path'):
files.append(FileList(file_path=file))
# print(len(files))
if len(files) > 0:
try:
FileList.objects.bulk_create(files)
messages.success(request, "File(s) has been uploaded successfully.")
except Exception as ex:
messages.error(request, ex)
else:
messages.error(request, 'Form data is invalid')
return redirect('home')
Register Model to Admin Site
Next, register the FileList to the admin site so we can manage the uploaded file paths on the admin site. Open the sampleApp >> admin.py.
from django.contrib import admin
from sampleApp.models import FileList
# Register your models here.
admin.site.register(FileList)
Creating a Super User Account
To create a super user account, run the following script on your terminal or command prompt.
python manage.py createsuperuser
Run the Application
Execute the following script on your terminal and command prompt to run the application.
python manage.py runserver
Then, browse the application using your preferred browser. The application link will be provided upon executing the runserver script i.e. http://127.0.0.1:8000/ and http://127.0.0.1:8000/admin for the admin site.
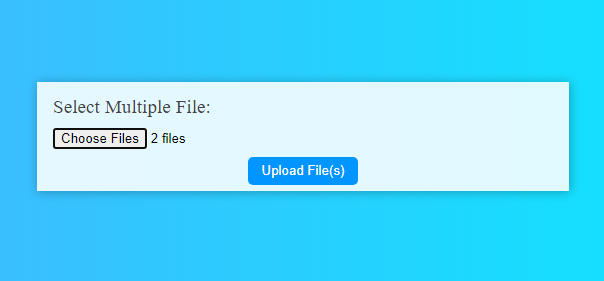
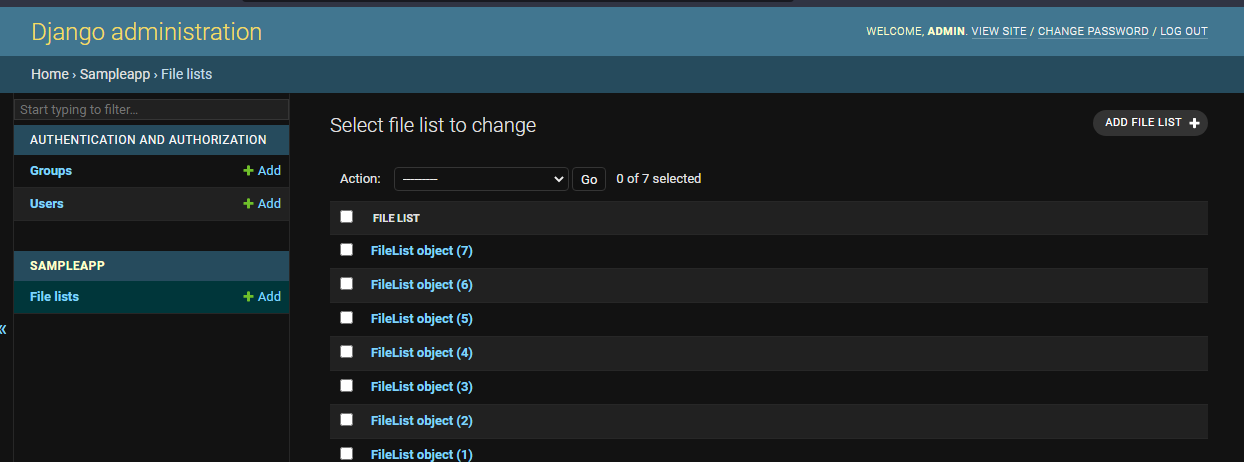
Snapshots
Here are some snapshots of the overall result of the project application.
Page UI
Success Message

Admin Site
There you go! I have also provided the complete source code that I created on this website and it is free to download. The download button can be found below this tutorial's content. Feel free to download and modify the source code the way you wanted to enhance your programming capabilities.
That's it! I hope this Multiple File Upload in Django Tutorial will help you with what you are looking for and that you'll find this useful for your current and future Django Projects.
Explore more on this website for more Tutorials and Free Source Codes.
Happy Coding =)