Mastering JavaScript DOM Manipulation: A Guide to Inserting, Replacing, and Removing Child Elements

In this tutorial, we'll explore techniques for DOM Manipulation, focusing on inserting, replacing, and removing child elements using JavaScript. This guide is designed to assist students, beginners, or those new to JavaScript programming, providing a valuable reference for enhancing their knowledge and skills in developing effective web applications. Throughout the tutorial, I'll provide explanations and JavaScript snippets demonstrating the usage of each method.
Understanding DOM Manipulation
DOM Manipulation entails the dynamic interaction and modification of the structure, content, and style of a web document, be it HTML, XML, or XHTML. This process is achieved through programming languages like JavaScript.
How to Insert, Replace, and Remove Child Element in JavaScript?
JavaScript comes with some useful functions and methods that was primarily crafted for manipulating the DOMs. One of the methods is knwon as `append()`, primarily developed to add or append a new node element in a specific parent element. The new child element will be added after the last item of the child elements.
When it comes to replacing an existing child element, JavaScript introduces a handy method called `replaceWith()`. This method plays a crucial role in achieving the functionality of replacing the current child element or any existing element within the document with a new one.
Finally, JavaScript provides a valuable function known as `remove()`. This function is designed to efficiently remove or delete the selected DOM element.
How to Implement these Methods:
Below are sample snippets illustrating the application of the `append()`, `replaceWith()`, and `remove()` methods:
Utilizing the `append` method
The `append()` method is a powerful tool for a node or DOM element, requiring another node as an argument that will be added to the current element. See the example below.
- const RandomList = document.getElementById('random-list')
- const listItem = document.createElement('li')
- var content = `Sample Content`;
- var row = document.createElement('div')
- row.innerHTML = `<div>${content}</div>`
- listItem.innerHTML = row.outerHTML
- RandomList.appendChild(listItem)
Applying the `replaceWith()` method
The `replaceWith()` method, belonging to the Node or DOM element, swaps the existing element with a new one. It mandates the presence of the new Node or DOM element as an argument.
- const RandomList = document.getElementById('random-list')
- const listItem = document.createElement('li')
- var content = `Sample Content`;
- var row = document.createElement('div')
- row.innerHTML = `<div>${content}</div>`
- listItem.innerHTML = row.outerHTML
- var items = RandomList.querySelectorAll('.list-group-item')
- var old_item = items[0]
- old_item.replaceWith(listItem)
Employing the `remove()` method
The `remove()` method, associated with a node element, eradicates the current node from the document.
- const RandomList = document.getElementById('random-list')
- var items = RandomList.querySelectorAll('.list-group-item')
- var old_item = items[0]
- old_item.remove(old_item)
I've developed a straightforward web application utilizing HTML, CSS, and JavaScript to showcase the practical application of the append(), replaceWith(), and remove() methods within an authentic webpage.
The uncomplicated application includes a single list container, an insert button, a replace input and button, and a remove or delete button. Below is the entire source code for this straightforward web application page.
CSS
This script serves as a CSS file defining custom styles for various elements on the web page. It is identified as `style.css`.
- @import url('https://fonts.googleapis.com/css2?family=Ubuntu+Mono:ital,wght@0,400;0,700;1,400;1,700&display=swap');
- * {
- font-family: 'Ubuntu Mono', monospace;
- }
- html, body{
- height: 100%;
- width: 100%;
- max-height: 100%;
- overflow: auto;
- }
- body{
- background-color:#c2e9fb ;
- background-image: linear-gradient(120deg, #a1c4fd 0%, #c2e9fb 100%);
- }
- #page-title{
- color:#fff;
- text-align: center;
- font-size: 1.8rem;
- letter-spacing: .3px;
- font-weight: 700;
- text-shadow: 0px 3px 5px #22222252;
- }
- #random-list{
- position: relative;
- counter-reset: item;
- }
- #random-list>li:before{
- counter-increment: item;
- content: counter(item) ".";
- position: absolute;
- height: 100%;
- width: 50px;
- left: 15px;
- }
- #random-list:empty{
- display: flex;
- width: 100%;
- justify-content: center;
- }
- #random-list:empty::before{
- content: "No item listed yet.";
- text-align: center;
- width: 100%;
- padding: .5em;
- font-style: italic;
- color: #c3c3c3;
- }
- button.rem-item {
- display: flex;
- align-items: center;
- justify-content: center;
- font-size: 17px;
- height: 30px;
- }
HTML
This script represents an HTML file encompassing essential elements of the web page. The file is labeled as `index.html`.
- <!DOCTYPE html>
- <html lang="en">
- <head>
- <meta charset="UTF-8">
- <meta name="viewport" content="width=device-width, initial-scale=1.0">
- <!-- Fontawesome CSS -->
- <link rel="stylesheet" href="https://cdn.jsdelivr.net/npm/[email protected]/dist/css/bootstrap.min.css">
- <!-- Custom CSS -->
- <link rel="stylesheet" href="style.css">
- <!-- Bootstrap jQuery -->
- <!-- Bootstrap JS -->
- <script src="https://cdn.jsdelivr.net/npm/[email protected]/dist/js/bootstrap.bundle.min.js"></script>
- </head>
- <body>
- <div class="container-md py-5">
- <!-- Page Title -->
- <div class="d-flex justify-content-center w-100">
- <hr class="border-3 border-dark bg-opacity-100 shadow" style="width:50px">
- </div>
- <!-- Page Title -->
- <div class="row justify-content-center">
- <div class="col-lg-6 col-md-10 col-sm-12 col-12">
- <div class="card rounded-0 shadow">
- <div class="card-header rounded-0">
- </div>
- <div class="card-body">
- <div class="container-fluid">
- <!-- List Container -->
- <!-- List Container -->
- <!-- Actions Container -->
- <div class="list-group">
- <div class="list-group-item d-flex w-100 justify-content-center align-items-center">
- <div class="col-lg-6 col-md-8 col-sm-12 col-12">
- <!-- Button for Item Insertion -->
- </div>
- </div>
- <div class="list-group-item d-flex w-100 justify-content-center align-items-center">
- <div class="input-group">
- <!-- Input for Item to Replace -->
- <input type="number" id="replace-item-inp" min="1" class="form-control form-control-sm" placeholder="" aria-describedby="replace-item">
- <!-- Button for replacing the Item -->
- </div>
- </div>
- </div>
- <!-- Actions Container -->
- </div>
- </div>
- </div>
- </div>
- </div>
- </div>
- </body>
- </html>
JavaScript
Finally, the following script is the JS file containing the code that enables the functional features of the web page. This file is referred to as `script.js`.
- // Random List Element (Parent Element)
- const RandomList = document.getElementById('random-list')
- // Button/Element that triggers to add Item into the list when clicked
- const actionBTN = document.getElementById('add_item')
- // Button/Element that triggers to replace Specific Item from the list with a new Item when clicked
- const ReplaceBTN = document.getElementById('replace-item')
- // Sample List Item possible contents
- const textData = [
- "Lorem ipsum dolor sit amet, consectetur adipiscing elit.",
- "Proin posuere molestie tellus vitae blandit.",
- "Nullam vitae metus a justo venenatis finibus in nec ante.",
- "Nam nec pellentesque velit.",
- "Nullam sodales suscipit lacus accumsan dapibus.",
- "Integer interdum est mollis purus malesuada convallis.",
- "Aliquam gravida ante sit amet imperdiet ornare.",
- "Proin tincidunt neque nec rhoncus pretium.",
- "Maecenas tristique maximus eleifend."
- ];
- // Item to Insert as New Child Element
- const listItem = document.createElement('li')
- listItem.classList.add("list-group-item", "list-group-item-action", "ps-5")
- // Function that generates the new List Item
- function create_new_el(){
- var item = listItem.cloneNode();
- var content = textData[Math.floor( Math.random() * textData.length)];
- var row = document.createElement('div')
- row.classList.add("row", "justify-content-between")
- row.innerHTML = `<div class="col-10">${content}</div>`
- row.innerHTML += `<div class="col-auto"><button type="button" class="rem-item btn btn-sm btn-outline-danger">×</div>`
- item.innerHTML = row.outerHTML
- return item;
- }
- // Event Listener that insert new Item into the list when add button triggered
- actionBTN.addEventListener('click', function(e){
- e.preventDefault()
- // Generate New Item
- var item = create_new_el();
- // Append or add the new Item after the last item on the list
- RandomList.appendChild(item)
- // Event Listener for Removing or Deleting the Child Element From the List
- item.querySelector('.rem-item').addEventListener('click', function(e){
- e.preventDefault()
- item.remove()
- })
- })
- // Event Listener for replacing the existing Child Element
- ReplaceBTN.addEventListener('click', function(e){
- e.preventDefault()
- // Get the Selected List Item to replace with
- var itemNo = document.getElementById('replace-item-inp').value
- // Index of the Child Element to replace
- var index = parseInt(itemNo) - 1;
- // Listing All the List Items
- var items = RandomList.querySelectorAll('.list-group-item')
- // Selecting the list item to replace
- var old_item = items[index]
- // Validate if the provided List Item Number is valid and the child Item exists
- if(parseInt(itemNo) < 1 || old_item == undefined){
- alert("Please Provide Valid List Item #");
- return false;
- }
- // Generate New Item
- var item = create_new_el()
- // Replacing the the item
- old_item.replaceWith(item)
- })
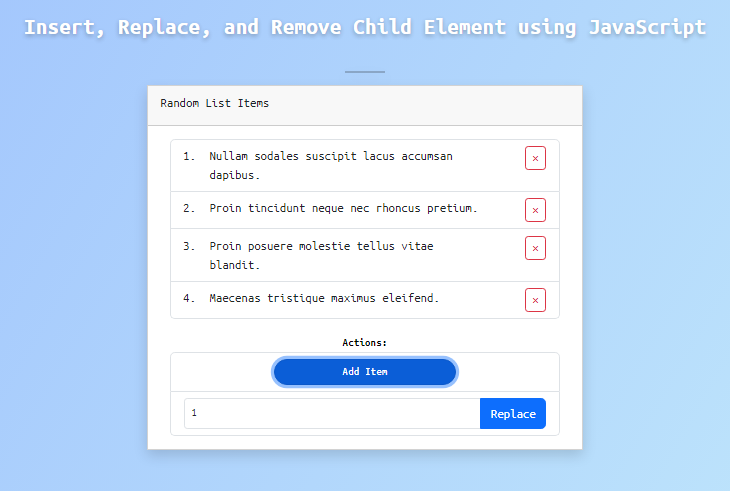
Snapshot
Here is the snapshot displaying the outcome of the provided scripts:
There you have it! I've also supplied the zip file containing the comprehensive source code of the web application I crafted on this website. Feel free to download and customize it according to your preferences.
I hope that this Guide to Inserting, Replacing, and Removing Child Elements using JavaScript will be valuable for your current and future web application projects. Explore further on this website for additional Free Source Codes, Tutorials, and Articles covering various programming languages.