Inserting New Element Before or After Existing Element using Pure JavaScript Tutorial
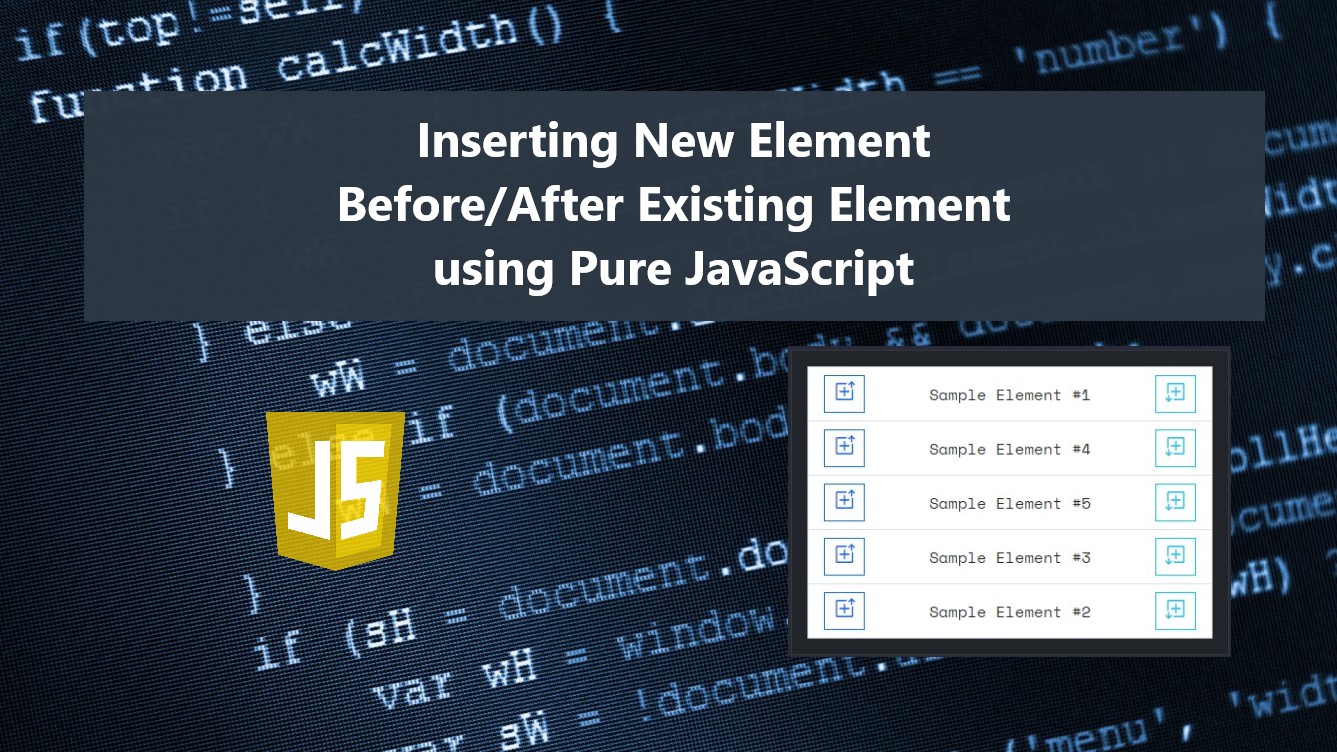
In this tutorial, you can learn how to Insert a New Element Before or After existing elements using JavaScript. The main purpose of this tutorial is to provide students and beginners with a reference for learning some techniques and usage using the JavaScript built-in methods. Here, I will be providing a sample web application that demonstrates the usage of JavaScript insertBefore and after methods.
How to Insert New Element Before and After existing Element?
JavaScript comes with useful built-in methods and APIs including the insertBefore and after method. These methods are very handy in manipulating the Page Interface or DOM. The insertBefore method helps the developer to insert an element inside the parent element and before the specific child element. The after method can help us to insert an element after the existing element. Check out the following syntax for the usage of the given JS method.
insertBefore() Syntax
The below snippet is a sample usage of the JS insertBefore method.
- //Parent Element Wrapper
- const parentEl = document.getElementId('parent')
- //Child Element
- const childEl = document.getElementId('child1')
- // New Element
- const newEl = document.createElement('div')
- newEl.innerHTML = `<p>Sample Content</p>`
- // Insert New Element Before the Child Element
- parentEl.insertBefore(newEl, childEl)
after() Syntax
The below snippet is a sample usage of the JS after method.
- //Existing Element
- const existingEl = document.getElementId('sampleEl')
- // New Element
- const newEl = document.createElement('div')
- newEl.innerHTML = `<p>Sample Content</p>`
- // Insert New Element After the Existing Element
- existingEl.after(newEl)
Sample Web Application
Here, I will be providing a simple web page that demonstrates the usage of the insertBefore() and after() methods. The scripts below will result in a simple web page that contains a simple list view with items that allow the user to clone it and insert the cloned items with updated text content before or after the selected element.
Page Interface
Here is the HTML file script. The file is known as index.html.
- <!DOCTYPE html>
- <html lang="en">
- <head>
- <meta charset="UTF-8">
- <meta http-equiv="X-UA-Compatible" content="IE=edge">
- <meta name="viewport" content="width=device-width, initial-scale=1.0">
- <link rel="preconnect" href="https://fonts.googleapis.com">
- <link rel="preconnect" href="https://fonts.gstatic.com" crossorigin>
- <link rel="stylesheet" href="https://fonts.googleapis.com/css2?family=Material+Symbols+Outlined:opsz,wght,FILL,GRAD@48,400,0,0" />
- <link rel="stylesheet" href="https://cdn.jsdelivr.net/npm/[email protected]/dist/css/bootstrap.min.css">
- <link rel="stylesheet" href="style.css">
- <script src="https://cdn.jsdelivr.net/npm/[email protected]/dist/js/bootstrap.bundle.min.js"></script>
- </head>
- <body>
- <div class="content-md-lg py-3">
- <hr style="margin:auto; width:25px" class="border-light opacity-100">
- <div class="container-lg">
- <div class="row py-3">
- <div class="col-lg-5 col-md-5 col-sm-10 col-12 mx-auto">
- <div class="card bg-dark rounded-0 border-dark-subtle">
- <div class="card-body rounded-0">
- <!-- Sample Insertion Wrapper -->
- <div class="list-group rounded-0" id="InsertWrapper">
- <div class="list-group-item insertedItem">
- <div class="d-flex w-100 align-items-center">
- <div class="col-auto flex-shrink-1">
- </div>
- <div class="col-auto flex-shrink-1">
- </div>
- </div>
- </div>
- <div class="list-group-item insertedItem">
- <div class="d-flex w-100 align-items-center">
- <div class="col-auto flex-shrink-1">
- </div>
- <div class="col-auto flex-shrink-1">
- </div>
- </div>
- </div>
- </div>
- <!-- Sample Insertion Wrapper -->
- </div>
- </div>
- </div>
- </div>
- </div>
- </div>
- </body>
- </html>
Stylesheet
Here is the CSS file script. The file is known as style.css.
- @import url('https://fonts.googleapis.com/css2?family=IBM+Plex+Mono:wght@200&family=Space+Mono&display=swap" rel="stylesheet');
- :root{
- --space-mono-font: 'Space Mono', monospace;
- --border-dark-subtle: #373838;
- }
- *{
- box-sizing: border-box;
- }
- body *{
- font-family: var(--space-mono-font);
- }
- /**
- Page Design
- */
- body,
- html{
- height: 100%;
- width: 100%;
- margin: 0;
- padding: 0;
- }
- body{
- background-color: #282A3A;
- }
- .page-title{
- font-size: 2.5rem;
- font-weight: 500;
- color: #fff;
- letter-spacing: 3px;
- font-family: var(--secular-font);
- text-align: center;
- text-shadow: 0px 0px 3px #2020208c;
- }
- .border-dark-subtle{
- border-color: var(--border-dark-subtle) !important;
- }
- /* Button Icons Style*/
- .insertBefore > span{
- rotate: -90deg;
- }
- /* Button Icons Style*/
- .insertAfter > span{
- rotate: 90deg;
- }
JavaScript
Here is the JavaScript file script. The file is known as script.css.
- // Parent Container Selector
- const ParentWrapper = document.getElementById('InsertWrapper')
- // Next Element ID
- var i = document.querySelectorAll('.insertedItem').length
- // Sample Element to Insert
- // Here I will just clone the first element and change the content text later on
- const InsertEl = ParentWrapper.querySelector('.insertedItem:nth-child(1)').cloneNode(true)
- /**
- * Inserting Element Before an Element
- * @param {DOM Element} el
- * - Target Element to insert the new element before
- */
- const InsertElBefore = (el) =>{
- // Incrementing Item Iteration #
- i++;
- // Clone Element as the New Element
- var newEl = InsertEl.cloneNode(true)
- // Updating the New Elements Text Content
- newEl.querySelector('.textContent').innerText = `Sample Element #${i}`;
- //Inserting the new Element into the parent wrapper and before the specific child element
- ParentWrapper.insertBefore(newEl, el)
- //Adding functionality to the New Element buttons
- InsertBtnFunc(newEl)
- }
- /**
- * Inserting Element After an Element
- * @param {DOM Element} el
- * - Target Element to insert the new element after
- */
- const InsertElAfter = (el) =>{
- // Incrementing Item Iteration #
- i++;
- // Clone Element as the New Element
- var newEl = InsertEl.cloneNode(true)
- // Updating the New Elements Text Content
- newEl.querySelector('.textContent').innerText = `Sample Element #${i}`;
- //Inserting the new Element after the specific element
- el.after(newEl)
- //Adding functionality to the New Element buttons
- InsertBtnFunc(newEl)
- }
- /**
- * Inserted Items buttons Functionality
- * @param {DOM Element} el
- * - Target Element
- */
- const InsertBtnFunc = (el)=>{
- // Trigger Inserting Before
- el.querySelector('.insertBefore').addEventListener('click', e => {
- InsertElBefore(el)
- })
- // Trigger Inserting After
- el.querySelector('.insertAfter').addEventListener('click', e => {
- InsertElAfter(el)
- })
- }
- /** Add the Button Function to the defualt Items */
- ParentWrapper.querySelectorAll('.insertedItem').forEach(el => {
- InsertBtnFunc(el)
- })
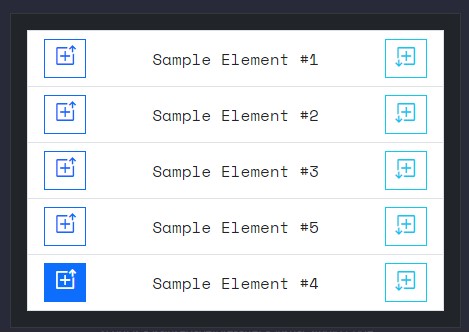
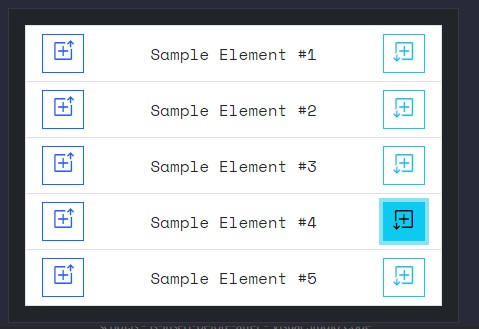
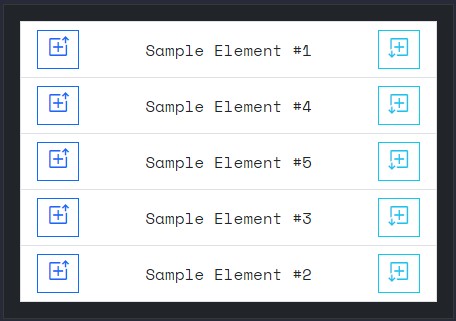
Snapshots
Here are the images of the overall result of the script I provided above.
Inserting Before
Inserting After
Inserting After and Before
There you go! I have also provided the source code zip file that I created for this tutorial on this website and it is free to download. Feel free to download it by clicking the download button located after this tutorial's content.
That's it! I hope this Inserting New Element Before or After Existing Element using Pure JavaScript Tutorial will help you with what you are looking for and will be useful for your current and future web application projects.
Explore more on this website for more Tutorials and Free Source Codes.