Creating a Simple Input Masking using JavaScript Tutorial
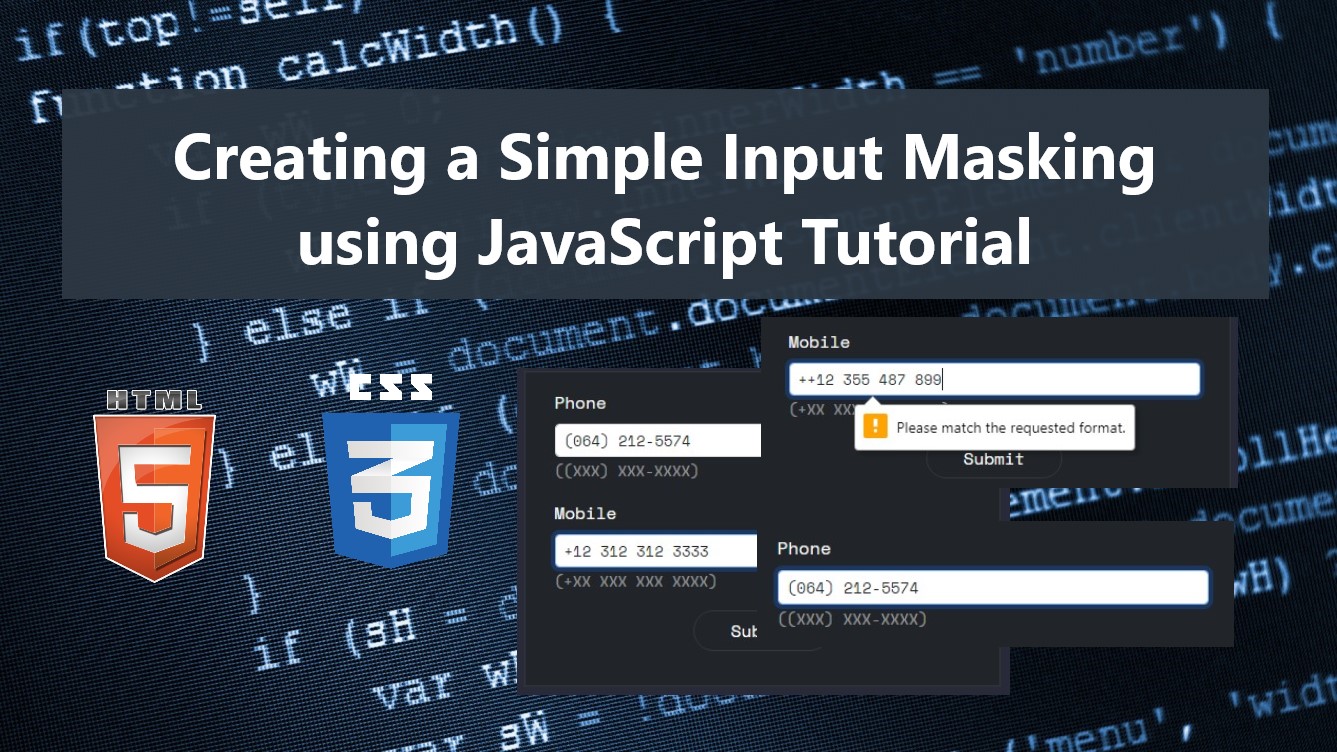
In this tutorial, you can learn how to create a simple Input Masking for formatting the HTML input values using only JavaScript. The tutorial aims to provide students and beginners with a reference for learning to create a useful component using JavaScript. Here, I will be providing a simple web page script that demonstrates the creation of a simple form with the masked input field.
What is Input Masking?
An input mask is a string expression that limits user input and is referred to in computer programming. It might be argued that it serves as a template, or predetermined format, to which all data must adhere in order to ensure data integrity and eliminate transcription errors. Although the syntax of this string expression varies depending on the implementation, all of the basic input types are accepted.
How can we create an Input Mask using JavaScript?
Input Mask can be achieved using some useful built-in methods, event listeners, and web APIs of JavaScript. Although there are now lots of free input masking JS plugins that are available on the internet, you might still want to learn how to create a custom one which means you are in the right place. We can create input masking with the use of Regular Expressions. Check out the web page scripts that I created and provided below to understand more about how to achieve this kind of component.
Sample Web Page Script
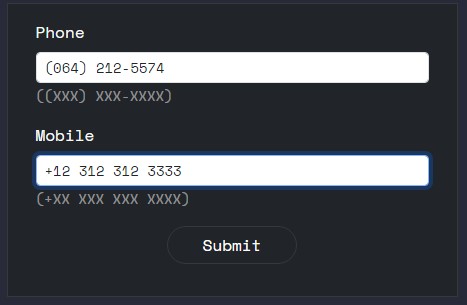
The script results in a simple web page that contains a simple form with phone and mobile number input fields. Each of the inputs has its own format or required template before the user can continue to submit the form.
Page Interface
Here is the HTML file script named index.html. It contains the page elements and the form inputs.
- <!DOCTYPE html>
- <html lang="en">
- <head>
- <meta charset="UTF-8">
- <meta http-equiv="X-UA-Compatible" content="IE=edge">
- <meta name="viewport" content="width=device-width, initial-scale=1.0">
- <link rel="preconnect" href="https://fonts.googleapis.com">
- <link rel="preconnect" href="https://fonts.gstatic.com" crossorigin>
- <link rel="stylesheet" href="https://fonts.googleapis.com/css2?family=Material+Symbols+Outlined:opsz,wght,FILL,GRAD@48,400,0,0" />
- <link rel="stylesheet" href="https://cdn.jsdelivr.net/npm/[email protected]/dist/css/bootstrap.min.css">
- <link rel="stylesheet" href="style.css">
- <script src="https://cdn.jsdelivr.net/npm/[email protected]/dist/js/bootstrap.bundle.min.js"></script>
- </head>
- <body>
- <div class="content-md-lg py-3">
- <hr style="margin:auto; width:25px" class="border-light opacity-100">
- <div class="container-lg">
- <div class="row py-3">
- <div class="col-lg-5 col-md-5 col-sm-10 col-12 mx-auto">
- <div class="card bg-dark rounded-0 border-dark-subtle">
- <div class="card-body rounded-0">
- <!-- Sample Form -->
- <form action="">
- <div class="container-fluid">
- <div class="mb-3">
- <input type="text" id="phone" name="phone" class="form-control form-control-sm phone-masking" required>
- </div>
- <div class="mb-3">
- <input type="text" id="mobile" name="mobile" class="form-control form-control-sm mobile-masking" required>
- </div>
- <div class="mb-3">
- <div class="mx-auto col-lg-4 col-md-6 col-sm-12 col-12">
- </div>
- </div>
- </div>
- </form>
- <!-- Sample Form -->
- </div>
- </div>
- </div>
- </div>
- </div>
- </div>
- </body>
- </html>
Custom Stylesheet
Here is the custom CSS file script of the web page. It contains some of the custom designs of the web page elements. The file is known as style.css.
- @import url('https://fonts.googleapis.com/css2?family=IBM+Plex+Mono:wght@200&family=Space+Mono&display=swap" rel="stylesheet');
- :root{
- --space-mono-font: 'Space Mono', monospace;
- --border-dark-subtle: #373838;
- }
- *{
- box-sizing: border-box;
- }
- body *{
- font-family: var(--space-mono-font);
- }
- /**
- Page Design
- */
- body,
- html{
- height: 100%;
- width: 100%;
- margin: 0;
- padding: 0;
- }
- body{
- background-color: #282A3A;
- }
- .page-title{
- font-size: 2.5rem;
- font-weight: 500;
- color: #fff;
- letter-spacing: 3px;
- font-family: var(--secular-font);
- text-align: center;
- text-shadow: 0px 0px 3px #2020208c;
- }
- .border-dark-subtle{
- border-color: var(--border-dark-subtle) !important;
- }
Main Script
Lastly, here is the JavaScript file script known as script.js. It contains the custom Input Masking class. The class contains the codes that initialize the input element into masked input and update the input value to a given format or template.
- class InputMasking{
- el;
- format;
- pattern;
- _alt;
- /**
- *
- * @param {DOM Element} el
- * @param {Input Value Format [X = character]} format
- */
- constructor(el, format){
- //set element
- this.el = el
- //Pattern Default Value
- this.pattern = [];
- //Alternative Format Default Value
- this._alt = [];
- // Set Given Format
- this.format = String(format)
- //Match All X or (character groups)
- var FormatMatches = this.format.match(/(X+)/gi)
- var _altFormat = this.format;
- //Default Input Pattern RegExp Value
- var inputFormat = '^' + this.format.replace(/[!@#$%^&*()+=\[\]\\';,./{}|":<>?~]/g, "(\\$&)").replace(/\s/, "\\s")
- FormatMatches.forEach((pat, i) =>{
- //Set Matched Group with the pattern
- this.pattern[i+1]= `(\\d{${pat.length}})`
- //Replace Character Group to a Replacement Pattern
- _altFormat= _altFormat.replace(pat, `\$${i+1}`);
- //Replace Character Group to RegExp Pattern as Input Patter Attribue
- inputFormat = inputFormat.replace(pat, `(\\d{${pat.length}})`);
- })
- // Join Pattern Array
- this.pattern = new RegExp(this.pattern.join(''))
- // Set Input Placeholder
- this.el.placeholder = this.format
- //Set Replacement Format to class object
- this._alt = _altFormat
- //Set input pattern
- this.el.pattern = inputFormat
- // Creating Sub text for input Format
- var inpFmtsub = document.createElement('div')
- inpFmtsub.innerHTML = `<span class="text-white-50 h6"><small>(${this.format})</small></span>`
- //Insert sub text after the input
- this.el.after(inpFmtsub)
- //Disable input's autocomplete
- this.el.setAttribute('autocomplete', 'off')
- //Trigger Input Masking / Format Value
- this.el.addEventListener('input', this.mask.bind(this))
- //Check if the current input value is equal to the complere require pattern/format
- this.el.addEventListener('keydown', e => {this.checkVal(e,this)})
- }
- mask(){
- //Re-format input value according to the given pattern
- this.el.value = String(this.el.value).replace(this.pattern, this._alt);
- }
- checkVal(e, _this){
- if( e.key.length == 1 && _this.el.value.length >= _this.format.length){
- //Stop adding new character if the input already meet the required pattern
- e.preventDefault()
- return false
- }
- }
- }
- window.inputMask = function(el, format){
- //Initialize InputMasking Class to the given Element
- new InputMasking(el,format)
- }
- window.addEventListener('load', ()=>{
- //Add Input Masking with format to a spedific input
- inputMask(document.getElementById('phone'), '(XXX) XXX-XXXX')
- inputMask(document.getElementById('mobile'), '+XX XXX XXX XXXX')
- })
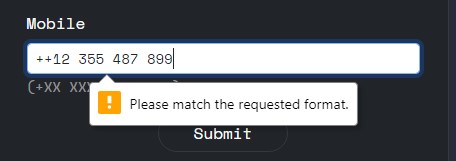
Snapshots
Here are the snpashots of the overall result of the web page scripts I provided above.
Form Panel

Filled with Correct Value

Filled with Incorrect Value
Filled
DEMO VIDEO
There you go! I have also provided the source code zip file of all the complete scripts that I provided above. The zip file is available on this website. The download button is located below this tutorial's content.
That's it! I hope this Creating a Simple Input Masking using JavaScript Tutorial will help you with what you are looking for and will be useful for your current and future web application projects.
Explore more on this website for more Tutorials and Free Source Codes.