Web Text-to-Speech Tutorial using Web Speech API Synthesis
This is a simple tutorial that will teach how to convert Text into Speech in web applications. In order to do this, we are going to use the Web Speech API Interface Speech Synthesis. The Web Speech API will allow you to convert the text into incorporate voice data into web projects.
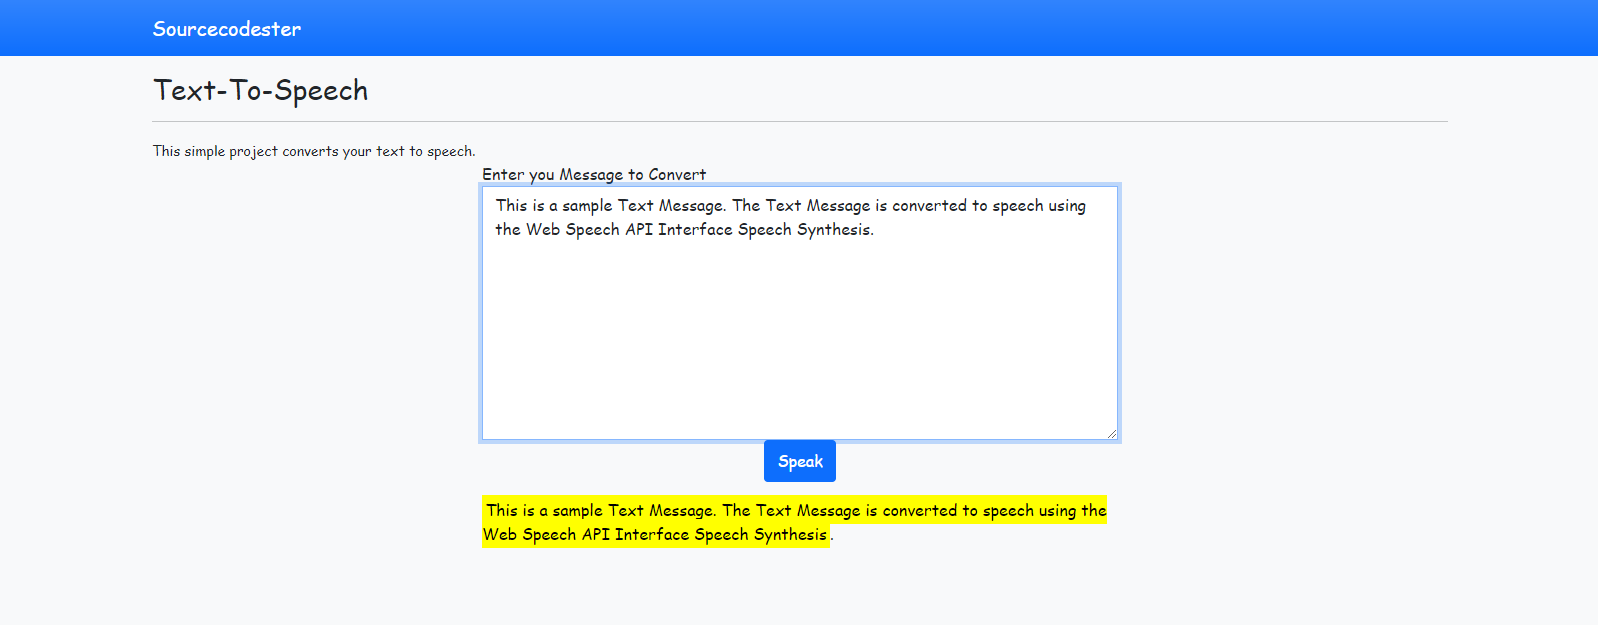
In this tutorial, I will be providing a simple web application that allows users to write a text message and converts it into speech. The application will re-display the text message below the form. Each word spoken will be highlighted.
Getting Started
The source code below uses Bootstrap v5 as the CSS Framework of the application user interface. Also, I have used jQuery Library for writing the JavaScript functions.
Compile the downloaded files of the library and CSS Framework into a directory that will serve as your source code directory.
Creating the Interface
The following script is an HTML File that contains the HTML Tags for the design of our web application. This file holds the Text Message Form and the Display Area.
Open a text editor such as (notepad++, Submlime Text, VS Code, or etc.). Create a new HTML File. Copy the script below and paste it into your new HTML File. Then, save the file into your source code directory and name the file as index.html.
- <!DOCTYPE html>
- <html lang="en">
- <head>
- <meta charset="UTF-8">
- <meta http-equiv="X-UA-Compatible" content="IE=edge">
- <meta name="viewport" content="width=device-width, initial-scale=1.0">
- <link rel="stylesheet" href="./css/bootstrap.min.css">
- <!-- Custom Css -->
- <style>
- :root {
- --bs-success-rgb: 71, 222, 152 !important;
- }
- html,
- body {
- height: 100%;
- width: 100%;
- font-family: Apple Chancery, cursive;
- }
- mark {
- background-color: yellow;
- }
- </style>
- <!-- End of Custom Css -->
- </head>
- <body class="bg-light">
- <nav class="navbar navbar-expand-lg navbar-dark bg-primary bg-gradient" id="topNavBar">
- <div class="container">
- <a class="navbar-brand" href="https://sourcecodester.com">
- Sourcecodester
- </a>
- </div>
- </nav>
- <div class="container py-3" id="page-container">
- <hr>
- <div class="content">
- <div class="row justify-content-center">
- <div class="col-md-6">
- <!-- Text Area Form -->
- <form action="" id="text-form">
- <div class="form-goup">
- </div>
- <center>
- </center>
- </form>
- <!-- End of Text Area Form-->
- <!-- Display Container of the Text -->
- <div id="display" class="py-3">
- </div>
- <!-- End Display Container of the Text -->
- </div>
- </div>
- </div>
- </div>
- </body>
- </html>
Creating the Main Function
The following code/script is a JavaScript file which contains the codes of the function of form submission and speech synthesis configuration. Save this file as script.js.
- // setting Speech Synthesis
- let text_to_speech = new SpeechSynthesisUtterance();
- let synth = window.speechSynthesis;
- $(function() {
- // SpeechSynthesisUtterance Configuration
- text_to_speech.lang = 'en';
- text_to_speech.voice = synth.getVoices()[0];
- // An Event that identifies the part of text has spoken
- text_to_speech.onboundary = function(e) {
- var message = $('#display').text()
- var b_text = String(message).substring(0, e.charIndex + e.charLength)
- var marked = $('<mark>')
- marked.text(b_text)
- $('#display').html('')
- $('#display').append(marked)
- $('#display').append(message.replace(b_text, ""))
- }
- $('#text-form').submit(function(e) {
- e.preventDefault();
- // Set Text to be spoken
- text_to_speech.text = $('#message').val();
- $('#display').text($('#message').val())
- $('#message').val('')
- // Start to Speak the text
- synth.speak(text_to_speech)
- $('#display').animate({ scrollTop: 0 }, 'fast')
- })
- })
That's it! You can now test the source code on your end and see if the application is working as was planned. To run the application, browse the index.html file in a browser. If there's an error occurred on your end, check your source code and differentiate it from the source code I provided above. You can also download the working source code that I created for this tutorial. The download button is located below this article.
DEMO VIDEO
That is the end of this tutorial. I hope this will help you with what you are looking for and for your future Web Application Project. Explore more on this website for more tutorials and free source codes.

