Creating Main Menu – Creating Scenes, Controllers, Main Menu Canvas, and Slicing Sprites
Submitted by razormist on Wednesday, March 7, 2018 - 21:51.

Creating Scenes
In the Unity environment you will notice an Untitled object in the Hierarchy area. That is the name of the scenes by default, to change it just simply press ctrl + s and save it as Main Menu.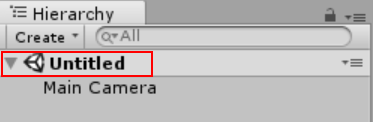
Creating Controllers
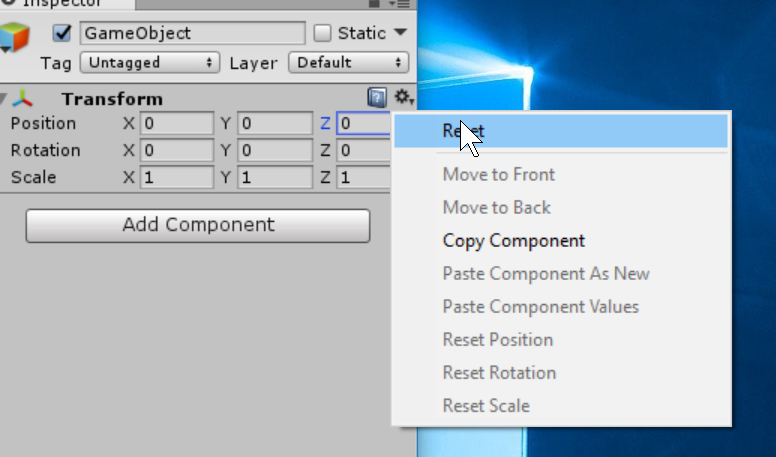
Now that we have the main menu scene we will now create Controllers for the game. The Controllers are game objects that handle some methods that be needed in the game later. To do that just click GameObject tab, then a drop down will show up. Then in the sub menu click Create Empty, a GameObject will appear in the Hierarchy.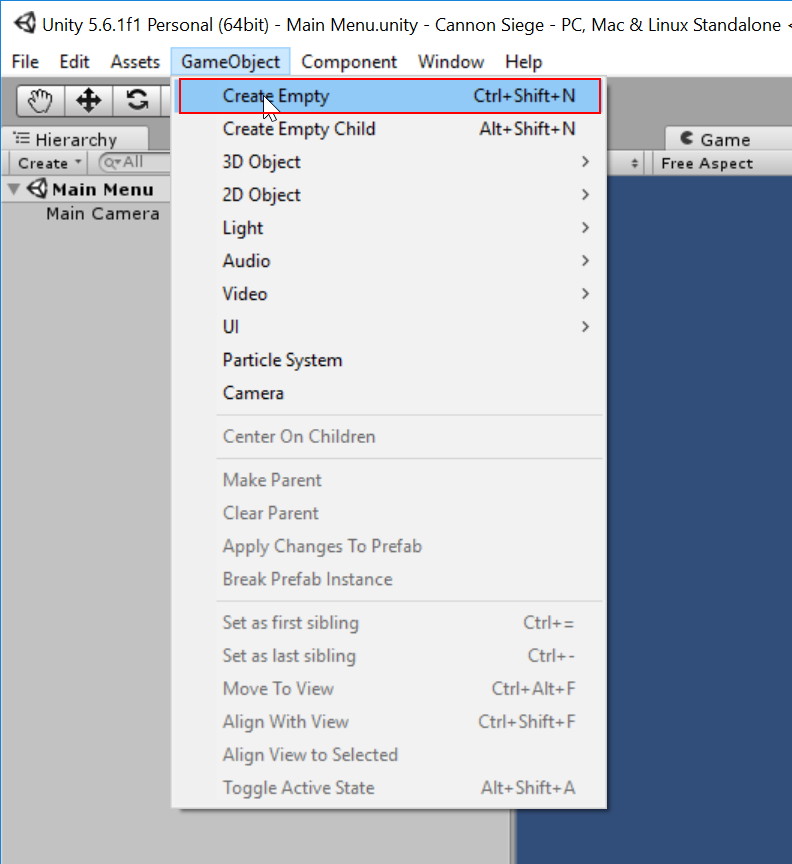 Before working on the GameObject make sure to reset its transform to avoid conflict in the future.
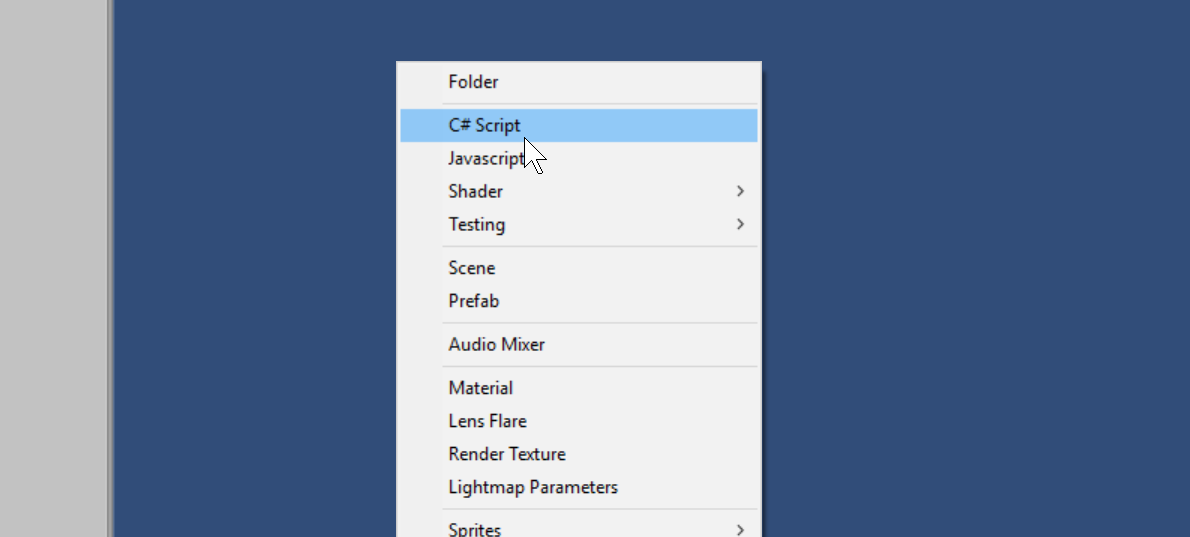
 Rename your GameObject as Game Controller, then go to the Scripts directory creates a new folder called Game Controllers. Right click the mouse button and select create then choose C# script.
 Save it as GameController. The Game Controller handles all the save data of our game.
Note: To avoid script error make sure the name of your script has no space, because C# is white space sensitive. And make sure to save all Controllers inside the Game Controllers folder to avoid misplaced.
Open you’re newly created Script; you notice that there is already a block code in the script. By default the unity engine already created that part to make the developer at ease.
Save it as GameController. The Game Controller handles all the save data of our game.
Note: To avoid script error make sure the name of your script has no space, because C# is white space sensitive. And make sure to save all Controllers inside the Game Controllers folder to avoid misplaced.
Open you’re newly created Script; you notice that there is already a block code in the script. By default the unity engine already created that part to make the developer at ease.
- using System.Collections;
- using System.Collections.Generic;
- using UnityEngine;
- public class GameController : MonoBehaviour {
- // Use this for initialization
- void Start () {
- }
- // Update is called once per frame
- void Update () {
- }
- }
- using System;
- using System.IO;
- using System.Runtime.Serialization.Formatters.Binary;
- public static GameController instance;
- public bool isMusicOn;
- public bool isGameStartedFirstTime;
- public bool[] levels;
- public int[] highscore;
- public int score;
- public int currentLevel;
- private GameData data;
- void Awake(){
- CreateInstance ();
- }
- // Use this for initialization
- void Start () {
- InitializeGameVariables ();
- }
- void CreateInstance(){
- if (instance != null) {
- Destroy (gameObject);
- } else {
- instance = this;
- DontDestroyOnLoad (gameObject);
- }
- }
- void InitializeGameVariables(){
- Load ();
- if (data != null) {
- isGameStartedFirstTime = data.GetIsGameStartedFirstTime ();
- } else {
- isGameStartedFirstTime = true;
- }
- if (isGameStartedFirstTime) {
- isGameStartedFirstTime = false;
- isMusicOn = true;
- levels [0] = true;
- for (int i = 1; i < levels.Length; i++) {
- levels [i] = false;
- }
- for (int i = 0; i < highscore.Length; i++) {
- highscore [i] = 0;
- }
- data.SetIsMusicOn (isMusicOn);
- data.SetIsGameStartedFirstTime (isGameStartedFirstTime);
- data.SetHighScore (highscore);
- data.SetLevels (levels);
- Save ();
- Load ();
- } else {
- isGameStartedFirstTime = data.GetIsGameStartedFirstTime ();
- isMusicOn = data.GetIsMusicOn ();
- highscore = data.GetHighScore ();
- levels = data.GetLevels ();
- }
- }
- public void Save(){
- FileStream file = null;
- try{
- file = File.Create(Application.persistentDataPath + "/data.dat");
- if(data != null){
- data.SetIsMusicOn(isMusicOn);
- data.SetIsGameStartedFirstTime(isGameStartedFirstTime);
- data.SetHighScore(highscore);
- data.SetLevels(levels);
- bf.Serialize(file, data);
- }
- }catch(Exception e){
- Debug.LogException (e, this);
- }finally{
- if(file != null){
- file.Close ();
- }
- }
- }
- public void Load(){
- FileStream file = null;
- try{
- file = File.Open(Application.persistentDataPath + "/data.dat", FileMode.Open);
- data = bf.Deserialize(file) as GameData;
- }catch(Exception e){
- Debug.LogException (e, this);
- }finally{
- if(file != null){
- file.Close ();
- }
- }
- }
- }
- [Serializable]
- class GameData{
- private bool isGameStartedFirstTime;
- private bool isMusicOn;
- private bool[] levels;
- private int[] highscore;
- public void SetIsGameStartedFirstTime(bool isGameStartedFirstTime){
- this.isGameStartedFirstTime = isGameStartedFirstTime;
- }
- public bool GetIsGameStartedFirstTime(){
- return this.isGameStartedFirstTime;
- }
- public void SetIsMusicOn(bool isMusicOn){
- this.isMusicOn = isMusicOn;
- }
- public bool GetIsMusicOn(){
- return this.isMusicOn;
- }
- public void SetHighScore(int[] highscore){
- this.highscore = highscore;
- }
- public int[] GetHighScore(){
- return this.highscore;
- }
- public void SetLevels(bool[] levels){
- this.levels = levels;
- }
- public bool[] GetLevels(){
- return this.levels;
- }
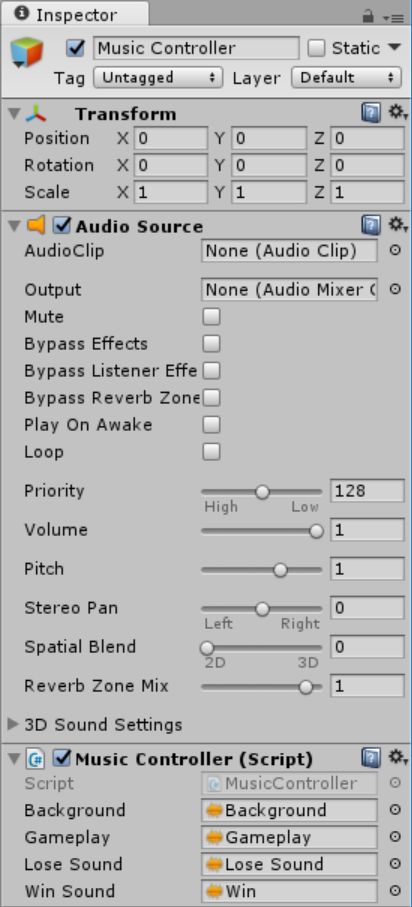
Creating Music Controller
The Music Controller handles the background sounds of the game; this is where you put your game sound clip as an array. Just like what you did on the Game Controller, create a new GameObject then name it as Music Controller. Then create a new C# script name it as MusicController. Note: All the needed sounds are already in the Sounds folder. Inside the Music Controller script, create a certain variable that we will use for our sounds- public static MusicController instance;
- public AudioClip background, gameplay, loseSound, winSound;
- [HideInInspector]
- public AudioSource audioSource;
- void CreateInstance(){
- if (instance != null) {
- Destroy (gameObject);
- } else {
- instance = this;
- DontDestroyOnLoad (gameObject);
- }
- }
- void InitializeVariables(){
- audioSource = GetComponent<AudioSource> ();
- }
- void Awake(){
- CreateInstance ();
- InitializeVariables ();
- }
- // Use this for initialization
- void Start () {
- }
- // Update is called once per frame
- void Update () {
- }
- void CreateInstance(){
- if (instance != null) {
- Destroy (gameObject);
- } else {
- instance = this;
- DontDestroyOnLoad (gameObject);
- }
- }
- void InitializeVariables(){
- audioSource = GetComponent<AudioSource> ();
- }
- public void PlayBgMusic(){
- if(background){
- audioSource.clip = background;
- audioSource.loop = true;
- audioSource.Play ();
- }
- }
- public void GameplaySound(){
- if(gameplay){
- audioSource.clip = gameplay;
- audioSource.loop = true;
- audioSource.Play ();
- }
- }
- public void StopAllSounds(){
- if(audioSource.isPlaying){
- audioSource.Stop ();
- }
- }
Creating Main Menu Controller
The Main Menu Controller is the one that handles where you start the game, and also trigger some events that necessary needed in the game. To do this just simply creates a new GameObject name it as Main Menu Controller. Create a script and name it as MainMenuController. Inside the Main Menu Controller script, create a certain variable that we will use. Write this code inside the Main Menu Controller class.- public GameObject settingsPanel, exitPanel;
- public Toggle soundToggle;
- // Use this for initialization
- void Start () {
- if(GameController.instance != null && MusicController.instance != null){
- if (GameController.instance.isMusicOn) {
- MusicController.instance.PlayBgMusic ();
- soundToggle.isOn = true;
- } else {
- MusicController.instance.StopAllSounds ();
- soundToggle.isOn = false;
- }
- }
- }
- // Update is called once per frame
- void Update () {
- if(Input.GetKeyDown(KeyCode.Escape)){
- if (exitPanel.activeInHierarchy) {
- exitPanel.SetActive (false);
- } else {
- exitPanel.SetActive (true);
- }
- if (settingsPanel.activeInHierarchy) {
- settingsPanel.SetActive (false);
- }
- }
- }
- public void PlayButton(){
- SceneManager.LoadScene("Level Menu");
- }
- public void SettingsButton(){
- settingsPanel.SetActive (true);
- }
- public void CloseSettingsButton(){
- settingsPanel.SetActive (false);
- }
- public void SoundToggle(){
- if (soundToggle.isOn) {
- GameController.instance.isMusicOn = true;
- MusicController.instance.PlayBgMusic ();
- GameController.instance.Save ();
- } else {
- GameController.instance.isMusicOn = false;
- MusicController.instance.StopAllSounds ();
- GameController.instance.Save ();
- }
- }
- public void YesButton(){
- Application.Quit ();
- }
- public void NoButton(){
- exitPanel.SetActive (false);
- }
- using UnityEngine.SceneManagement;
- using UnityEngine.UI;
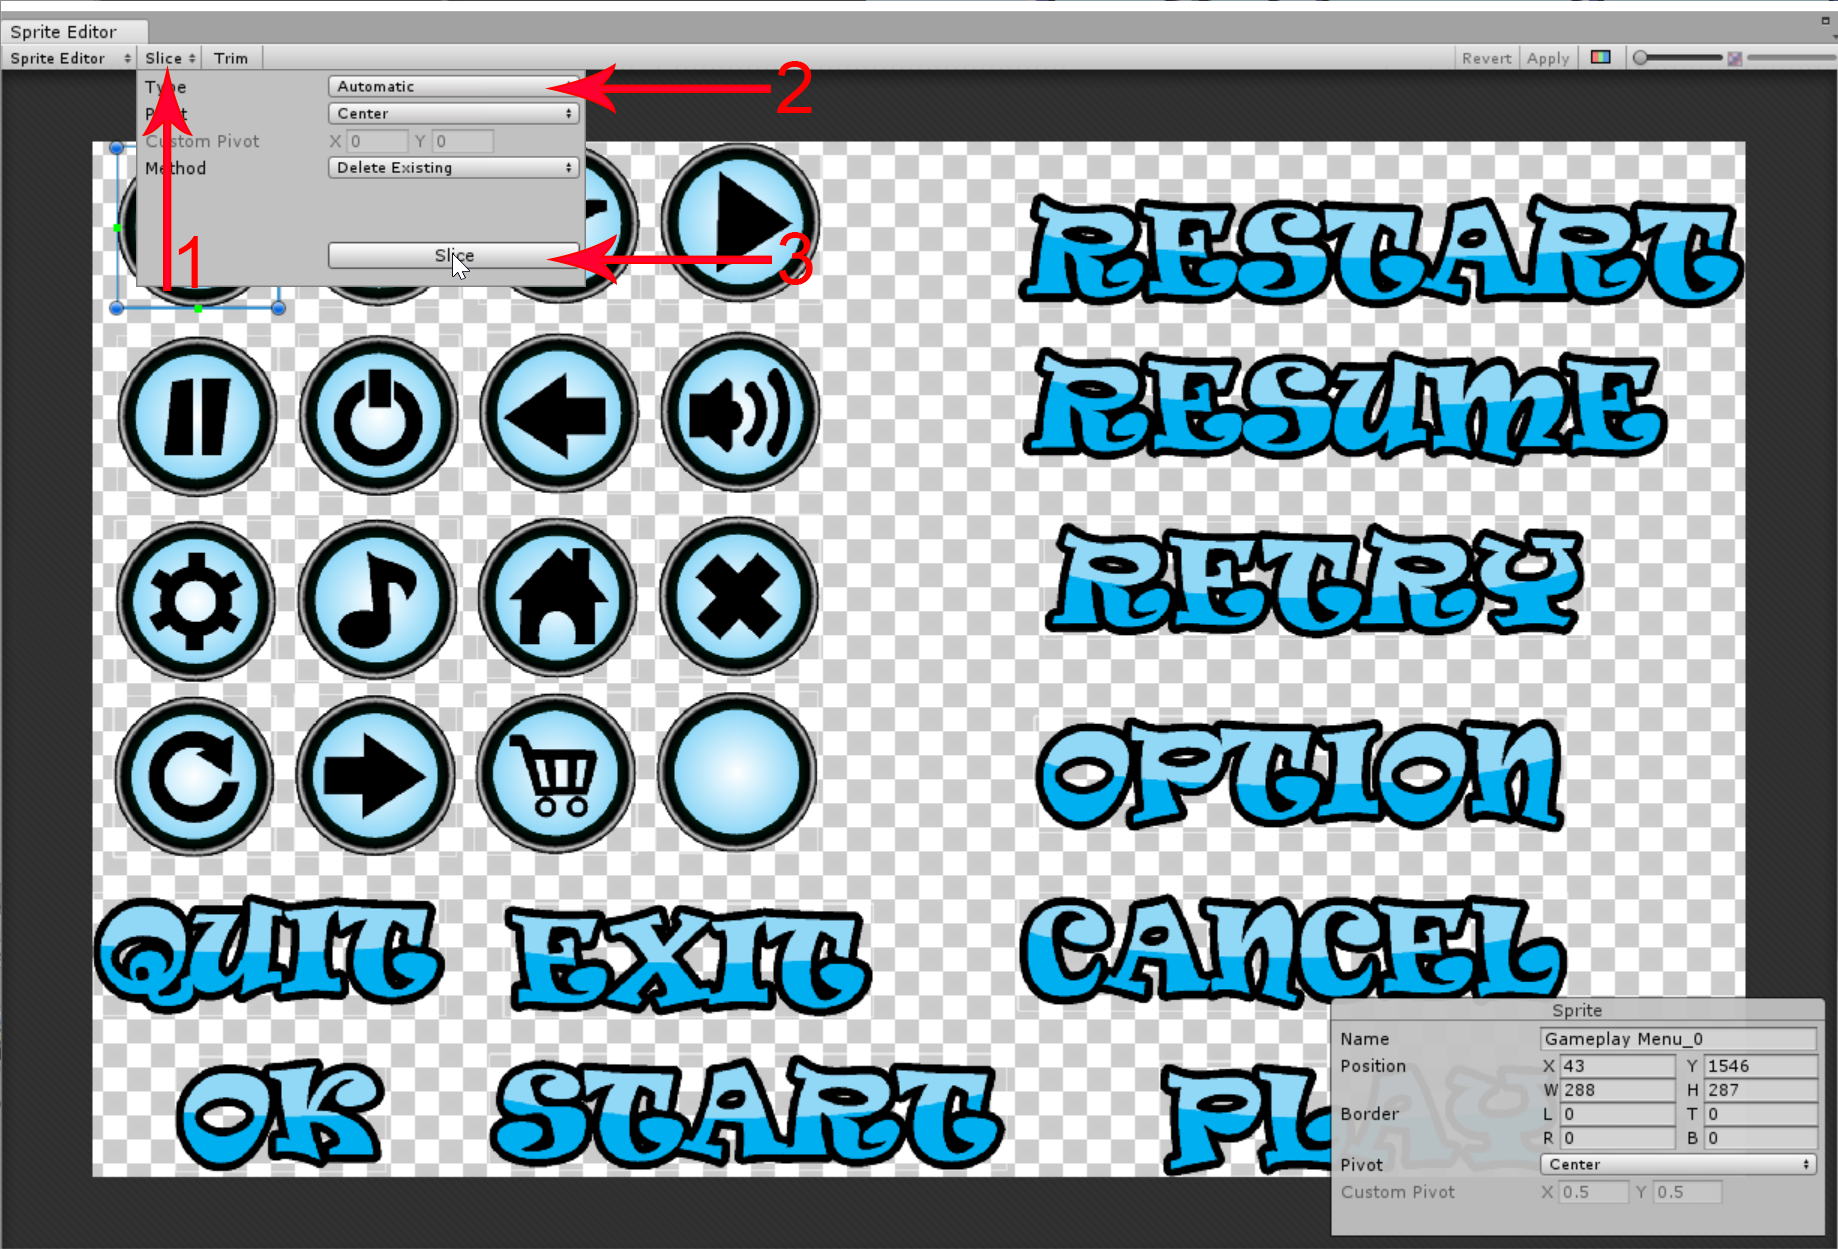
Slicing Sprites
When slicing the sprite sheet into a several images you need to select first your image, then in Sprite Mode choose Multiple after that click Sprite Editor. A new Pop up window will appear from here click the Slice on the menu bar, and then Slice. It will automatically slice the sheet of a sprite.
 Note: All the needed sprite in the game are already in Sprites folder.
Main Menu Canvas
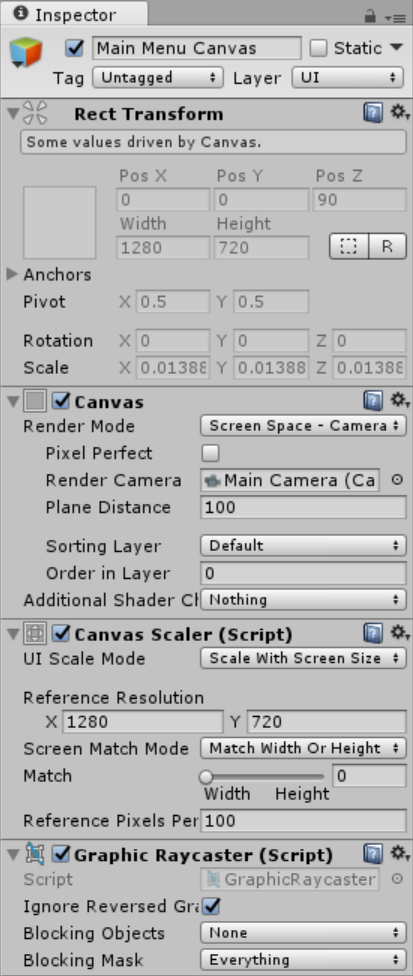
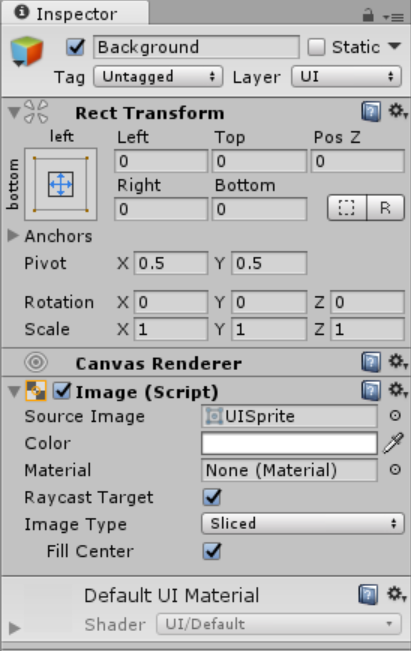
The Main Menu UI is a GameObject that hold a several Children component. To Create a UI click the GameObject menu then choose UI then Image. You notice that it automatically create a UI Canvas then your image as a child of it, and also a new object will be created automatically called EventSytem.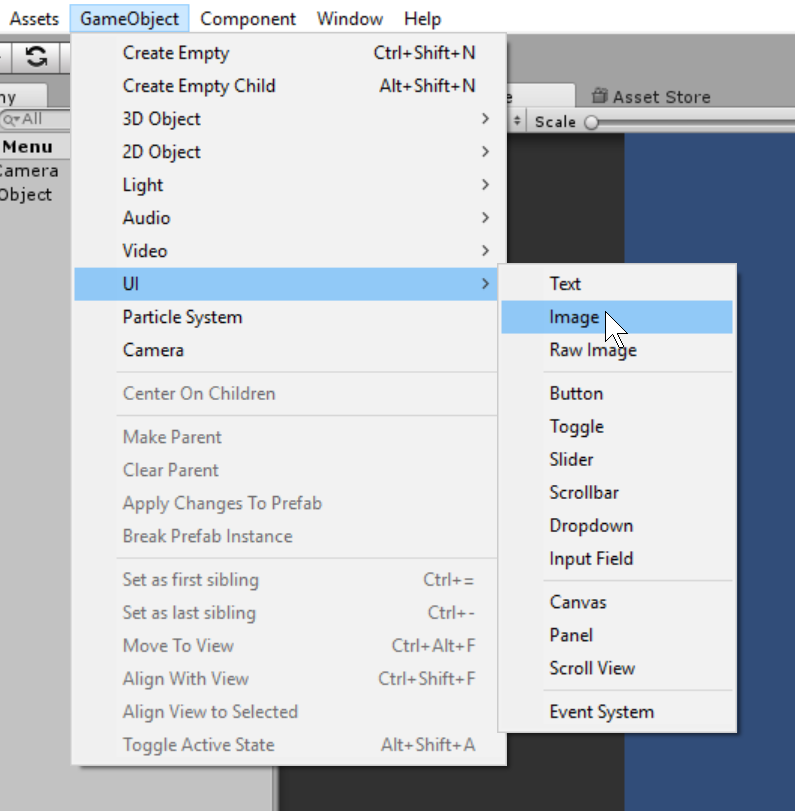 Then rename Canvas as Main Menu Canvas, and also Image as Background. In the Main Menu Canvas set the values same as the image shown below.
 To make the Background Image locate your sprite from the Sprites directory then add it to the Background GameObject as a component.
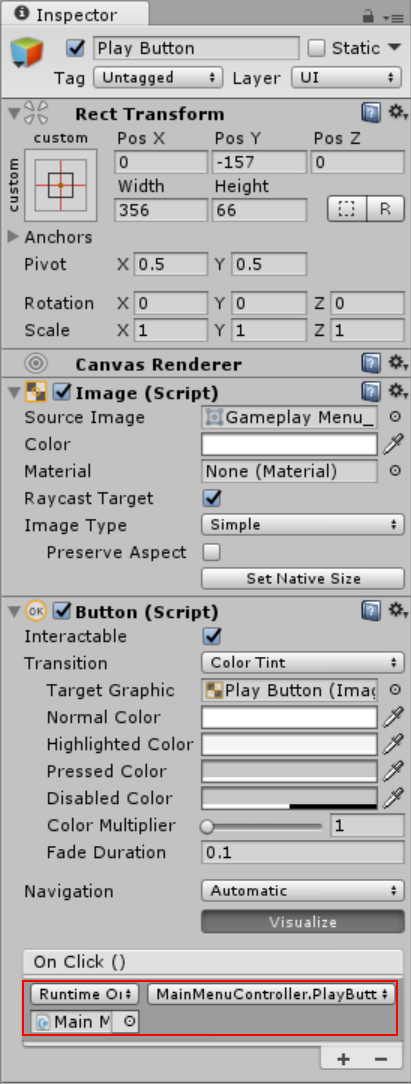
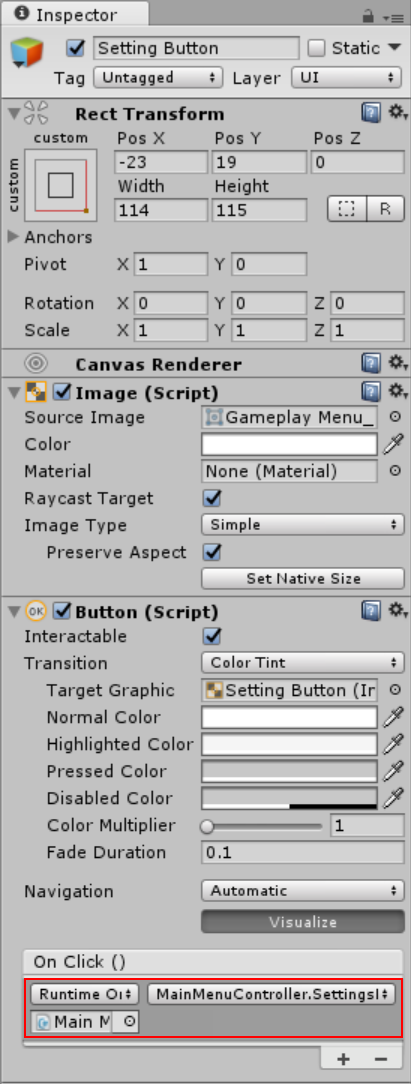
 Now that we have the image we will now add a button Play and Settings. Then remove the child text of button, then locate and add a sprite to their components.
Then attach the Main Menu Controller script to the Play and Settings Button in the RuntimeController.
Now that we have the image we will now add a button Play and Settings. Then remove the child text of button, then locate and add a sprite to their components.
Then attach the Main Menu Controller script to the Play and Settings Button in the RuntimeController.
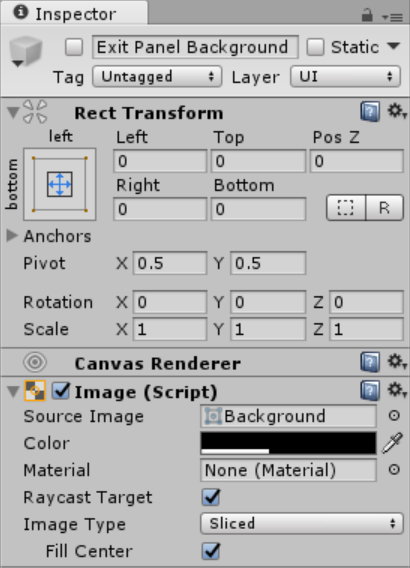
Main Menu Canvas - Exit Panel
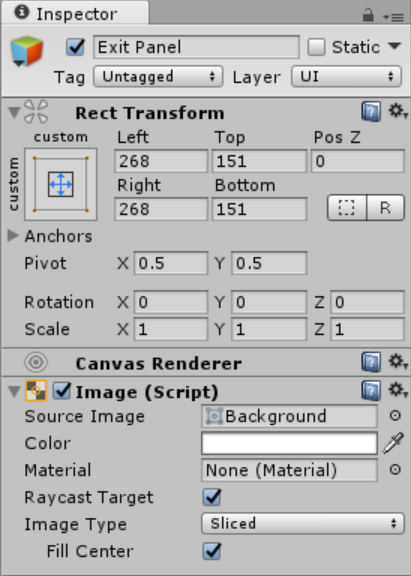
We will now create the Exit Panel, exit panel take care of the confirmation prompt that closes the app. Create a panel then name it as Exit Panel Background. And create another panel by just right clicking the GameObject then set its name as Exit Panel and set the components as shown in the inspector below.Exit Panel Background
Exit Panel
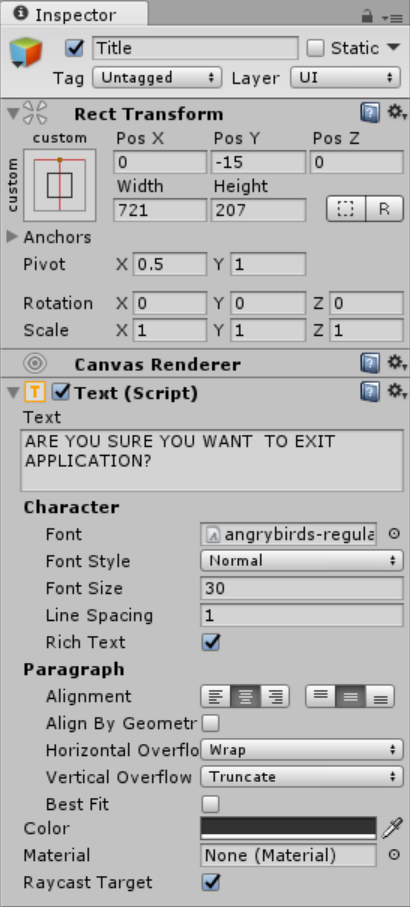
 Then add a several children (Text, Buttons) for the Exit Panel. Then set the values of each component as shown below.
Text
Buttons

Main Menu Canvas - Settings Panel
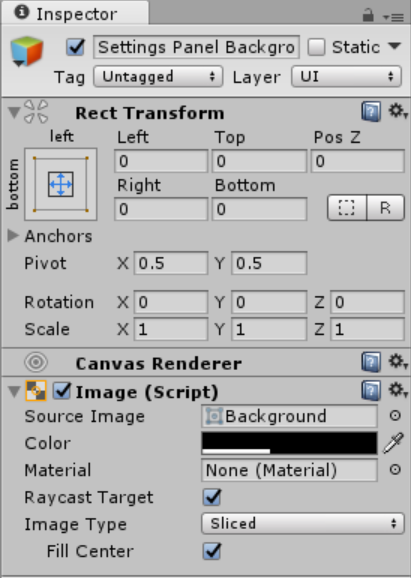
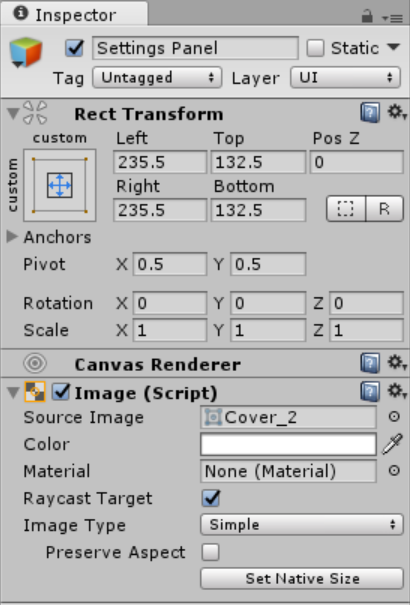
We will now create the Settings Panel; it takes care of displaying the settings options to change the gameplay. Create a panel then names it as Settings Panel Background. And create another panel by just right clicking the GameObject then set its name as Settings Panel and set the components as shown in the inspector below.Settings Panel Background
Settings Panel
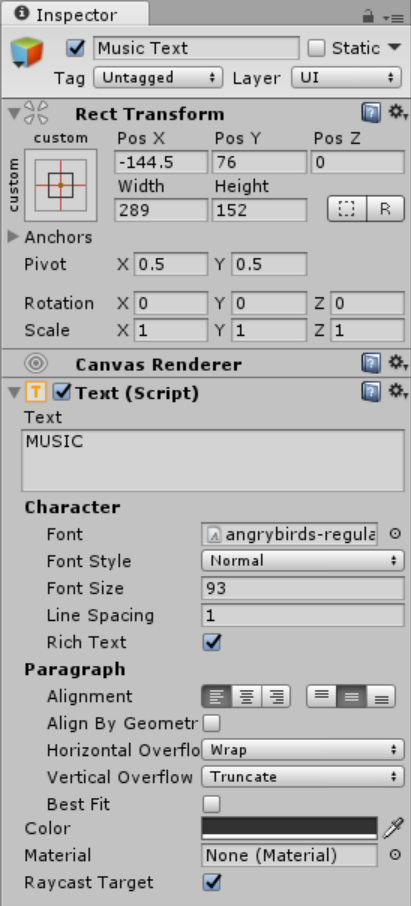
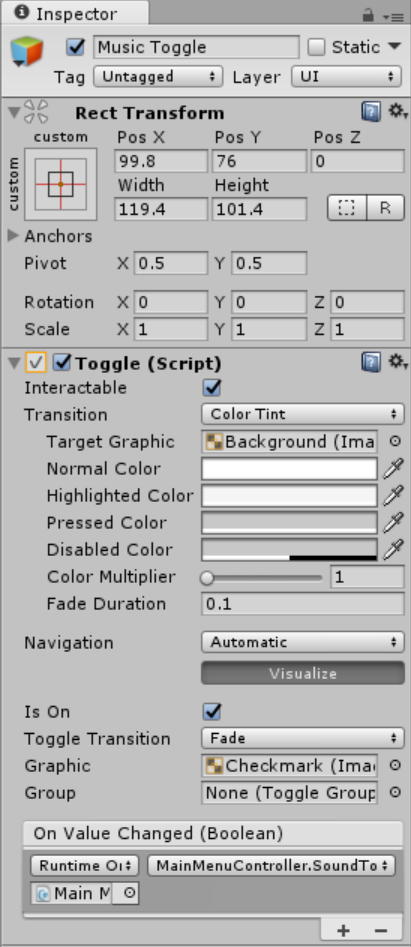
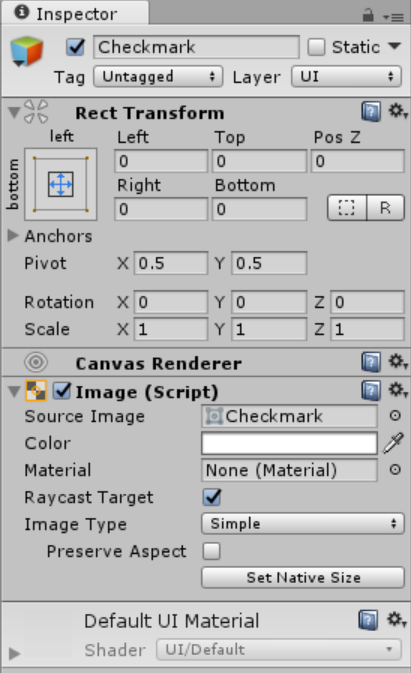
 Then add a several children (Text, Toggle, Button) for the Settings Panel. Then set the values of each component as shown below.
Text
Button

Toggle
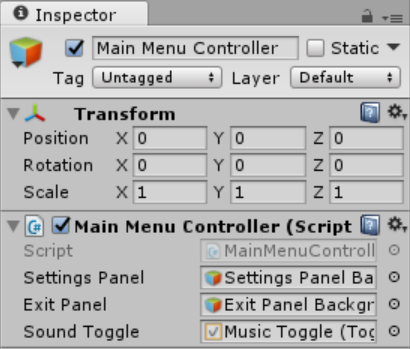
 Now that you’re done will the components there is one thing we need to do. Attach all the needed components to the MainController to be able to run the application successfully.
Note: Due to the size or complexity of this submission, the author has submitted it as a .zip file to shorten your download time. After downloading it, you will need a program like Winzip to decompress it.
Virus note: All files are scanned once-a-day by SourceCodester.com for viruses, but new viruses come out every day, so no prevention program can catch 100% of them.
FOR YOUR OWN SAFETY, PLEASE:
1. Re-scan downloaded files using your personal virus checker before using it.
2. NEVER, EVER run compiled files (.exe's, .ocx's, .dll's etc.)--only run source code.