Gallery Viewer using Fancybox
Submitted by nurhodelta_17 on Tuesday, December 19, 2017 - 19:00.
Getting Started
I've used CDN of Bootstrap and jQuery so, you need internet connection for them to work. FancyBox CSS and JS is included in the downloadable file of this tutorial.Creating our Database
1. Open phpMyAdmin. 2. Click databases, create a database and name it as fancybox. 3. After creating a database, click the SQL and paste the below codes. See image below for detailed instruction.- CREATE TABLE `photo` (
- `photoid` INT(11) NOT NULL AUTO_INCREMENT,
- `description` text NOT NULL,
- `location` VARCHAR(150) NOT NULL,
- PRIMARY KEY(`photoid`)
- ) ENGINE=InnoDB DEFAULT CHARSET=latin1;

index.php
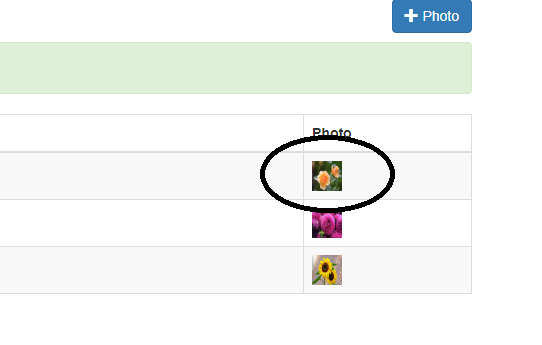
This is our index which contains our images table, modal in adding a new image, and our fancybox viewer.- <!DOCTYPE html>
- <html>
- <head>
- <meta charset="utf-8" />
- <title>Gallery Viewer using Fancybox</title>
- <link rel="stylesheet" href="https://maxcdn.bootstrapcdn.com/bootstrap/3.3.6/css/bootstrap.min.css" />
- <script src="https://ajax.googleapis.com/ajax/libs/jquery/3.1.0/jquery.min.js"></script>
- <script src="https://maxcdn.bootstrapcdn.com/bootstrap/3.3.7/js/bootstrap.min.js"></script>
- <!-- fancybox CSS library -->
- <link rel="stylesheet" type="text/css" href="fancybox/jquery.fancybox.css">
- <!-- JS library -->
- <script src="//code.jquery.com/jquery-3.1.1.min.js"></script>
- <!-- fancybox JS library -->
- <script src="fancybox/jquery.fancybox.js"></script>
- <script type="text/javascript">
- $("[data-fancybox]").fancybox({ });
- </script>
- </head>
- <body>
- <div class="container">
- <h1 class="page-header text-center">Gallery Viewer using FancyBox</h1>
- <h2>
- Photo List
- <a href="#newphoto" data-toggle="modal" class="pull-right btn btn-primary"><span class="glyphicon glyphicon-plus"></span> Photo</a>
- </h2>
- <?php
- ?>
- <div class="alert alert-success text-center">
- <?php echo $_SESSION['success']; ?>
- </div>
- <?php
- }
- ?>
- <div class="alert alert-danger text-center">
- <?php echo $_SESSION['error']; ?>
- </div>
- <?php
- }
- ?>
- <table class="table table-bordered table-striped">
- <thead>
- <th>Description</th>
- <th>Location</th>
- <th>Photo</th>
- </thead>
- <tbody>
- <?php
- $conn = new mysqli("localhost", "root", "", "fancybox");
- if ($conn->connect_error) {
- }
- $sql="select * from photo";
- $query=$conn->query($sql);
- while($row=$query->fetch_array()){
- ?>
- <tr>
- <td><?php echo $row['description']; ?></td>
- <td><?php echo $row['location']; ?></td>
- <td><a href="<?php echo $row['location']; ?>" data-fancybox="group" data-caption="<?php echo $row["description"]; ?>"><img src="<?php echo $row['location']; ?>" height="30px" width="30px"></a></td>
- </tr>
- <?php
- }
- ?>
- </tbody>
- </table>
- </div>
- <!-- Add Photo -->
- <div class="modal fade" id="newphoto" tabindex="-1" role="dialog" aria-labelledby="myModalLabel">
- <div class="modal-dialog" role="document">
- <div class="modal-content">
- <div class="modal-header">
- <button type="button" class="close" data-dismiss="modal" aria-label="Close"><span aria-hidden="true">×</span></button>
- <h4 class="modal-title text-center" id="myModalLabel">Add New Photo</h4>
- </div>
- <div class="modal-body">
- <div class="container-fluid">
- <form method="POST" action="upload.php" enctype="multipart/form-data">
- <div class="form-group">
- <div class="row">
- <div class="col-md-2" style="margin-top:7px;">
- <label>Description:</label>
- </div>
- <div class="col-md-10">
- <input type="text" class="form-control" name="description" required>
- </div>
- </div>
- </div>
- <div class="form-group">
- <div class="row">
- <div class="col-md-2" >
- <label>Photo:</label>
- </div>
- <div class="col-md-10">
- <input type="file" name="image">
- </div>
- </div>
- </div>
- </div>
- </div>
- <div class="modal-footer">
- <button type="button" class="btn btn-default" data-dismiss="modal"><span class="glyphicon glyphicon-remove"></span> Cancel</button>
- <button type="submit" class="btn btn-primary"><span class="glyphicon glyphicon-floppy-disk"></span> Save</button>
- </form>
- </div>
- </div>
- </div>
- </div>
- </body>
- </html>
upload.php
Lastly, this is our PHP upload code that uploaded new images in the database.- <?php
- $conn = new mysqli("localhost", "root", "", "fancybox");
- if ($conn->connect_error) {
- }
- $description=$_POST['description'];
- $_SESSION['error']="Upload Failed. File empty!";
- }
- else{
- if ($fileInfo['extension'] == "jpg" OR $fileInfo['extension'] == "jpeg" OR $fileInfo['extension'] == "png") {
- $location = "upload/" . $newFilename;
- $sql="insert into photo (description, location) values ('$description', '$location')";
- $query=$conn->query($sql);
- if($query){
- $_SESSION['success']="Photo uploaded Successfully!";
- }
- else{
- $_SESSION['error']="Something went wrong. Can't upload Photo!";
- }
- }
- else{
- $_SESSION['error']="Upload Failed. Please upload JPG or PNG photo only!";
- }
- }
- ?>
 That ends this tutorial. Happy Coding :)

