How to Display XML Data using jQuery
Submitted by razormist on Thursday, November 24, 2022 - 22:57.
How to Display XML Data using jQuery
Introduction
In this tutorial we will create a How to Display XML Data using jQuery. This tutorial purpose is to teach how to you will display the xml data into the html page. This will tackle the process for display all the xml data. I will provide a sample program to show the actual coding of this tutorial.
This tutorial is very easy to understand just follow the instruction I provided and you can do it without a problem. This program can be use if you want to secure some important data in your site. I will try my best to give you the easiest way of creating this program Displaying of xml. So let's do the coding.
Before we get started:
First you have to download the jQuery plugin.
Here is the link for the jQuery that i used in this tutorial https://jquery.com/.
Lastly, this is the link for the template that i used for the layout design https://getbootstrap.com/.
Creating The Interface
This is where we will create a simple interface for our application. This code will display only an empty table and a simple button. To create this simply copy and write it into your text editor, then save it as index.html.
Creating JavaScript Function
This is where the main function of the application is. This code will automatically translate and display the xml data into the html table. To do this just copy and write these block of codes inside the text editor and save it as script.js.
In the given code we first call the basic jQuery ready event to signal that the DOM of the page is now ready to be use. After that we create new variable that will be the xml data and called it xml.We then bind the button trigger event using the on() function. We first then set a variable called data that will parse the our xml data using the $.parseXML() function and set it to a new variable called $xml. Next we will need to find a specific data using the find() function and set it as $member variable.
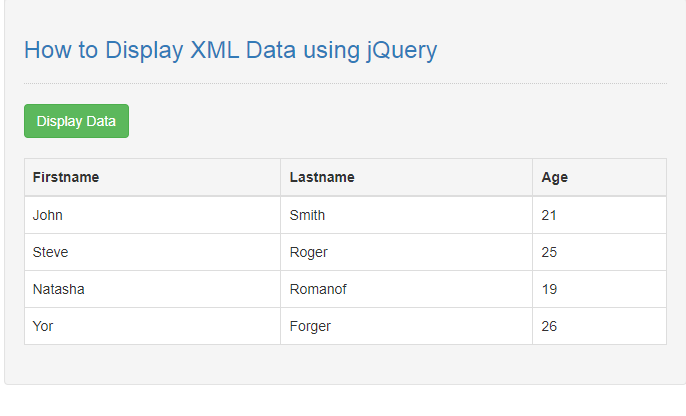
In order to display the xml data into the table we need to loop the data by calling the parent data first and finding the children data, then append all of it using the html() function
Output:
The How to Display XML Data using jQuery source code that I provide can be download below. Please kindly click the download button.
There you have it we successfully created How to Display XML Data using jQuery. I hope that this simple tutorial help you to what you are looking for. For more updates and tutorials just kindly visit this site. Enjoy Coding!
More Tutorials for JavaScript Language
Add new comment
- 595 views