Load More Data using AJAX/jQuery in PHP/MySQLi
Submitted by nurhodelta_17 on Friday, October 6, 2017 - 14:44.
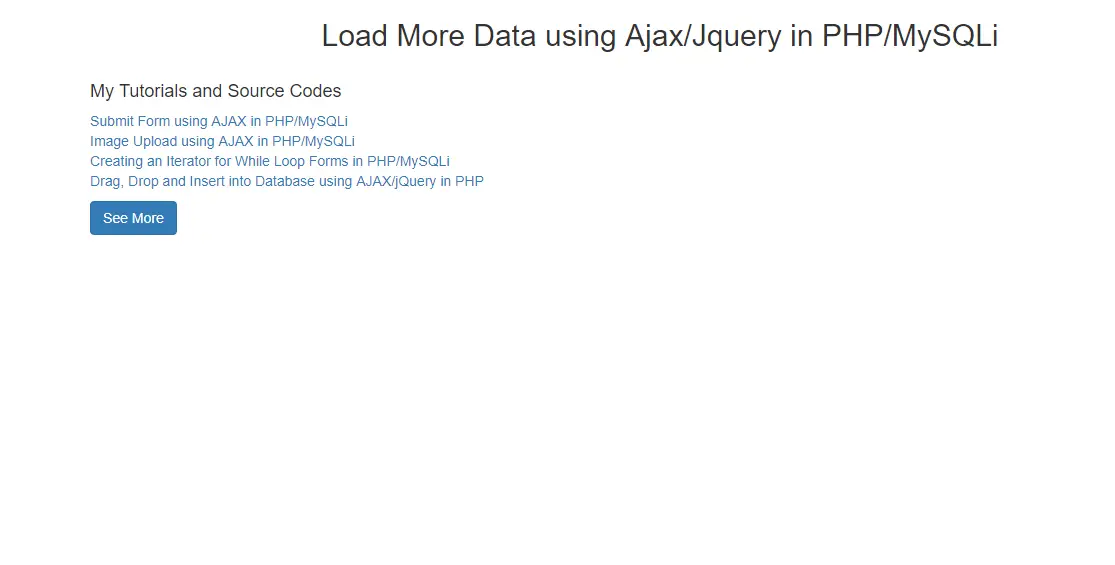
This tutorial will teach you on how to create a load more button that loads additional data using AJAX/jQuery.
Note: Scripts and css used in this tutorial are hosted, therefore, you need internet connection for them to work.
 That ends this tutorial. If you have any questions or comments, feel free to write it below or message me. Happy Coding :)
Creating our Database
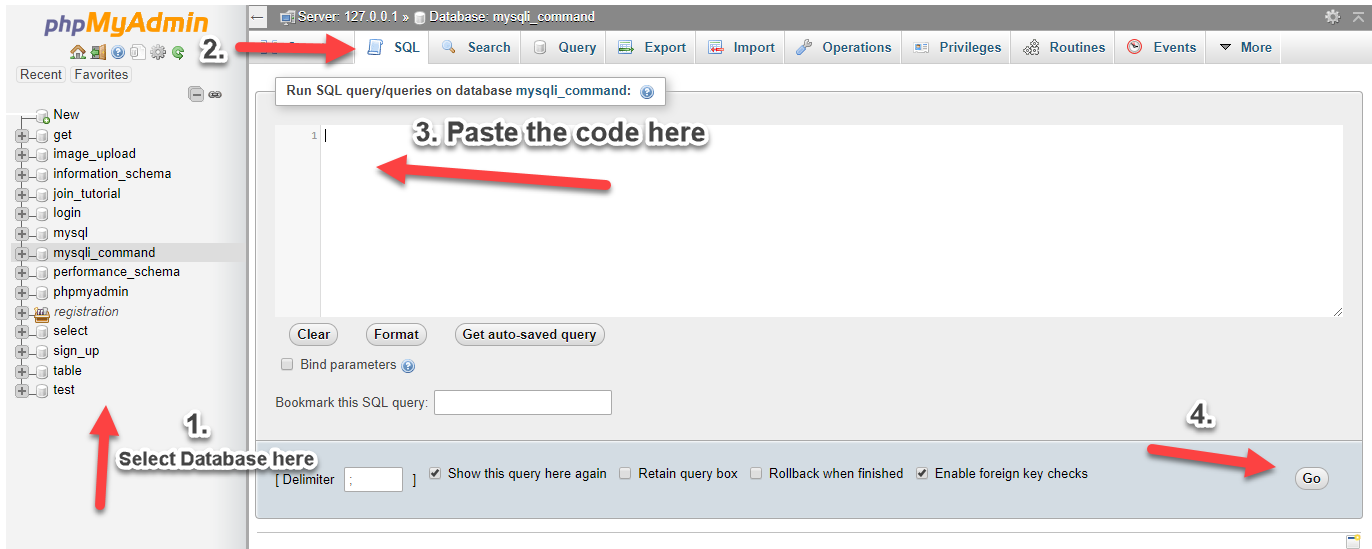
First step is to create our database. 1. Open phpMyAdmin. 2. Click databases, create a database and name it as testing. 3. After creating a database, click the SQL and paste the below codes. See image below for detailed instruction.- CREATE TABLE `tutorial` (
- `tutorialid` INT(11) NOT NULL AUTO_INCREMENT,
- `title` VARCHAR(150) NOT NULL,
- `link` VARCHAR(150) NOT NULL,
- PRIMARY KEY(`tutorialid`)
- ) ENGINE=InnoDB DEFAULT CHARSET=latin1;
- INSERT INTO `tutorial` (`tutorialid`, `title`, `link`) VALUES
- (1, 'Submit Form using AJAX in PHP/MySQLi', 'https://www.sourcecodester.com/tutorials/php/11649/submit-form-using-ajax-phpmysqli.html'),
- (2, 'Image Upload using AJAX in PHP/MySQLi', 'https://www.sourcecodester.com/tutorials/php/11648/image-upload-using-ajax-phpmysqli.html'),
- (3, 'Creating an Iterator for While Loop Forms in PHP/MySQLi', 'https://www.sourcecodester.com/php/11643/creating-iterator-while-loop-forms-phpmysqli.html'),
- (4, 'Drag, Drop and Insert into Database using AJAX/jQuery in PHP', 'https://www.sourcecodester.com/tutorials/php/11641/drag-drop-and-insert-database-using-ajaxjquery-php.html'),
- (5, 'Simple POS and Inventory System', 'https://www.sourcecodester.com/php/11625/simple-pos-and-inventory-system.html'),
- (6, 'Performance Indicator System', 'https://www.sourcecodester.com/php/11638/performance-indicator-system.html'),
- (7, 'Simple Chat System', 'https://www.sourcecodester.com/php/11610/simple-chat-system.html'),
- (8, 'Uploading Multiple Files into MySQL Database using PHP/MySQLi', 'https://www.sourcecodester.com/tutorials/php/11634/uploading-multiple-files-mysql-database-using-phpmysqli.html'),
- (9, 'Deleting Multiple Rows using Checkbox in PHP/MySQLi', 'https://www.sourcecodester.com/tutorials/php/11631/deleting-multiple-rows-using-checkbox-phpmysqli.html'),
- (10, 'PHP/MySQLi CRUD Operation with Bootstrap/Modal', 'https://www.sourcecodester.com/php/11629/phpmysqli-crud-operation-bootstrapmodal.html'),
- (11, 'PHP Passing Value to Modal using jQuery', 'https://www.sourcecodester.com/tutorials/php/11627/php-passing-value-modal-using-jquery.html'),
- (12, 'How to Add Class to a Div using JQuery', 'https://www.sourcecodester.com/tutorials/javascript/11619/how-add-class-div-using-jquery.html'),
- (13, 'How to Limit Number of Items per Row in While Loop using PHP/MySQLi', 'https://www.sourcecodester.com/tutorials/php/11618/how-limit-number-items-row-while-loop-using-phpmysqli.html'),
- (14, 'PHP Prevent the Return to Login Page/Disable Back after Login', 'https://www.sourcecodester.com/tutorials/php/11614/php-prevent-return-login-pagedisable-back-after-login.html');
Creating our Connection
Next, we create our connection to our database. This will serve as the bridge between our forms and database. We name this as conn.php.- <?php
- if (!$conn) {
- }
- ?>
index.php
Next step is to create our initial data from database then our load more button. Notice that we set our initial data to fetch only 2 rows from our database.- <!DOCTYPE html>
- <html>
- <head>
- <title>Load More Data using Ajax/Jquery in PHP/MySQLi</title>
- <link rel="stylesheet" href="https://maxcdn.bootstrapcdn.com/bootstrap/3.3.6/css/bootstrap.min.css" />
- <script src="https://maxcdn.bootstrapcdn.com/bootstrap/3.3.6/js/bootstrap.min.js"></script>
- <script src="https://ajax.googleapis.com/ajax/libs/jquery/2.2.0/jquery.min.js"></script>
- </head>
- <body>
- <div class="container">
- <div>
- <h2 align="center" >Load More Data using Ajax/Jquery in PHP/MySQLi</h2>
- <div style="height:10px;"></div>
- <h4>My Tutorials and Source Codes</h4>
- <div id="loadtable">
- <?php
- $lastid='';
- include('conn.php');
- ?>
- <div class="row">
- <div class="col-lg-12">
- <a href="<?php echo $row['link']; ?>"><?php echo $row['title']; ?></a>
- </div>
- </div>
- <?php
- $lastid=$row['tutorialid'];
- }
- ?>
- <div id="remove">
- <div style="height:10px;"></div>
- <div class="row">
- <div class="col-lg-12">
- <button type="button" name="loadmore" id="loadmore" data-id="<?php echo $lastid; ?>" class="btn btn-primary">See More</button>
- </div>
- </div>
- </div>
- </div>
- </div>
- </div>
- <script src="custom.js"></script>
- </body>
- </html>
custom.js
This contains our AJAX and jQuery codes that fetch additional data from our database.- $(document).ready(function(){
- $(document).on('click', '#loadmore', function(){
- var lastid = $(this).data('id');
- $('#loadmore').html('Loading...');
- $.ajax({
- url:"load_data.php",
- method:"POST",
- data:{
- lastid:lastid,
- },
- dataType:"text",
- success:function(data)
- {
- if(data != '')
- {
- $('#remove').remove();
- $('#loadtable').append(data);
- }
- else
- {
- $('#loadmore').html('No more data to show');
- }
- }
- });
- });
- });
load_data.php
Lastly, we create our code in fetching additional data from our database.- <?php
- include('conn.php');
- $lastid=$_POST['lastid'];
- $query=mysqli_query($conn,"select * from tutorial where tutorialid > '$lastid' order by tutorialid asc limit 2");
- ?>
- <div class="row">
- <div class="col-lg-12">
- <a href="<?php echo $row['link']; ?>"><?php echo $row['title']; ?></a>
- </div>
- </div>
- <?php
- $lastid=$row['tutorialid'];
- }
- ?>
- <div id="remove">
- <div style="height:10px;"></div>
- <div id="remove_row" class="row">
- <div class="col-lg-12">
- <button type="button" name="loadmore" id="loadmore" data-id="<?php echo $lastid; ?>" class="btn btn-primary">See More</button>
- </div>
- </div>
- </div>
- <?php
- }
- }
- ?>