Simple Dropdown Menu Using Javascript and CSS
Submitted by GeePee on Thursday, April 2, 2015 - 22:08.
This tutorial we’re going to create a simple drop-down list using javascript and css. This element or sometimes refers as “widget” or “control” same with a listbox, which allows the user to select one value from a list. Drop-down list or menu provides a hierarchical overview of the subsections contained within the menu item that spawned it. All the subsections within a section of a site when you hover your mouse cursor over it.
To start with this course, first we need to create a folder named as “Dropdown”, inside this folder we need to create another folder named as “images” then we’re also going to create a “home.html” file and a “design.css” file and lastly a “drop.js” file.
Next we will open the”home.html” and add the following code:
Here in the home.htm file as you observe on we add link in the Head section of our html file. These are the “design.css” and “drop.js”. Having these two file we can be able to do the dropping down menu onMouseover, and the other, onClick.
Next for “design.css” add the following code:
In this segment of codes, we use CSS to convert a series of nested Unordered List into a smooth, easy to use, neat and self-contained dropdown menu. Meaning this is where the magic happens.
And for “drop.js” add the following code:
This “drop.js” is a script that offers enhanced stability and speed. It includes animation, toggles, rollout timeout, and style handling.
So at this time you can now try to test this application by running first the “home.html” file. And the source code is totally available in this site. And you could just copy and paste the code and modify it apart for yourselves. Hopefully you enjoy reading and you find it helpful.
If you want to see more of my works, new Source Code or Application and Tutorials Just click here.
- <!DOCTYPE html PUBLIC "-//W3C//DTD XHTML 1.0 Transitional//EN" "http://www.w3.org/TR/xhtml1/DTD/xhtml1-transitional.dtd">
- <html xmlns="http://www.w3.org/1999/xhtml">
- <head>
- <meta http-equiv="Content-Type" content="text/html; charset=iso-8859-1" />
- <title>JavaScript Dropdown</title>
- <script type="text/javascript" src="drop.js"></script>
- </head>
- <body>
- <h3>JavaScript Dropdown sample</h3>
- <br /><br />
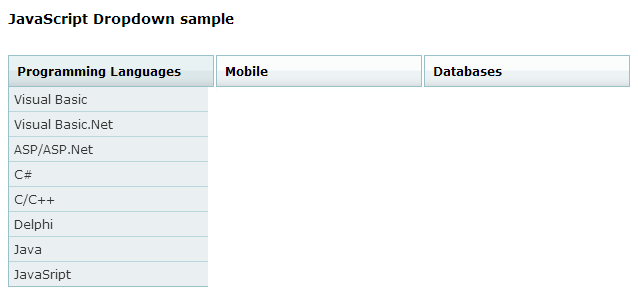
- <dt id="one-ddheader" onmouseover="ddMenu('one',1)" onmouseout="ddMenu('one',-1)">Programming Languages</dt>
- <dd id="one-ddcontent" onmouseover="cancelHide('one')" onmouseout="ddMenu('one',-1)">
- <ul>
- <li><a href="#" class="separator">Visual Basic</a></li>
- <li><a href="#" class="separator">Visual Basic.Net</a></li>
- <li><a href="#" class="separator">ASP/ASP.Net</a></li>
- <li><a href="#" class="separator">C#</a></li>
- <li><a href="#" class="separator">C/C++</a></li>
- <li><a href="#" class="separator">Delphi</a></li>
- <li><a href="#" class="separator">Java</a></li>
- <li><a href="#">JavaSript</a></li>
- </ul>
- </dd>
- </dl>
- <dt id="two-ddheader" onmouseover="ddMenu('two',1)" onmouseout="ddMenu('two',-1)">Mobile</dt>
- <dd id="two-ddcontent" onmouseover="cancelHide('two')" onmouseout="ddMenu('two',-1)">
- <ul>
- <li><a href="#" class="separator">Android</a></li>
- <li><a href="#" class="separator">iOS</a></li>
- <li><a href="#" class="separator">windows phone</a></li>
- </ul>
- </dd>
- </dl>
- <dt id="three-ddheader" onmouseover="ddMenu('three',1)" onmouseout="ddMenu('three',-1)">Databases</dt>
- <dd id="three-ddcontent" onmouseover="cancelHide('three')" onmouseout="ddMenu('three',-1)">
- <ul>
- <li><a href="#" class="separator">Microsoft Access</a></li>
- <li><a href="#" class="separator">MySQL</a></li>
- <li><a href="#" class="separator">MSSQL</a></li>
- <li><a href="#" class="separator">MySQLi</a></li>
- <li><a href="#" class="separator">Oracle</a></li>
- <li><a href="#">SQL Server</a></li>
- </ul>
- </dd>
- </dl>
- <div style="clear:both" />
- </body>
- </html>
- body {margin:25px;font:12px Verdana, Arial, Helvetica}
- * {padding:0; margin:0}
- .dropdown {float:left; padding-right:2px}
- .dropdown dt {width:188px; border:1px solid #9ac1c9; padding:8px; font-weight:bold; cursor:pointer; background:url(images/header.gif)}
- .dropdown dt:hover {background:url(images/header_over.gif)}
- .dropdown dd {position:absolute; overflow:hidden; width:200px; display:none; background:#fff; z-index:200; opacity:0}
- .dropdown ul {width:204px; border:1px solid #9ac1c9; list-style:none; border-top:none}
- .dropdown li {display:inline}
- .dropdown a, .dropdown a:active, .dropdown a:visited {display:block; padding:5px; color:#333; text-decoration:none; background:#eaf0f2; width:194px}
- .dropdown a:hover {background:#d9e1e4; color:#000}
- .dropdown .separator {border-bottom:1px solid #b9d6dc}
- var DDSPEED = 10;
- var DDTIMER = 15;
- // main function to handle the mouse events //
- function ddMenu(id,d){
- var h = document.getElementById(id + '-ddheader');
- var c = document.getElementById(id + '-ddcontent');
- clearInterval(c.timer);
- if(d == 1){
- clearTimeout(h.timer);
- if(c.maxh && c.maxh <= c.offsetHeight){return}
- else if(!c.maxh){
- c.style.display = 'block';
- c.style.height = 'auto';
- c.maxh = c.offsetHeight;
- c.style.height = '0px';
- }
- c.timer = setInterval(function(){ddSlide(c,1)},DDTIMER);
- }else{
- h.timer = setTimeout(function(){ddCollapse(c)},50);
- }
- }
- // collapse the menu //
- function ddCollapse(c){
- c.timer = setInterval(function(){ddSlide(c,-1)},DDTIMER);
- }
- // cancel the collapse if a user rolls over the dropdown //
- function cancelHide(id){
- var h = document.getElementById(id + '-ddheader');
- var c = document.getElementById(id + '-ddcontent');
- clearTimeout(h.timer);
- clearInterval(c.timer);
- if(c.offsetHeight < c.maxh){
- c.timer = setInterval(function(){ddSlide(c,1)},DDTIMER);
- }
- }
- // incrementally expand/contract the dropdown and change the opacity //
- function ddSlide(c,d){
- var currh = c.offsetHeight;
- var dist;
- if(d == 1){
- }else{
- }
- if(dist <= 1 && d == 1){
- dist = 1;
- }
- c.style.height = currh + (dist * d) + 'px';
- c.style.opacity = currh / c.maxh;
- c.style.filter = 'alpha(opacity=' + (currh * 100 / c.maxh) + ')';
- if((currh < 2 && d != 1) || (currh > (c.maxh - 2) && d == 1)){
- clearInterval(c.timer);
- }
- }